1. Rhagymadrodd
This manual provides detailed instructions for the assembly, operation, and maintenance of your PUTORSEN Triple Monitor Mount. Designed for heavy-duty use, this mount supports up to three monitors, each up to 49 inches and weighing up to 44 lbs (20 kg), including ultrawide and curved screens. Its ergonomic design and robust construction aim to optimize your workspace and enhance your viewing profiad.

Image 1: PUTORSEN Triple Monitor Mount supporting three large monitors.
2. Cynnwys Pecyn
Please verify that all components are present before beginning assembly. Refer to the diagram below for identification.
Delwedd 2: Ffrwydrodd view of the monitor mount components.
- Main Pole Assembly
- Gas Spring Arms (3 units)
- VESA Plates (3 units)
- Mae C-Clamp Mowntio Caledwedd
- Caledwedd Mowntio Sylfaen Grommet
- Clipiau Rheoli Ceblau
- Hex Keys and Screws (various sizes)
- Llawlyfr Cyfarwyddiadau
3. Gosod a Gosod
3.1 Choose Your Mounting Option
The mount offers two installation methods: C-clamp or Grommet base. Select the option best suited for your desk.
- Mae C-Clamp: Suitable for desk thicknesses between 0.4 inches (10mm) and 1.8 inches (45mm).
- Sylfaen Grommet: Suitable for desk thicknesses between 0.4 inches (10mm) and 1.6 inches (40mm), with a hole diameter between 0.39 inches (10mm) and 2.4 inches (60mm).
3.2 Assemble the Pole and Arms
- Secure the chosen desk clamp or grommet base to your desk. Ensure it is tightened firmly for stability.
- Thread the main pole onto the secured base and tighten the set screw.
- Slide the shaft collars onto the pole and tighten them with the handle to secure.
- Attach the arm extensions to the main pole, ensuring all set screws are tightened.
- Slide the center VESA plate onto the pole and secure it with its set screw.
3.3 Attach Monitors
- Rotate the VESA plates on the arms so they are facing straight, then rotate them so the open holes are on top.
- Secure two screws into the top holes of your monitor's VESA mounting points.
- Hang the monitor onto the VESA plate via the top screws, then secure the monitor using the remaining screws. Repeat for all monitors.
3.4 Addasiad Tensiwn y Gwanwyn Nwy
After mounting your monitors, adjust the gas spring tension to match the weight of your monitors. This ensures smooth and stable movement.
- Use the provided hex key to adjust the tension screw on each gas spring arm.
- Trowch clocwedd i gostyngiad support (for lighter monitors).
- Trowch gwrthglocwedd i cynydd support (for heavier monitors).
- Adjust until the monitor stays in position when released.
3.5 Rheoli Ceblau
Route all monitor cables through the integrated cable management channels on each arm and along the main pole to maintain a tidy workspace.

Image 3: Integrated cable management keeps your desk clutter-free.
3.6 Installation Videos
For visual guidance, please refer to the following installation videos:
Video 1: VIVO STAND-V300G Assembly Guide. This video demonstrates the assembly process for a triple monitor desk mount, including securing the clamp, attaching arms, and VESA plates.
Video 2: MOUNT PRO Triple Monitor Mount Installation. This video provides a step-by-step guide on how to install a triple monitor mount, covering various assembly stages.
4. Cyfarwyddiadau Gweithredu
The PUTORSEN Triple Monitor Mount offers extensive adjustability for optimal ergonomic positioning.
- Addasiad Uchder: Use the gas spring arms to effortlessly raise or lower your monitors to your desired eye level.
- Tilt: Adjust the monitor screen angle +50° to -20° to reduce glare and optimize viewing.
- troi: Pivot your monitors 180° left or right to share your screen or change viewing onglau.
- Cylchdro: Rotate your monitors 360° for portrait or landscape orientation.

Image 4: Visual guide to monitor tilt, swivel, and rotation capabilities.
4.1 Flexible Configurations
The independent gas-spring arms allow for various monitor layouts, including side-by-side, staggered, mixed-size, or portrait/landscape orientations, catering to multitaskers, designers, streamers, and gamers.

Image 5: Multiple setup options for enhanced productivity.
5. cynnal
To ensure the longevity and optimal performance of your monitor mount, follow these maintenance guidelines:
- Glanhau Rheolaidd: Sychwch y mowntiad gyda lliain meddal, damp cloth to remove dust and debris. Avoid harsh chemicals that may damage the finish.
- Gwirio Cysylltiadau: Periodically inspect all screws and bolts to ensure they remain tight. Re-tighten if necessary to maintain stability.
- Gas Spring Functionality: If you notice any changes in the gas spring's ability to hold the monitor, re-adjust the tension as described in Section 3.4.
6. Datrys Problemau
If you encounter issues with your monitor mount, refer to the following common problems and solutions:
- Monitor Sags or Does Not Stay in Position:
- The gas spring tension is too low for the monitor's weight. Increase the gas spring tension by turning the adjustment screw counter-clockwise (refer to Section 3.4).
- Monitor is Difficult to Move or Stays Too High:
- The gas spring tension is too high for the monitor's weight. Decrease the gas spring tension by turning the adjustment screw clockwise (refer to Section 3.4).
- Mount Feels Unstable or Wobbles:
- Sicrhewch y C-clamp or grommet base is securely tightened to the desk.
- Verify that all screws connecting the arms and VESA plates are firmly tightened.
- Cables are Not Neatly Organized:
- Re-route cables through the integrated cable management channels and use the provided clips (refer to Section 3.5).
7. manylebau
| Nodwedd | Manylyn |
|---|---|
| Rhif Model | FPT09-C036P-49B |
| Maint Sgrin â Chymorth | 17"-49" (per monitor) |
| Gallu Pwysau | Hyd at 44 pwys (20 kg) y fraich |
| Cydnawsedd VESA | 75x75mm, 100x100mm |
| Ongl Tilt | +50° i -20° |
| Ongl troi | 180° |
| Ongl Cylchdro | 360° |
| Opsiynau Mowntio | Mae C-Clamp, Sylfaen Grommet |
| Mae C-Clamp Trwch Desg | 0.4"-1.8" (10mm-45mm) |
| Grommet Base Desk Thickness | 0.4"-1.6" (10mm-40mm) |
| Grommet Base Hole Diameter | 0.39"-2.4" (10mm-60mm) |
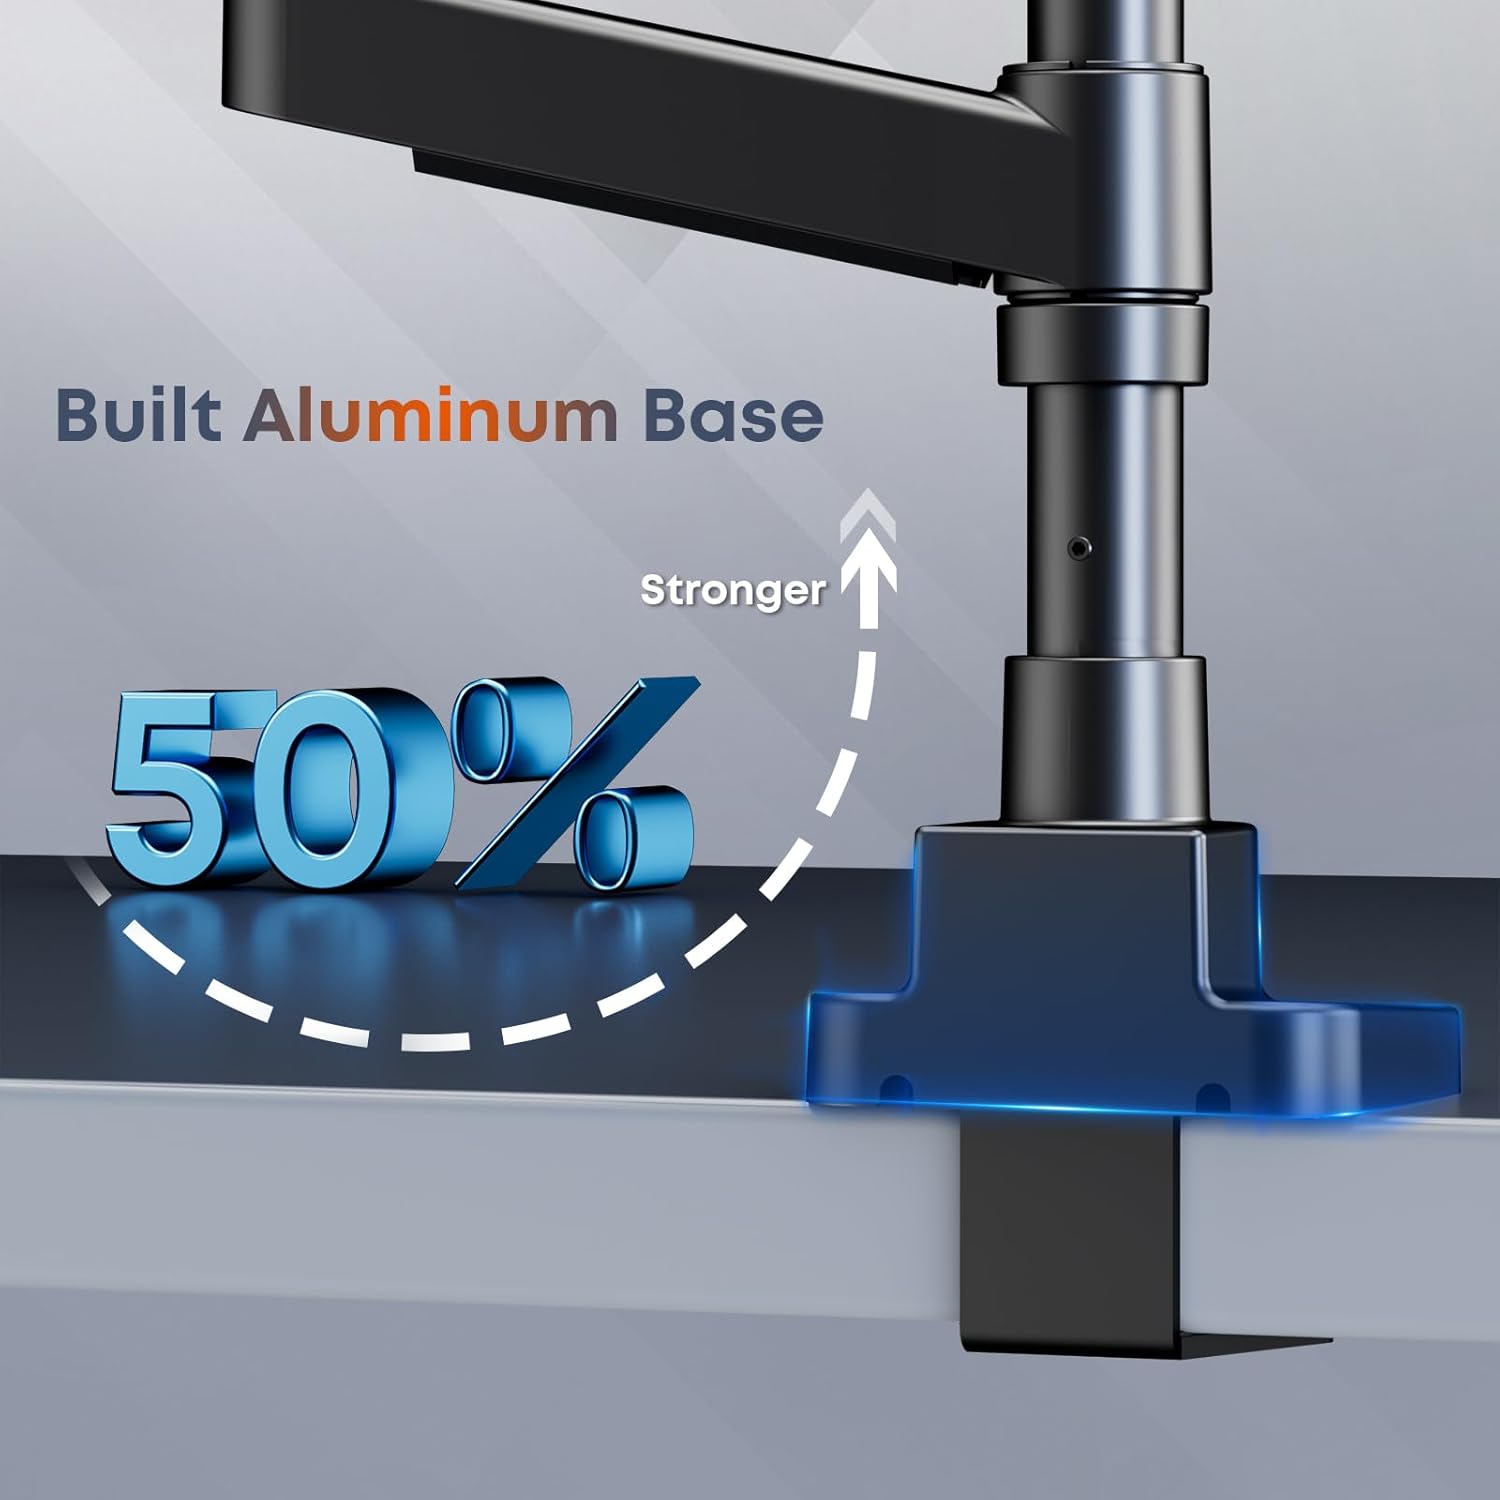
| Deunydd | Dur Aloi, Alwminiwm |
| Lliw | Du |
8. Gwarant a Chefnogaeth
For any questions, concerns, or assistance with your PUTORSEN Triple Monitor Mount, please contact our customer support team. We offer responsive 24-hour customer support to ensure a hassle-free experience.
Please retain your proof of purchase for warranty claims. Specific warranty details may vary; refer to your product packaging or contact customer support for more information.


