
1. Rhagymadrodd
Thank you for choosing the Pisichen 24 inch Touch Screen Gaming Monitor. This manual provides essential information for setting up, operating, and maintaining your monitor. Please read it thoroughly before use to ensure optimal performance and safety.
This monitor features a 24-inch QHD (2560x1440P) display with a 165Hz refresh rate, 2ms response time, and 10-point projected capacitive touchscreen functionality. It supports FreeSync and HDR, offering a vibrant and responsive visual experience for both gaming and professional applications.

Image: The Pisichen 24-inch 2K 165Hz Touch Screen Monitor highlighting its key features like HDR, IPS Panel, and 10-point Touch.
2. Cynnwys Pecyn
Cyn bwrw ymlaen â'r gosodiad, gwiriwch fod yr holl gydrannau yn bresennol yn y pecyn:
- Pisichen 24 inch Touch Screen Monitor
- Stand Monitor (Sylfaen a Gwddf)
- Cebl DP
- Cebl HDMI
- USB B Touch Cable
- Cebl CC USB
- DC Adapter Power
- Llawlyfr Defnyddiwr (y ddogfen hon)
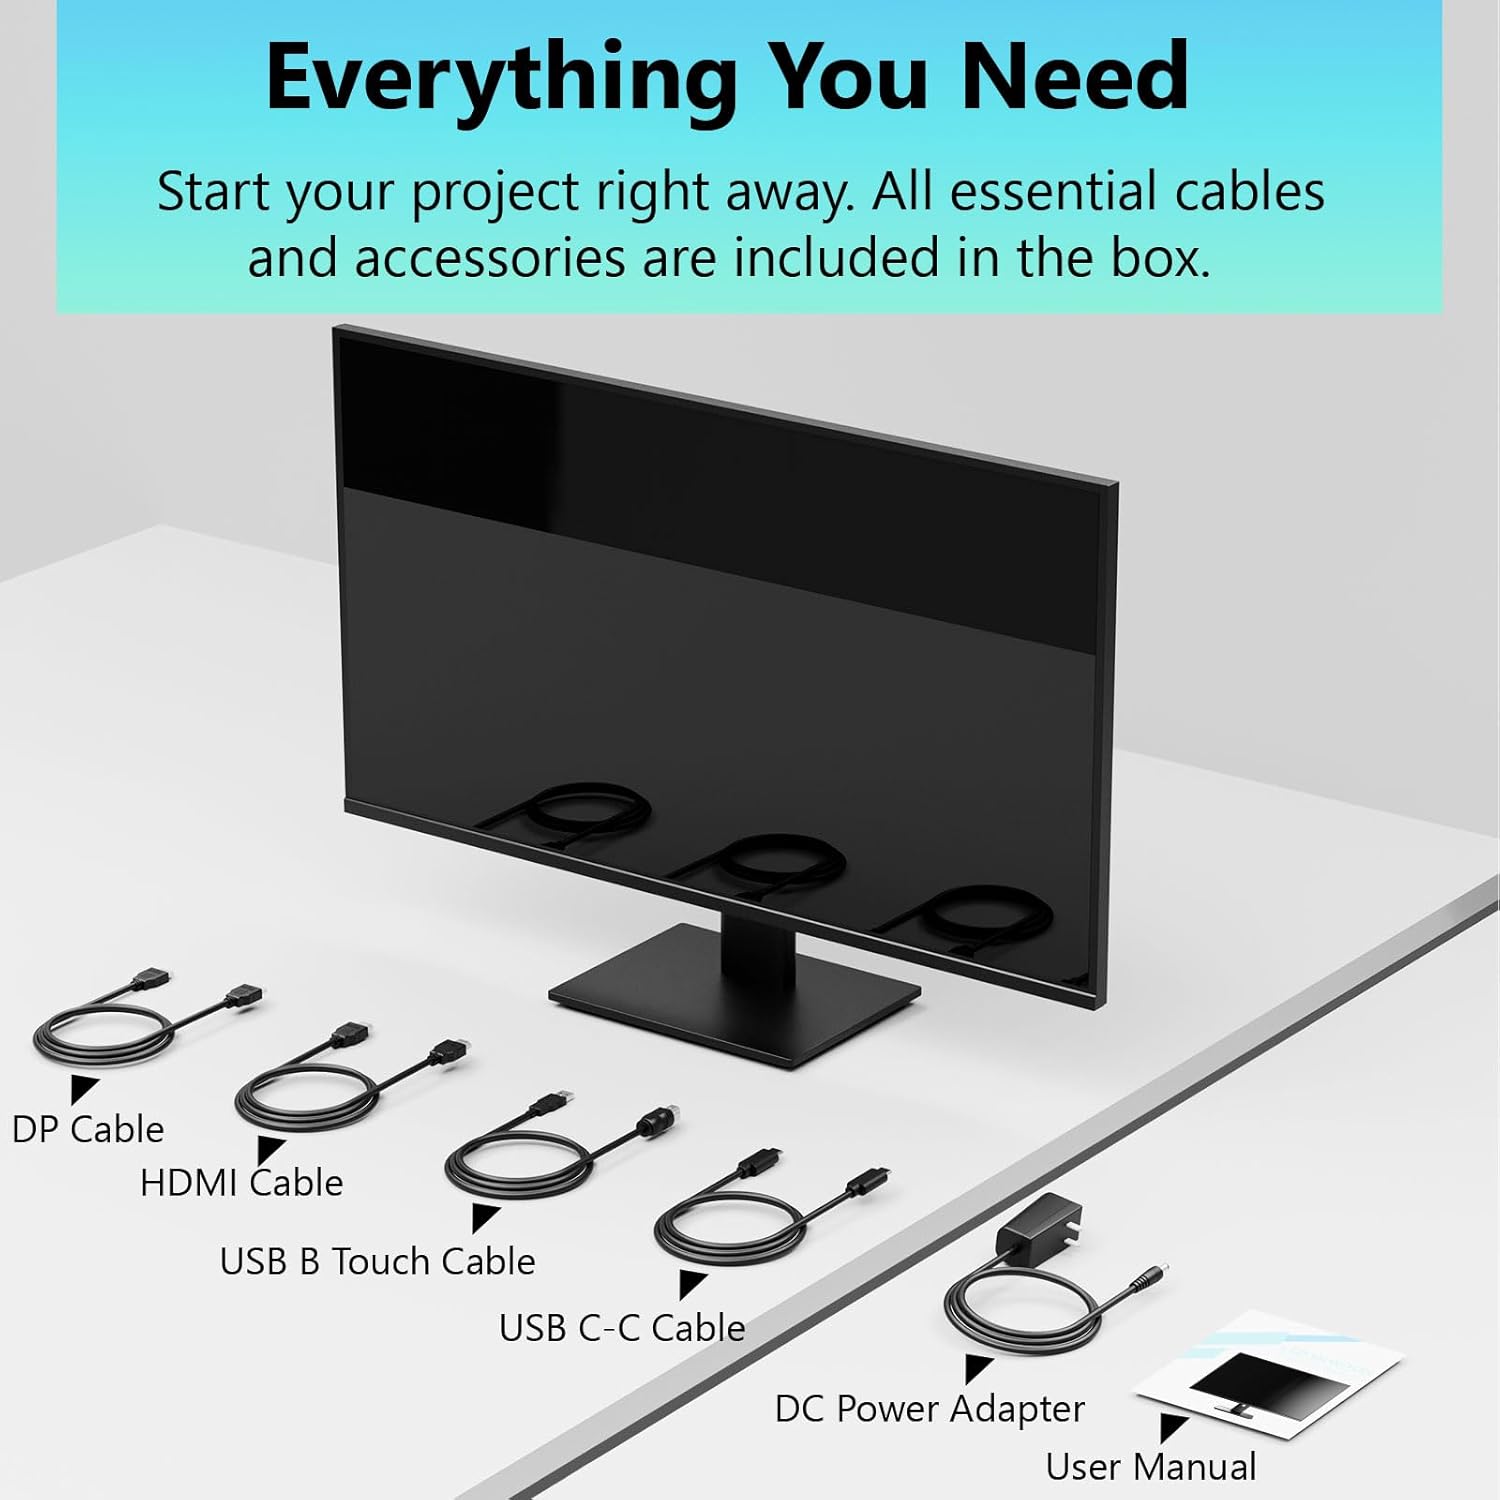
Image: All essential cables and accessories included in the box for the monitor setup.
3. Cyfarwyddiadau Gosod
3.1 Cydosod y Stand
- Tynnwch y monitor o'i becynnu yn ofalus, gan ei osod wyneb i lawr ar arwyneb meddal, glân i atal crafiadau.
- Attach the stand neck to the monitor's rear panel.
- Sicrhewch sylfaen y stondin i wddf y stondin gan ddefnyddio'r sgriwiau a ddarperir.
- Ensure all connections are firm before placing the monitor upright.
3.2 Gosod Mowntiad VESA (Dewisol)
This monitor supports VESA mounting. If you plan to use a VESA-compatible arm or wall mount, remove the stand and attach the VESA mount according to the mount's instructions. The VESA pattern is typically 75x75mm or 100x100mm (refer to specifications for exact details).
3.3 Cysylltu â Dyfais
The monitor offers multiple connectivity options:
- HDMI: Cysylltwch un pen y cebl HDMI â phorthladd HDMI y monitor a'r pen arall ag allbwn HDMI eich cyfrifiadur.
- DisplayPort (DP): Connect one end of the DP cable to the monitor's DP port and the other end to your computer's DP output.
- USB Math-C: For compatible devices, connect the USB C-C cable to the monitor's USB Type-C port and your device's USB Type-C port. This single cable can transmit video, data, and power (charging).
- USB Type-B (for Touch Functionality): To enable the touch screen feature, connect the USB B Touch Cable from the monitor's USB Type-B port to an available USB Type-A port on your computer.

Image: The monitor's rear panel with various connectivity options, including HDMI, DisplayPort, and USB-C ports.
3.4 Cysylltiad Pwer
Connect the DC Power Adapter to the monitor's power input port, then plug the adapter into a power outlet.
3.5 Initial Power On and Touch Compatibility
Press the power button on the monitor. The display should light up. If no image appears, ensure all cables are securely connected and the correct input source is selected on the monitor (via the OSD menu).
For touch functionality, ensure the USB B Touch Cable is connected to your computer. Touch compatibility may vary by operating system and device. Most Windows PCs support multi-touch. For Mac devices, single-touch click is generally supported, but multi-touch may require specific drivers or configurations. Game consoles (PS3/4/5, Xbox, Steam Deck) and some other devices (Fire TV, Apple products like iPhone/iPad) typically do not support touch functionality.

Image: A compatibility chart illustrating which devices support multi-touch or single-touch, and which devices do not support touch functionality with the monitor.
4. Cyfarwyddiadau Gweithredu
4.1 Pŵer Ymlaen/Diffodd
Press the power button located on the monitor to turn it on or off. The power indicator light will show the monitor's status.
4.2 Dewislen Arddangos Ar y Sgrin (OSD)
The OSD menu allows you to adjust various monitor settings. Use the control buttons (usually located on the back or bottom of the monitor) to navigate the menu. Common menu options include:
- Gosodiadau Llun: Brightness, Contrast, Sharpness, Color Temperature, HDR mode.
- Gosodiadau Arddangos: Aspect Ratio, Input Source selection (HDMI, DP, USB-C).
- Gosodiadau Hapchwarae: FreeSync, Response Time (Overdrive), Crosshair.
- Gosodiadau Sain: Volume (if internal speakers or audio output are present).
- Gosodiadau System: Iaith, Tryloywder OSD, Ailosod i Ddiofynion y Ffatri.
4.3 Touch Screen Functionality
The monitor supports 10-point multi-touch, allowing for intuitive interaction directly on the screen. Ensure the USB B Touch Cable is connected to your computer for this feature to work.
- Tap Sengl: Equivalent to a left-click.
- Tap a Dal: Cyfwerth â chlic dde.
- Pinsio-i-Chwyddo: Defnyddiwch ddau fys i chwyddo i mewn neu allan.
- Swipe: Navigate through content or scroll.

Image: A user interacting with the monitor's touch screen, highlighting its precision and responsiveness for creative tasks.
4.4 Addasiadau Ergonomig
The monitor stand allows for tilt adjustments to achieve the most comfortable viewing and touch angle. Gently adjust the screen to your preferred position.
4.5 Nodweddion Gofal Llygaid
The monitor includes advanced eye-comfort features such as Flicker-Free technology and Low Bluelight mode to reduce eye strain during prolonged use. These settings can typically be adjusted within the OSD menu.

Image: Visual representation of the monitor's advanced eye-comfort features, including Flicker-Free and Low Bluelight technologies.
5. cynnal
5.1 Glanhau'r Monitor
- Diffoddwch y monitor bob amser a datgysylltwch y llinyn pŵer cyn glanhau.
- Defnyddiwch frethyn meddal, di-lint yn ysgafn dampwedi'i lanhau â dŵr neu lanhawr sgrin ysgafn, nad yw'n sgraffiniol.
- Peidiwch â chwistrellu glanhawr yn uniongyrchol ar y sgrin. Rhowch ef ar y brethyn yn gyntaf.
- Osgowch ddefnyddio bensen, teneuwyr, glanhawyr sy'n seiliedig ar amonia, neu ddeunyddiau sgraffiniol, gan y gall y rhain niweidio wyneb y sgrin.
5.2 Storio
When storing the monitor for an extended period, ensure it is powered off, unplugged, and stored in a cool, dry place away from direct sunlight and extreme temperatures. Use the original packaging if available for best protection.
6. Datrys Problemau
Os byddwch chi'n dod ar draws problemau gyda'ch monitor, cyfeiriwch at y camau datrys problemau cyffredin canlynol:
- Dim pŵer: Gwnewch yn siŵr bod yr addasydd pŵer wedi'i gysylltu'n ddiogel â'r monitor ac â soced pŵer sy'n gweithio. Gwiriwch a yw'r golau dangosydd pŵer ymlaen.
- Dim Delwedd/Signal:
- Verify that the video cable (HDMI, DP, or USB-C) is securely connected to both the monitor and your computer.
- Gwnewch yn siŵr bod y ffynhonnell fewnbwn gywir wedi'i dewis yn newislen OSD y monitor.
- Check your computer's display settings to ensure the monitor is detected and enabled.
- No Touch Functionality:
- Confirm the USB B Touch Cable is connected from the monitor to your computer.
- Check your computer's device manager to see if the touch screen driver is installed and functioning correctly.
- Refer to the "Initial Power On and Touch Compatibility" section for device-specific limitations.
- Delwedd sy'n Fflachio neu wedi'i Gwyrdroi:
- Gwiriwch y cebl fideo am ddifrod neu gysylltiadau rhydd.
- Rhowch gynnig ar gebl fideo neu borthladd gwahanol.
- Addaswch y gyfradd adnewyddu yng ngosodiadau arddangos eich cyfrifiadur.
- picsel marw: A small number of bright or dark pixels are common in LCD/LED technology and are not considered a defect unless they exceed manufacturer specifications.
Os yw'r broblem yn parhau ar ôl rhoi cynnig ar y camau hyn, cysylltwch â chymorth cwsmeriaid.
7. manylebau
| Nodwedd | Manyleb |
|---|---|
| Brand | Pisichen |
| Rhif Model | 24IN165HZ-QHD |
| Maint Sgrin | 23.8 modfedd |
| Datrysiad | QHD Eang 1440p (2560 x 1440) |
| Cymhareb Agwedd | 16:9 |
| Cyfradd Adnewyddu | 165 Hz |
| Amser Ymateb | 2 o filieiliadau |
| Math Arddangos | LED IPS |
| Disgleirdeb | 400 Candela (cd/m²) |
| Cymhareb Cyferbyniad | 3000:1 |
| Viewongl ing | 178 Gradd |
| Lliw Gamut | 99% |
| Picture Quality Enhancement | HDR |
| Cysoni Addasol | FreeSync |
| Technoleg Cysylltedd | DisplayPort, HDMI, USB Type-C, USB Type-B |
| Nodweddion Ychwanegol | Tilt Adjustment, 10-Point Touchscreen |
| Dimensiynau Eitem (D x W x H) | 0.75"D x 21.5"W x 12.7"H |
| Pwysau Eitem | 5.38 Cilogram |
| Lliw | Du |
8. Gwybodaeth Gwarant
This product comes with a 1-year limited warranty from the date of purchase. The warranty covers manufacturing defects and workmanship under normal use. It does not cover damage caused by misuse, accidents, unauthorized modifications, or external factors. Please retain your proof of purchase for warranty claims.
9. Cefnogaeth i Gwsmeriaid
For technical assistance, warranty claims, or further inquiries, please contact Pisichen customer support. You may find contact information on the official Pisichen websafle neu drwy eich manwerthwr.
Am adnoddau ychwanegol a gwybodaeth am gynhyrchion, ewch i Pisichen Store on Amazon.