
1. Gwybodaeth Bwysig am Ddiogelwch
Please read all instructions carefully before installation and operation. Retain this manual for future reference.
- Sicrhewch fod yr uned yn cael ei gosod ar arwyneb sefydlog, gwastad.
- Peidiwch â rhwystro agoriadau awyru.
- Only use for storing ice. Do not store other food items or chemicals.
- Cadwch blant draw o'r uned.
- Disconnect power to any connected ice maker unit before cleaning or maintenance.
- This ice storage bin is designed for commercial use.
2. Cynnyrch Drosview
The VEVOR Commercial Ice Maker Storage Bin (Model LSB-250) is designed to provide a large, insulated reservoir for storing ice produced by a compatible ice maker head unit (sold separately). Its robust construction and thoughtful features ensure ice remains cold and accessible for extended periods.
Nodweddion Allweddol:
- Cynhwysedd Mawr: Stores up to 300 lbs (136 kg) of ice.
- 8-Hour Insulation: Heavy-duty galvanized sheet casing with integrated cyclopentane foaming (≥25mm foam thickness) effectively isolates external heat, maintaining ice temperature for 6-8 hours during power outages.
- Adjustable Anti-Slip Rubber Feet: Provides stability and allows for height adjustment up to 0.79 inches (20 mm), protecting floor surfaces.
- Draenio disgyrchiant: Facilitates automatic water drainage to prevent accumulation and maintain a hygienic environment.
- Buffer Door Design: Flip-top door with a buffer mechanism to prevent pinching and reduce operational noise.

Image 1: VEVOR Commercial Ice Maker Storage Bin with included drainage hose, ice scoop, and adjustable feet.

Image 2: The ice storage bin shown in a commercial kitchen setting, highlighting its large capacity for immediate use.

Image 3: Cross-section diagram detailing the multi-layer insulation for extended ice retention.
3. Cynnwys Pecyn
- 1 x VEVOR Ice Storage Bin (Model LSB-250)
- 1 x Drainage Hose
- 1 x Scoop Iâ
- 4 x Traed Addasadwy
Note: The ice maker head unit is sold separately and is required for ice production.
4. Gosod a Gosod
Proper installation is crucial for the optimal performance and longevity of your ice storage bin. This bin is designed to integrate with a compatible VEVOR ice maker head unit.
4.1 Paratoi Safle
- Choose a location that is level, stable, and can support the weight of the bin when full of ice.
- Sicrhewch fod digon o awyru o amgylch yr uned.
- The location should have access to a floor drain for the gravity drainage system.
4.2 Gosod Cam wrth Gam
- Install the Adjustable Feet:
Carefully tilt the ice storage bin and screw the four adjustable feet into the designated threaded holes at the bottom corners of the unit. Adjust the feet to level the bin and achieve the desired height, ensuring stability. The adjustable range is approximately 0.79 inches (20 mm).
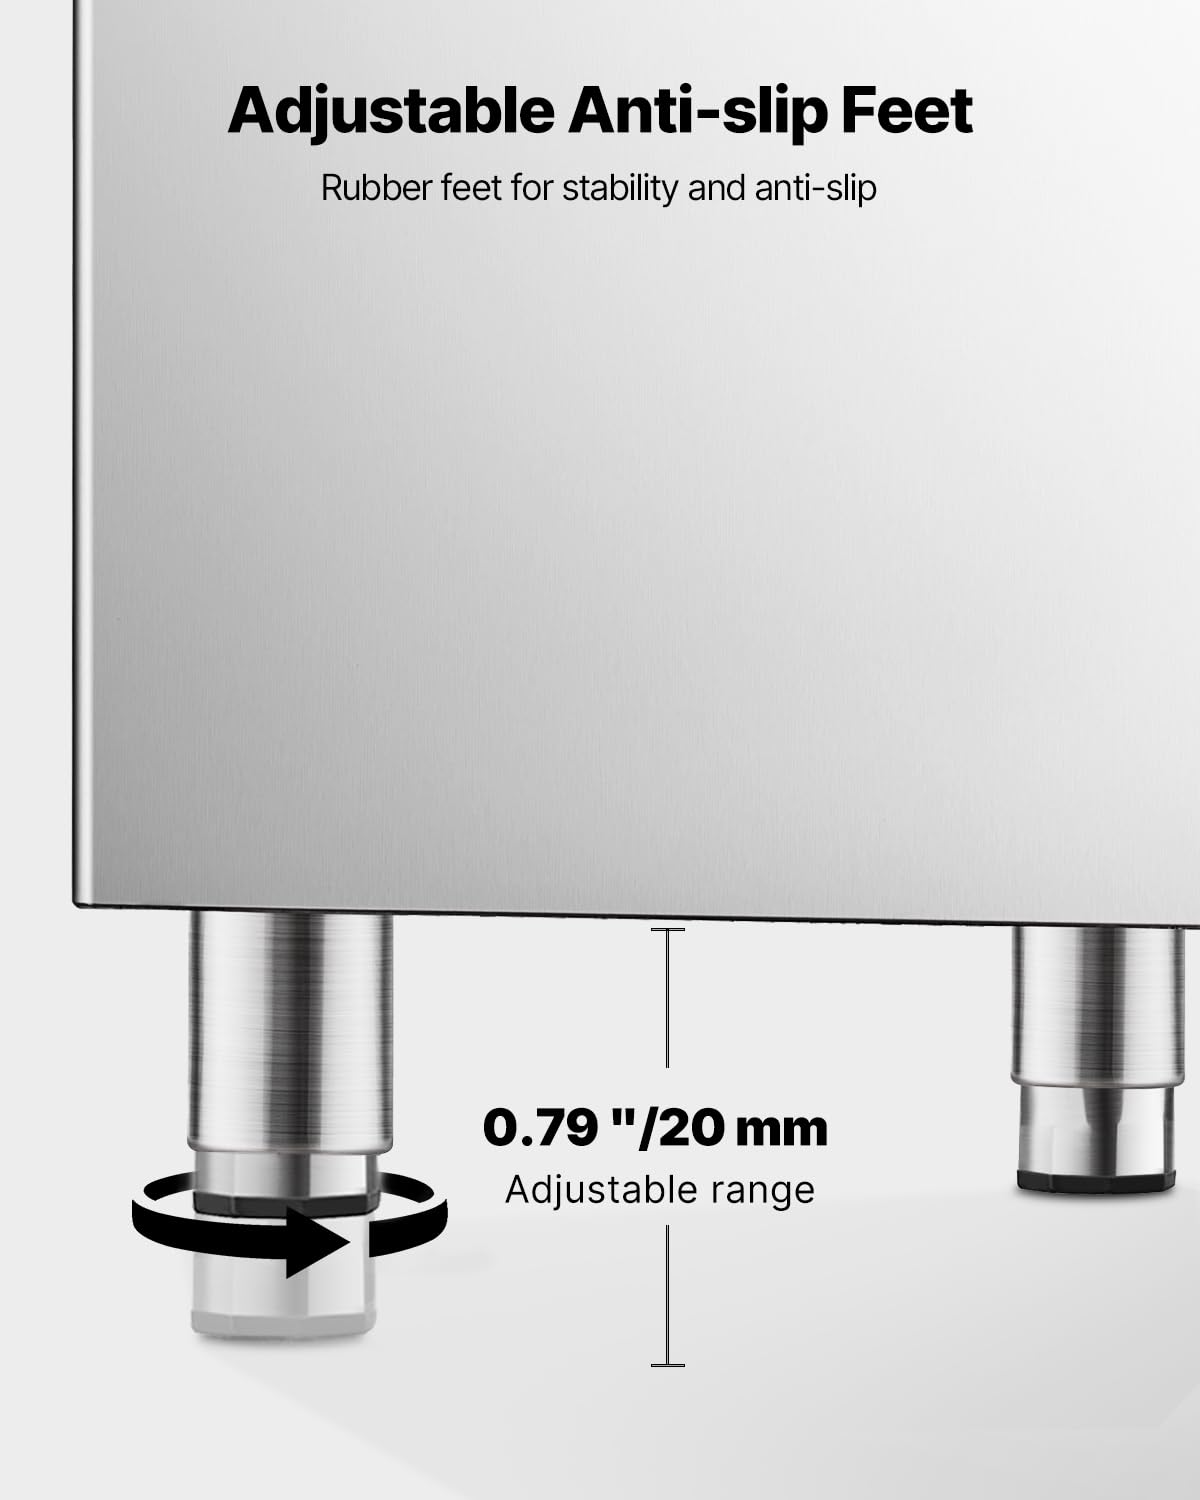
Image 4: Detail of the adjustable anti-slip rubber feet, showing the adjustment mechanism.
- Connect the Drainage Pipe:
Locate the drainage outlet at the bottom of the ice bin. Connect the provided drainage hose securely to this outlet. Route the other end of the hose to a suitable floor drain, ensuring a continuous downward slope for effective gravity drainage. Avoid kinks or obstructions in the hose.
- Install the Ice Maker Head Unit (Sold Separately):
Carefully place your compatible VEVOR ice maker head unit on top of the ice storage bin. Ensure it is securely seated and aligned according to the ice maker's specific instructions. This bin is designed to receive ice directly from the head unit.
- Connect Ice Maker Water Inlet and Drainage:
Refer to your ice maker head unit's instruction manual for connecting its water inlet and drainage pipes. The ice maker's drainage will typically route into the ice bin, which then drains via the bin's drainage system.

Image 5: Visual guide for the 3-step installation, including feet, drainage, and head unit placement.
5. Cyfarwyddiadau Gweithredu
Once installed and connected to a functioning ice maker head unit, the VEVOR Ice Storage Bin operates passively to store ice.
- Casglu Iâ: Ice produced by the connected ice maker head unit will fall directly into the storage bin.
- Accessing Ice: Lift the flip-top buffer door to access the stored ice. Use the provided ice scoop for hygienic ice retrieval.
- Inswleiddio: Keep the door closed when not in use to maximize insulation and prevent ice from melting prematurely. The bin's insulation helps maintain ice temperature for up to 8 hours during power interruptions.
- Draenio: The gravity drainage system will automatically remove melted ice water from the bin, ensuring a clean and dry storage environment.
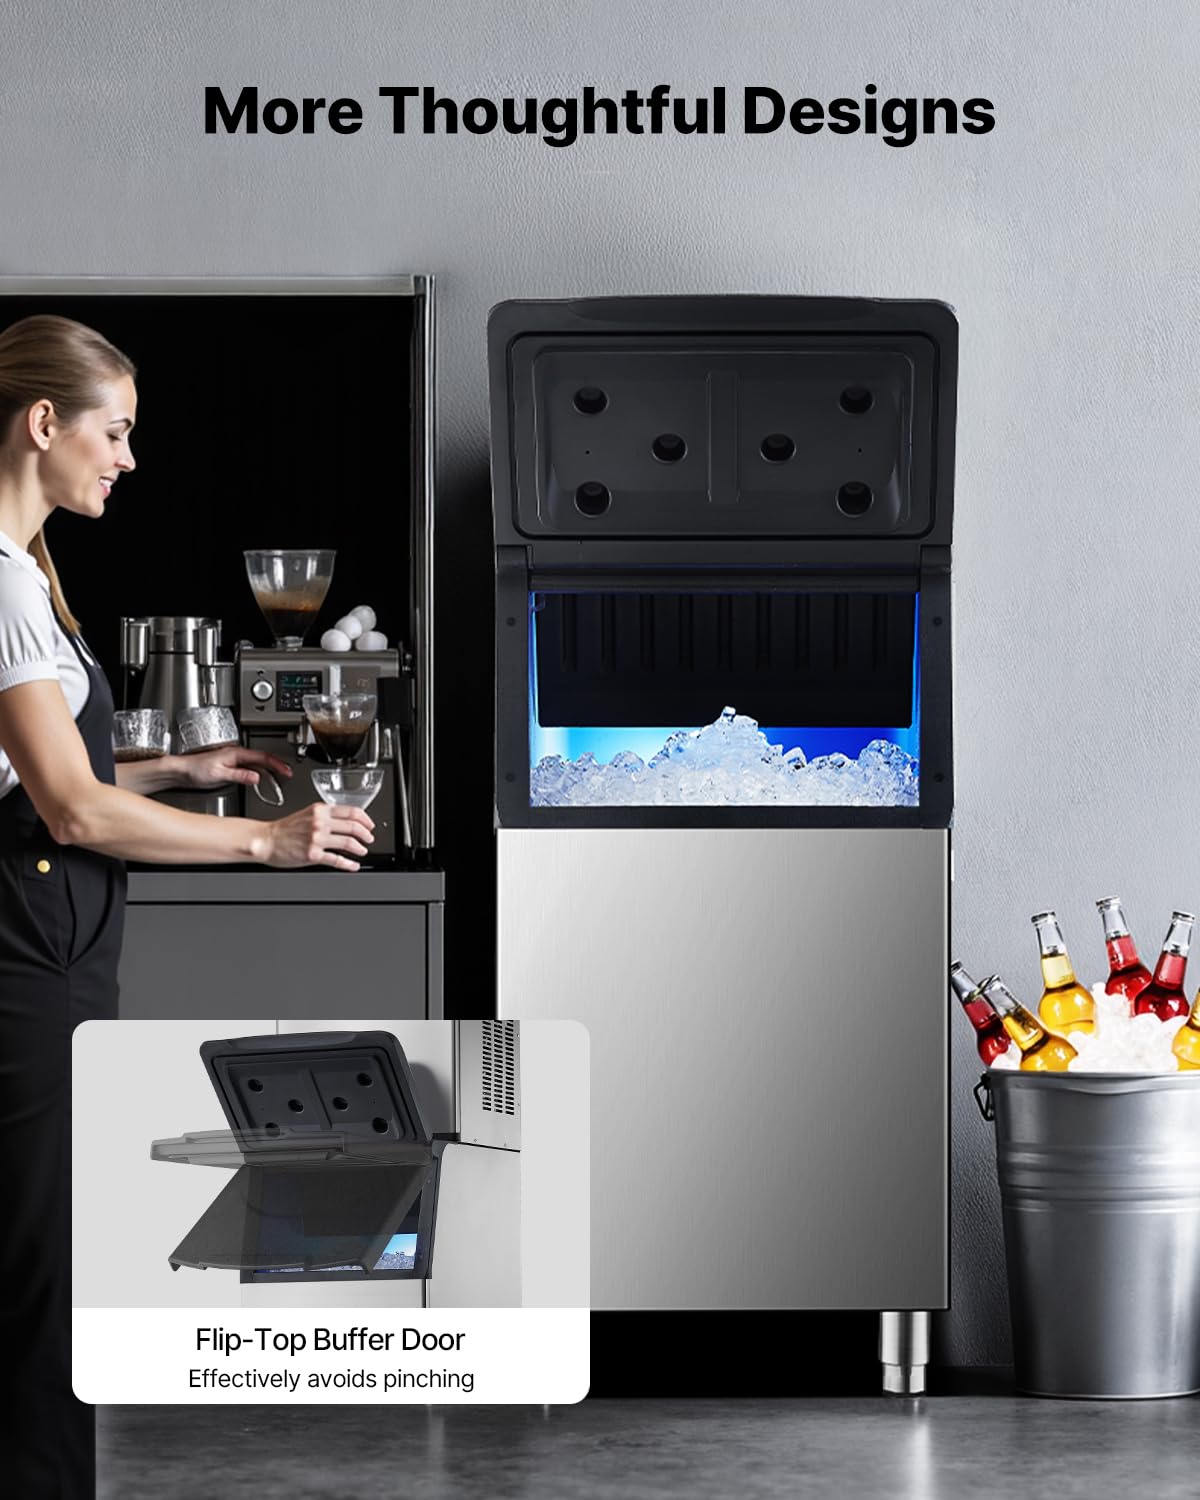
Image 6: Demonstrating the flip-top buffer door design, which prevents pinching and reduces noise.
6. Cynnal a Chadw a Glanhau
Regular cleaning and maintenance will ensure the hygienic operation and extend the lifespan of your ice storage bin.
6.1 Cynnal a Chadw Dyddiol
- Wipe down the exterior of the bin with a soft, damp brethyn.
- Ensure the ice scoop is clean and stored hygienically.
6.2 Glanhau Wythnosol
- Gwagio'r Bin: Remove all remaining ice from the storage bin.
- Pŵer Datgysylltu: If the ice maker head unit is connected, ensure its power supply is disconnected before proceeding.
- Tu Mewn Glân: Prepare a cleaning solution of mild detergent and warm water, or a food-grade sanitizer. Use a soft cloth or sponge to thoroughly clean the interior surfaces of the bin, including the lid.
- Rinsiwch: Rinse the interior with clean water. The gravity drainage system will help remove rinse water.
- Sanitize (Optional): For commercial settings, a food-grade sanitizer can be applied and allowed to air dry according to product instructions.
- Clean Drainage System: Periodically check the drainage hose for any blockages or debris. Flush with clean water if necessary.
- Sych: Allow the interior to air dry completely before resuming operation.
7. Datrys Problemau
This section addresses common issues you might encounter with your ice storage bin.
| Problem | Achos Posibl | Ateb |
|---|---|---|
| Ice melts too quickly |
|
|
| Water accumulation in the bin |
|
|
| Unpleasant odor in the bin |
|
|
8. manylebau
Technical details for the VEVOR Commercial Ice Maker Storage Bin (Model LSB-250).
| Nodwedd | Manylyn |
|---|---|
| Rhif Model | LSB-250 |
| Capasiti Storio Iâ | 300 pwys (136 kg) |
| Prif Ddeunydd | 0.5mm 430 Stainless Steel + Plastic |
| Trwch Inswleiddio | ≥25mm Cyclopentane Foaming |
| Insulation Duration | 6-8 hours (approximate, during power failure) |
| Dimensiynau Cynnyrch (D x W x H) | 22.8" x 26.3" x 43.5" (580 x 668 x 1105 mm) |
| Pwysau Net | 56 pwys (25.4 kg) |
| Adjustable Feet Range | Hyd at 0.79 fodfedd (20 mm) |
| Math Draenio | Draeniad Disgyrchiant |

Image 7: Detailed dimensions and key specifications of the ice storage bin.
9. Gwarant a Chefnogaeth
VEVOR products are designed for durability and performance. For warranty information and customer support, please refer to the warranty card included with your product or visit the official VEVOR websafle.
Gallwch hefyd ymweld â'r Siop VEVOR ar Amazon am wybodaeth ychwanegol am gynhyrchion ac adnoddau cymorth.
When contacting support, please have your model number (LSB-250) and purchase date available.


