
GenMachine Ren4000
GenMachine Mini PC AMD Ryzen 3 4300U (Ren4000) Instruction Manual
Model: Ren4000
1. Rhagymadrodd
Thank you for choosing the GenMachine Mini PC AMD Ryzen 3 4300U. This compact and high-performance mini computer is designed for both home and office use, offering efficient multitasking, 4K visuals, and advanced connectivity. This manual provides essential information for setting up, operating, and maintaining your device.
2. Beth sydd yn y Bocs
Gwiriwch fod yr holl eitemau yn bresennol yn eich pecyn:
- GenMachine Mini PC (R3 4300U 8G 256G)
- Llawlyfr Defnyddiwr
- Addasydd Pŵer
- Cebl HDMI
- Mounting Bracket (for VESA mounting)

3. Cynnyrch Drosview (Caledwedd)
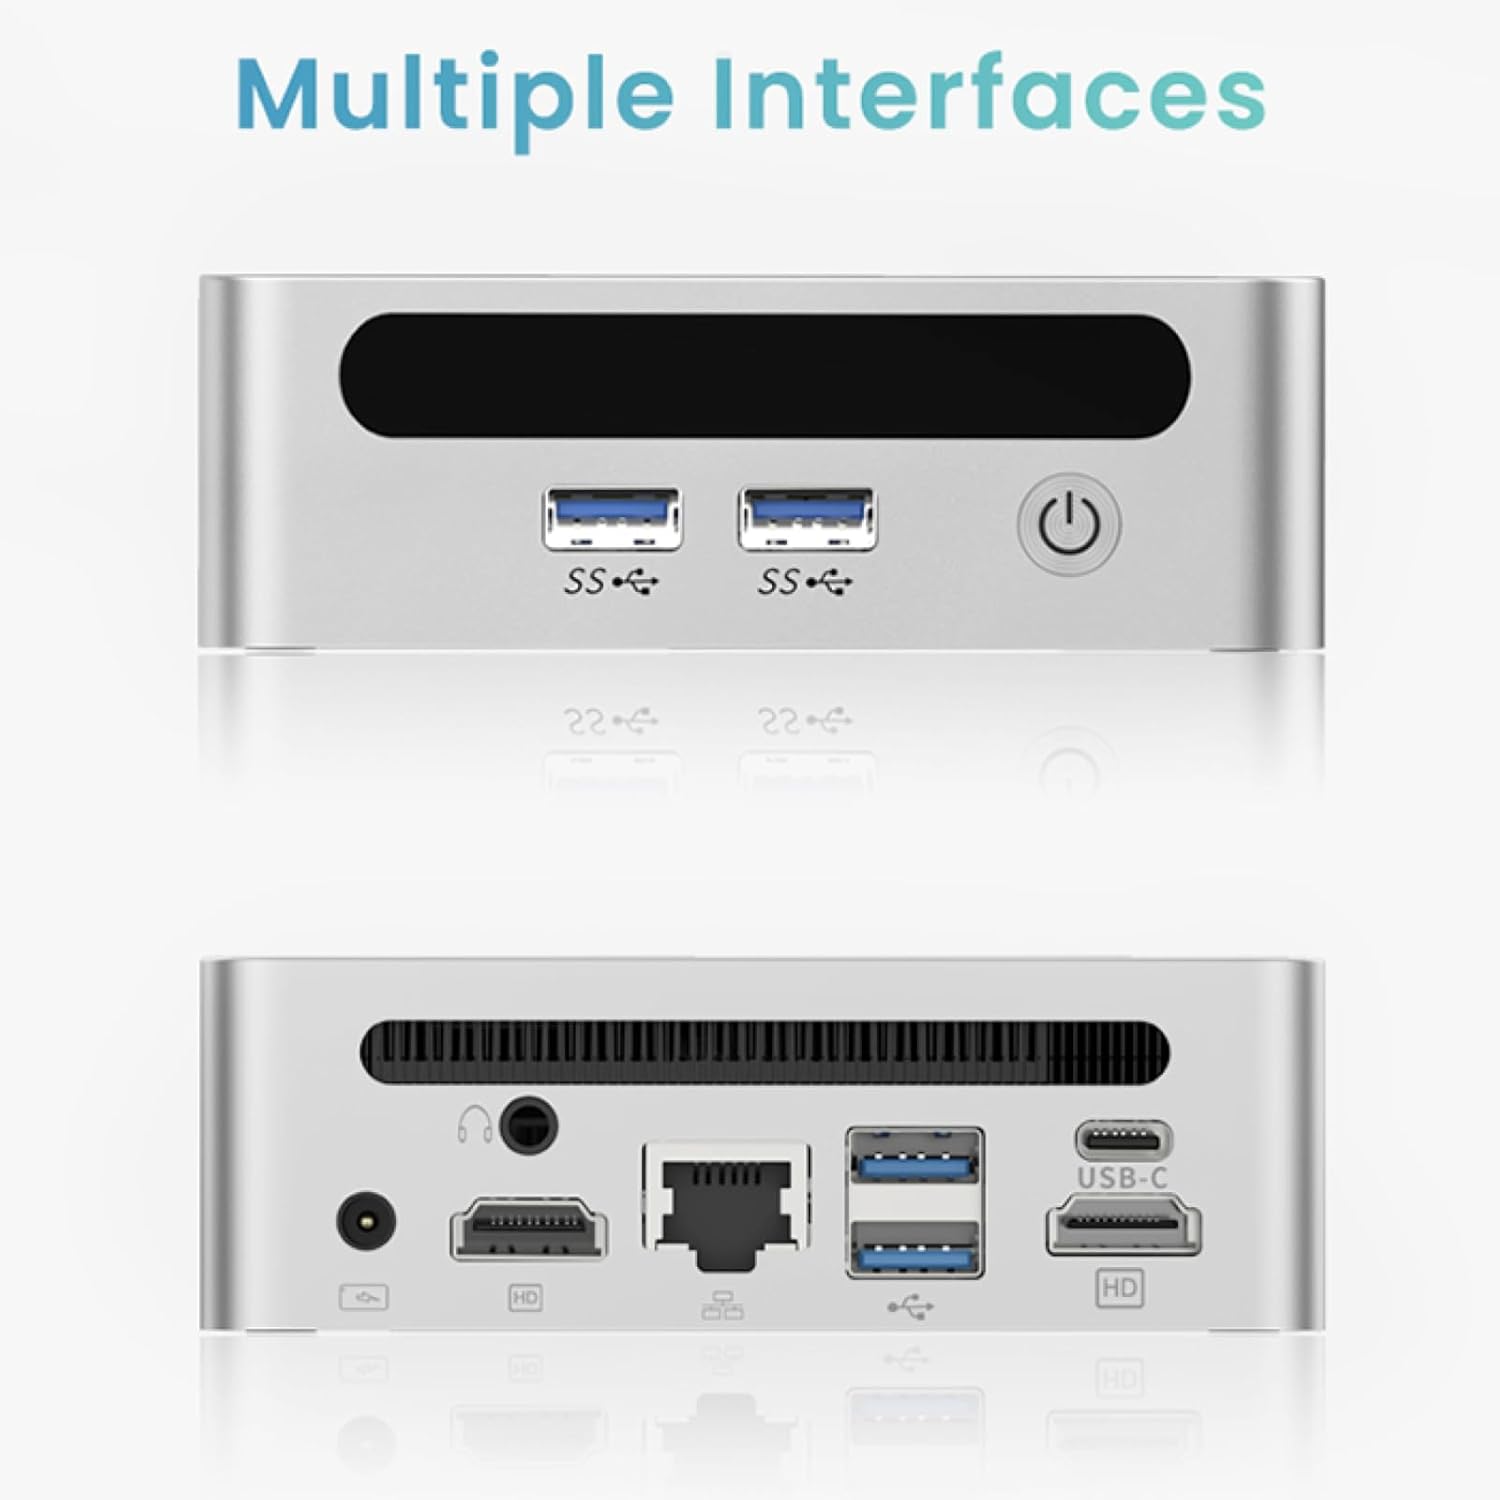
The GenMachine Mini PC features a compact design with various ports for connectivity and expansion.
Panel blaen
- Botwm Pŵer: I bweru ar / oddi ar y ddyfais.
- Porthladdoedd USB 3.0 (x2): For high-speed data transfer and peripheral connections.
- Porthladd USB 2.0 (x1): For standard peripheral connections.
Panel Cefn
- Mewnbwn Pwer DC: Cysylltwch yr addasydd pŵer a ddarperir yma.
- Porthladd USB 2.0 (x1): For standard peripheral connections.
- Porthladdoedd HDMI (x2): For connecting displays, supporting up to 4K resolution.
- Porthladd Ethernet (LAN): Ar gyfer cysylltiad rhwydwaith gwifrau.
- Jac Sain 3.5mm: Ar gyfer clustffonau neu seinyddion.
- Slot Clo Kensington: Ar gyfer sicrhau'r ddyfais.
4. Canllaw Gosod
Cysylltiad Cychwynnol
- Power off the Mini PC and disconnect all cables.
- Connect your monitor(s) to the HDMI port(s) on the rear panel.
- Cysylltwch eich bysellfwrdd a'ch llygoden â'r porthladdoedd USB sydd ar gael.
- (Optional) For a wired network connection, plug an Ethernet cable into the LAN port.
- Connect the power adapter to the DC input port and then to a power outlet.
- Press the power button on the front panel to turn on the Mini PC.
Operating System Setup (Windows 11)
Your GenMachine Mini PC comes with Windows 11 pre-installed. Upon first boot, you will be guided through the initial Windows setup process, including:
- Region and keyboard layout selection.
- Network connection (Wi-Fi 6 or Ethernet).
- Microsoft account sign-in or local account creation.
- Privacy settings configuration.
Dilynwch y cyfarwyddiadau ar y sgrin i gwblhau'r gosodiad.
5. Performance and Usage
The AMD Ryzen 3 4300U processor, combined with 8GB DDR4 RAM and a 256GB SSD, provides robust performance for various tasks.
Nodweddion Allweddol:
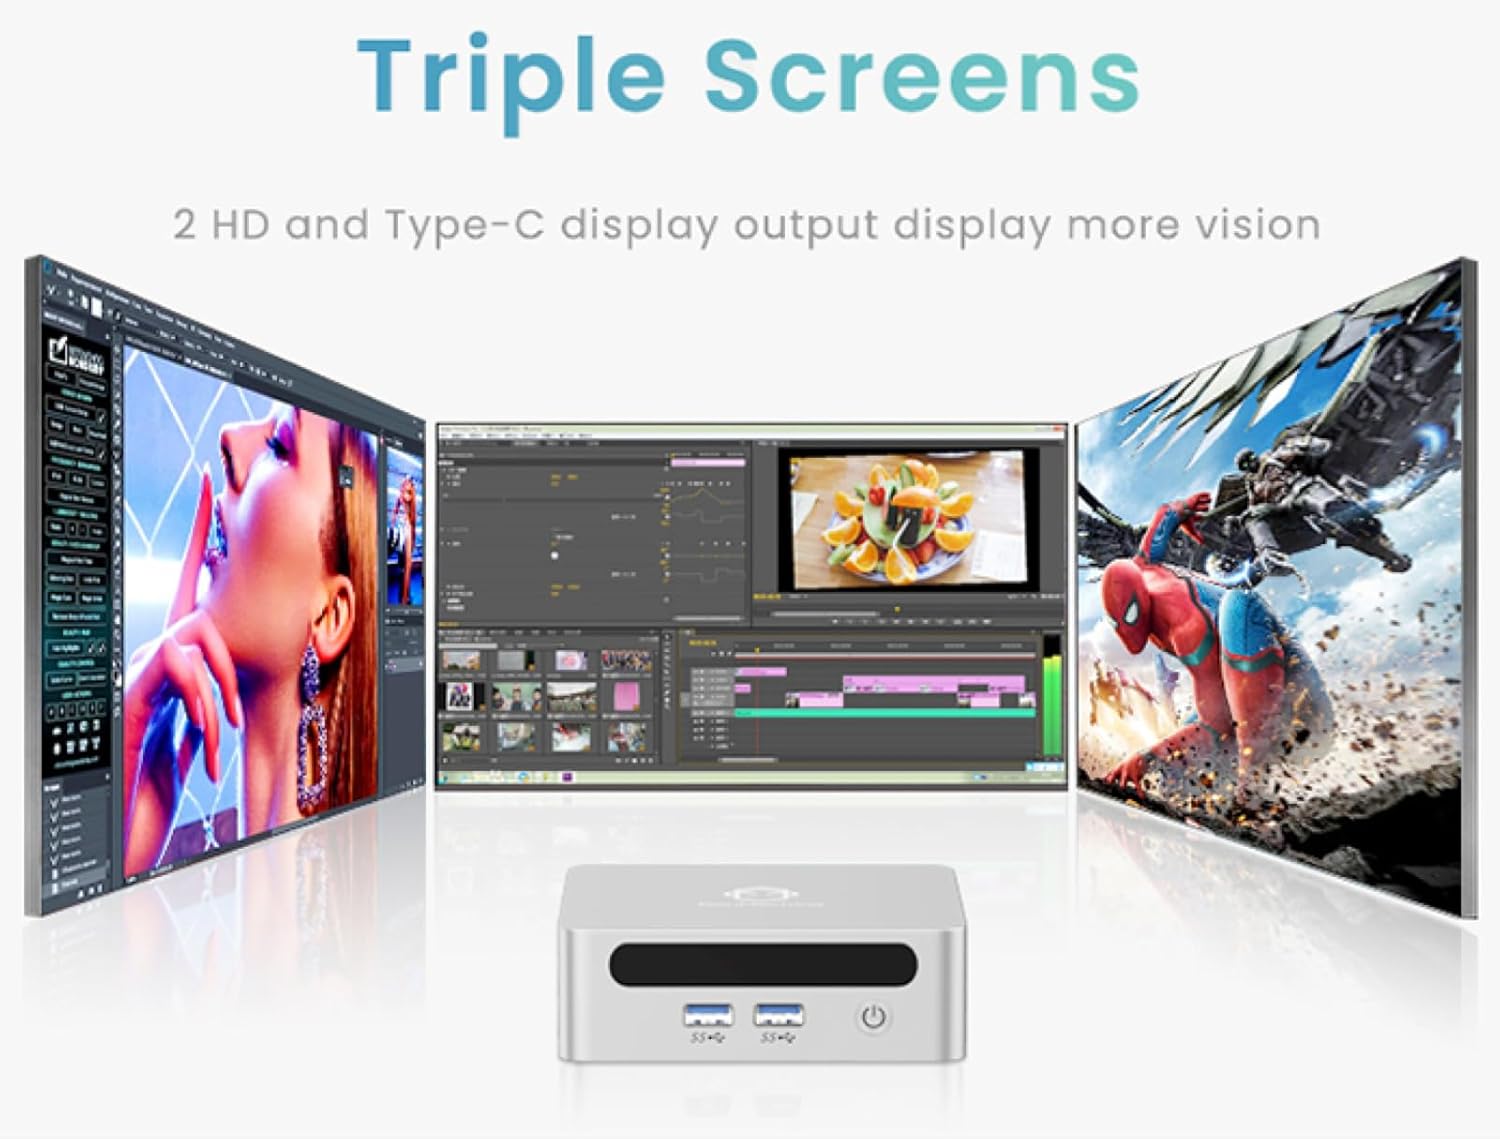
- 4K Ultra HD Visuals & Dual Display Support: Connect up to two 4K monitors for enhanced productivity or immersive entertainment.
- Wi-Fi 6 & Bluetooth 5.2: Enjoy faster and more stable wireless internet and seamless connectivity with Bluetooth peripherals.
- Compact and Quiet Design: Its small footprint and ultra-quiet cooling system make it suitable for any workspace without distraction.

6. Upgrading Components (Maintenance)
The GenMachine Mini PC allows for easy upgrades of its RAM and SSD to further enhance performance or storage capacity.
Offer Angenrheidiol:
- Sgriwdreifer pen Phillips bach
- Plastic pry tool (optional, for opening the case)
- New SSD (M.2 2280 NVMe or 2.5-inch SATA SSD)
- New RAM (DDR4 SODIMM)
Gweithdrefn:
- Power off the Mini PC and disconnect all cables.
- Carefully remove the four rubber foot pads on the bottom of the Mini PC to reveal the hidden screws.
- Dadsgriwiwch y pedwar sgriw.
- Gently pry open the bottom plate along the edges. Be careful with the internal clips.
- Locate the existing SSD and RAM modules.
- To remove the SSD: If fixed by screws, unscrew them. If by clips, open the clips and pull out the original SSD.
- To remove RAM: Open the clips at both ends of the memory slot and pull out the original memory vertically.
- Insert the new SSD/RAM into the respective slots, ensuring they are properly seated and secured.
- Replace the bottom plate, aligning it with the clips and screw holes.
- Screw on the previously removed screws and reattach the foot pads.
7. Opsiynau Mowntio
The GenMachine Mini PC can be mounted behind a VESA-compatible monitor using the included mounting bracket, saving desk space and creating a clean setup.

8. manylebau
| Nodwedd | Manylyn |
|---|---|
| Prosesydd | AMD Ryzen 3 4300U (2.7 GHz) |
| HWRDD | 8GB DDR4 SDRAM |
| Storio | 256GB 2280 SSD (PCIE x 16 interface) |
| Graffeg | Graffeg AMD Radeon Integredig |
| System Weithredu | OS (Windows 11 pre-installed) |
| Cysylltedd | Wi-Fi 6, Bluetooth 5.2, Ethernet |
| Allbwn Fideo | 2x HDMI (4K @ 60Hz), USB-C (DisplayPort Alt Mode) |
| Porthladdoedd USB | 2x USB 3.0, 2x USB 2.0, 1x USB-C |
| Dimensiynau | 6.26 x 6.26 x 3.6 modfedd |
| Pwysau | 2 pwys |
9. Datrys Problemau
- Dim pŵer: Gwnewch yn siŵr bod yr addasydd pŵer wedi'i gysylltu'n ddiogel â'r Mini PC ac allfa bŵer sy'n gweithio.
- Dim Arddangosfa: Verify that the HDMI cable(s) are correctly connected to the monitor(s) and the Mini PC. Check monitor input source settings.
- No Internet (Wi-Fi): Ensure Wi-Fi is enabled in Windows settings and you are connected to the correct network.
- No Internet (Wired): Check the Ethernet cable connection and ensure your router is functioning correctly.
- Perfformiad Araf: Close unnecessary applications. Check for background updates. Consider upgrading RAM or SSD if issues persist.
10. Gwarant a Chefnogaeth
For warranty information, technical support, or service inquiries, please refer to the contact details provided in your product packaging or visit the official GenMachine websafle. Cadwch eich derbynneb prynu ar gyfer hawliadau gwarant.
Ask a question about this manual
Ask about setup, troubleshooting, compatibility, parts, safety, or missing instructions. Manuals+ will review the question and use this page’s manual context to help answer it.