1. Rhagymadrodd
Thank you for choosing the MOUNTUP Dual Monitor Arm MU8012-W-07. This instruction manual provides essential information for the safe and correct installation, operation, and maintenance of your new monitor arm. Please read this manual thoroughly before installation and keep it for future reference.
Rhagofalon Diogelwch
- Gwnewch yn siŵr bod yr holl gydrannau'n bresennol ac yn ddi-ddifrod cyn eu cydosod. Peidiwch â defnyddio os oes unrhyw rannau ar goll neu'n ddiffygiol.
- Verify that your desk surface is strong enough to support the combined weight of the monitor arm and your monitors.
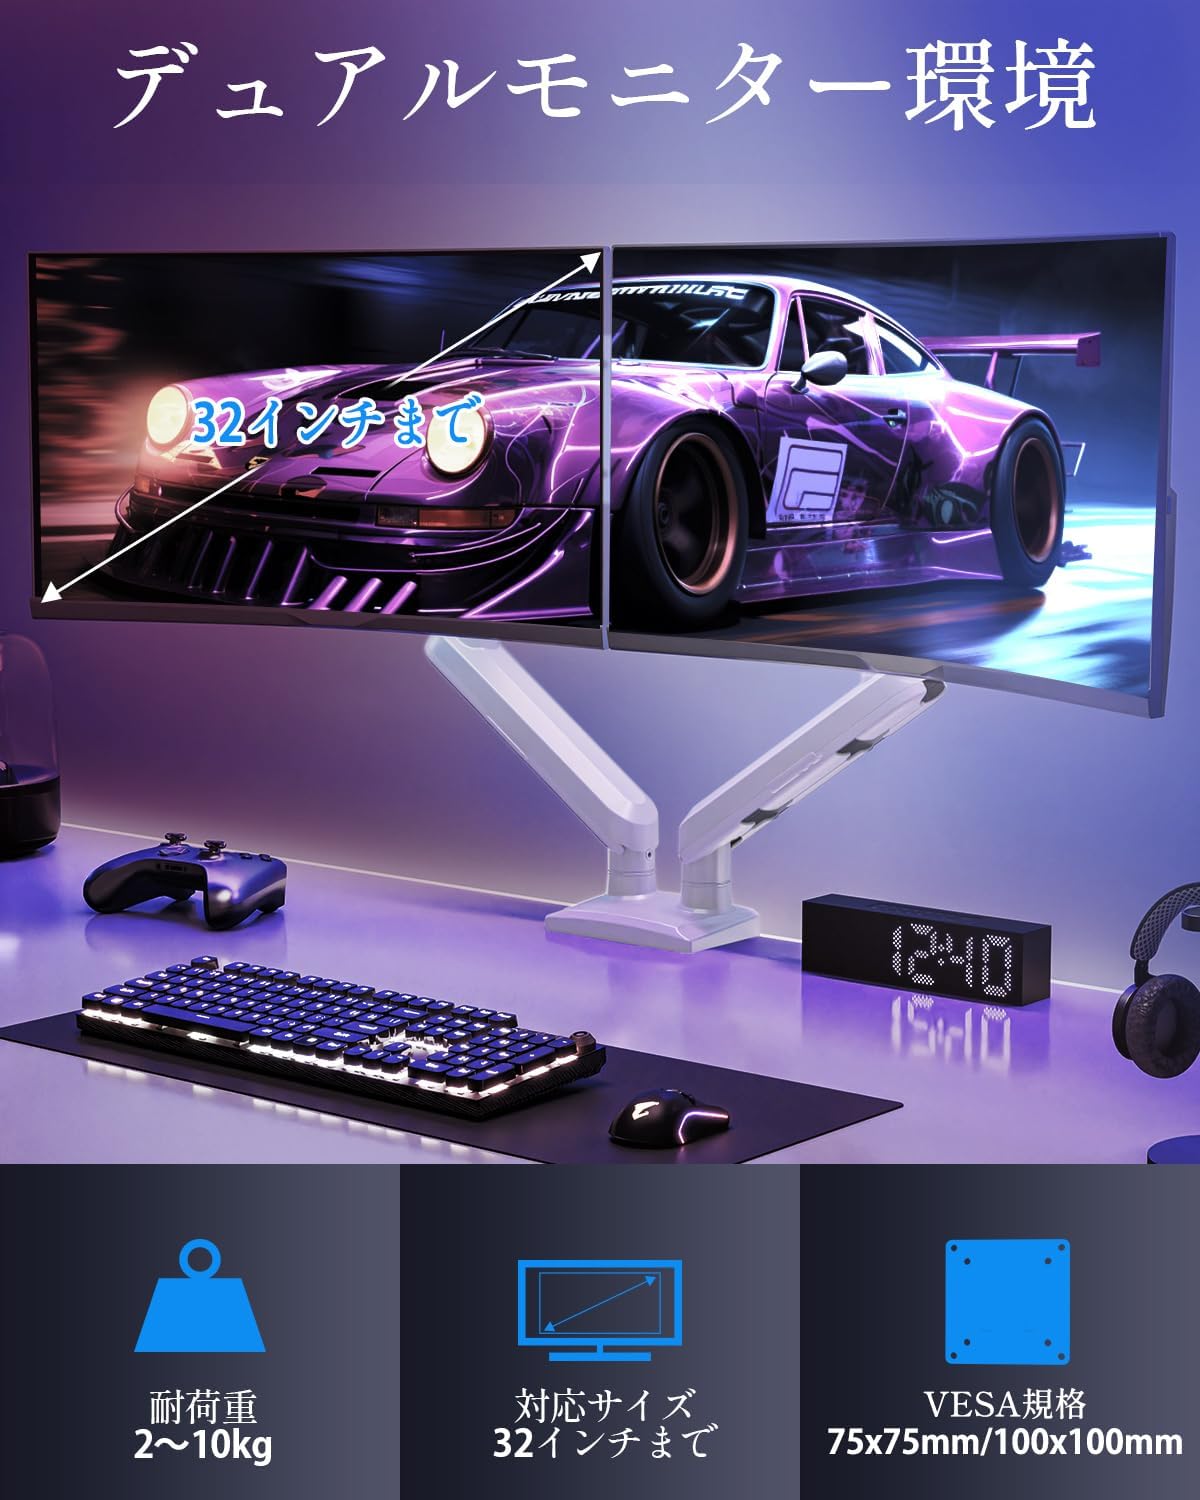
- Do not exceed the maximum weight capacity of 10kg (22 lbs) per arm.
- Always follow the installation steps carefully. Improper installation may result in product damage or personal injury.
- Keep children away from the product during assembly. Small parts may be a choking hazard.
2. Cynnwys Pecyn
Gwiriwch fod yr holl gydrannau canlynol wedi'u cynnwys yn eich pecyn:
- Monitor Arm Assembly (x1)
- Plât VESA (x2)
- Desg Clamp Sylfaen (x1)
- Grommet Base (x1)
- Mounting Hardware Kit (screws, washers, spacers)
- Hex Wrenches (various sizes)
- Llawlyfr Cyfarwyddiadau (x1)
3. manylebau
| Nodwedd | Manyleb |
|---|---|
| Model | MU8012-W-07 |
| Deunydd | Dur aloi |
| Lliw | Gwyn |
| Cydweddoldeb Maint Sgrin | 13 - 32 modfedd |
| Capasiti Pwysau (fesul braich) | 2 - 10 kg (4.4 - 22 pwys) |
| Cydnawsedd VESA | 75x75mm, 100x100mm |
| Opsiynau Mowntio | Clamp, Grommet |
| Ystod Tilt | +85° i -45° |
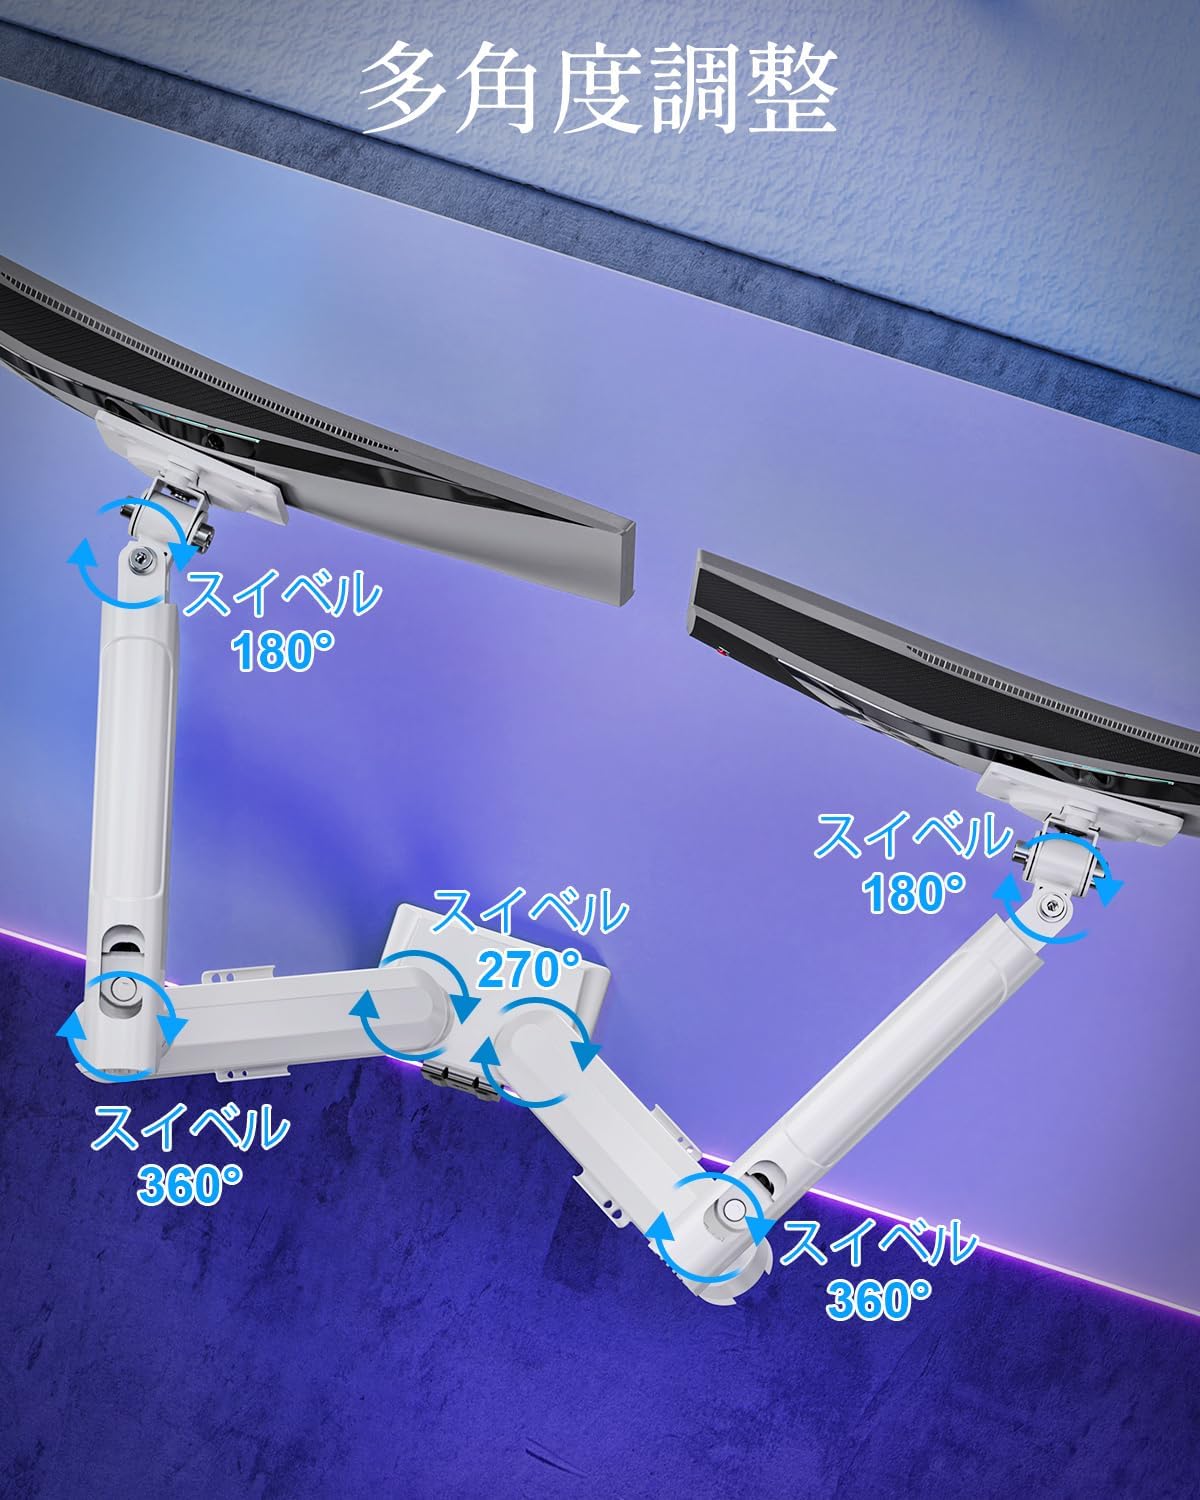
| Ystod Swivel | 180° (monitor plate), 270° (middle joint), 360° (base) |
| Rotation (Pivot) | 360° |
| Max Height Adjustment | 44 cm (17.3 fodfedd) |
| Estyniad Braich Uchaf | 50 cm (19.7 fodfedd) |
| Pwysau Cynnyrch | 3.1 kg (6.8 pwys) |

4. Gosod a Gosod
Cam 1: Dewiswch Eich Dull Mowntio
The MOUNTUP Dual Monitor Arm supports two installation methods: Clamp Mount and Grommet Mount. Choose the method that best suits your desk.

Clamp Gosod Mount
- Atodwch y clamp base to the main pole of the monitor arm.
- Gosodwch y clamp onto the edge of your desk. Ensure the desk thickness is between 10-70mm (0.4-2.7 inches).
- Tynhau'r clamp screw until the arm is securely fastened to the desk. Ensure it is stable and does not wobble.

Gosod Grommet Mount
- If your desk has a grommet hole, ensure its diameter is between 10-60mm (0.4-2.4 inches) and the desk thickness is between 10-70mm (0.4-2.7 inches).
- Attach the grommet base to the main pole.
- Insert the grommet bolt through the desk hole and secure it from underneath with the provided plate and nut.
- Tighten the nut until the arm is firmly attached to the desk.
Cam 2: Cysylltwch Platiau VESA i Fonitoriaid
- Carefully lay your monitor face down on a soft, clean surface.
- Aliniwch y plât VESA â'r tyllau mowntio ar gefn eich monitor.
- Use the appropriate screws (M4 or M5) and washers from the hardware kit to secure the VESA plate to the monitor. Do not overtighten.
Step 3: Mount Monitors to Arms
- Slide the monitor (with the attached VESA plate) onto the VESA head of the monitor arm.
- Ensure the monitor clicks into place or is securely fastened by the quick-release mechanism.
- Ailadroddwch ar gyfer yr ail fonitor.

Cam 4: Rheoli Ceblau
Route your monitor cables through the integrated cable management clips on the underside of the arms. This helps maintain a tidy workspace.

5. Gweithredu ac Addasiadau
The MOUNTUP Dual Monitor Arm offers flexible adjustments to optimize your viewing profiad.

Adjusting Arm Tension (Gas Spring)
The gas spring mechanism allows for smooth height adjustments. If your monitor sags or is difficult to move, you may need to adjust the tension.

- To increase tension (if monitor sags): Use the provided hex wrench to turn the adjustment screw clockwise.
- To decrease tension (if arm is too stiff): Turn the adjustment screw counter-clockwise.
- Always adjust tension with the arm held horizontally. Test the movement after each small adjustment until the monitor holds its position freely.
Addasiadau Monitro
- Addasiad Uchder: Gently push or pull the monitor up or down to your desired height. The gas spring will assist in holding the position. Max height is 44cm (17.3 inches).
- Addasiad Tilt: Tilt the monitor screen up to +85° or down to -45° to reduce glare and optimize viewing angles. Loosen the tilt bolt, adjust, then re-tighten.
- Addasiad troi: The arm allows for 180° swivel at the monitor plate, 270° at the middle joint, and 360° at the base, providing wide range of motion.
- Rotation (Pivot): Rotate your monitor 360° to switch between landscape and portrait orientations.

6. cynnal
- Glanhau: Sychwch fraich y monitor gyda lliain meddal, damp brethyn. Osgowch lanhawyr sgraffiniol neu doddyddion a allai niweidio'r gorffeniad.
- Gwiriadau Cyfnodol: Gwiriwch yr holl sgriwiau a chysylltiadau o bryd i'w gilydd i sicrhau eu bod yn parhau'n dynn ac yn ddiogel. Ail-dynhau os oes angen.
- Gas Spring Longevity: The high-quality gas spring is tested for over 20,000 cycles. Proper tension adjustment will help maintain its performance over time.

7. Datrys Problemau
- Monitor Sags or Won't Stay Up: The gas spring tension is too low. Refer to the "Adjusting Arm Tension" section and turn the adjustment screw clockwise to increase tension.
- Arm is Too Stiff or Difficult to Move: The gas spring tension is too high. Refer to the "Adjusting Arm Tension" section and turn the adjustment screw counter-clockwise to decrease tension.
- Sigladau Monitro: Ensure all mounting screws (VESA plate to monitor, arm to desk) are securely tightened. Check that the desk clamp or grommet mount is firm.
- Monitor Tilt Angle Won't Hold: The tilt bolt may be loose. Tighten the tilt bolt on the VESA head.
8. Gwarant a Chefnogaeth
MOUNTUP provides a Gwarant ansawdd 2 blynedd from the date of purchase for this product. This warranty covers manufacturing defects and issues arising from normal use.
If you encounter any problems with your MOUNTUP Dual Monitor Arm, or if you have questions regarding installation or operation, please contact our customer support. You can typically find seller contact information through your purchase history on the platform where you bought the product (e.g., Amazon order details).
Please have your model number (MU8012-W-07) and purchase date ready when contacting support to ensure a swift resolution.