
GREATHTEK 4K60HZ+USB2.0
GREATHTEK HDMI+Displayport Dual Monitor KVM Switch User Manual
Model: 4K60HZ+USB2.0
1. Rhagymadrodd
The GREATHTEK HDMI+Displayport Dual Monitor KVM Switch allows two computers or laptops to share two monitors and a single set of keyboard and mouse. This device supports both extended and duplicate display modes, provided your computer's graphics card supports these capabilities. It is designed to streamline your workspace by enabling seamless switching between two systems.
Mae nodweddion allweddol yn cynnwys:
- Cefnogaeth Monitor Deuol: Connects two monitors to two computers using a combination of HDMI and DisplayPort inputs.
- Cydraniad Uchel: Supports Ultra HD resolutions up to 4K@60Hz, with backward compatibility for lower resolutions.
- Hwb USB Integredig: Features four USB 2.0 ports for sharing peripherals such as keyboards, mice, U-disks, printers, gamepads, and webcams.
- Adaptive EDID: Ensures smooth and stable signal output by adapting to various display environments.
- Cydnawsedd Eang: Compatible with Windows 10/7/2000/XP/Vista, Linux, UNIX, Ubuntu, Fedora, and other operating systems.
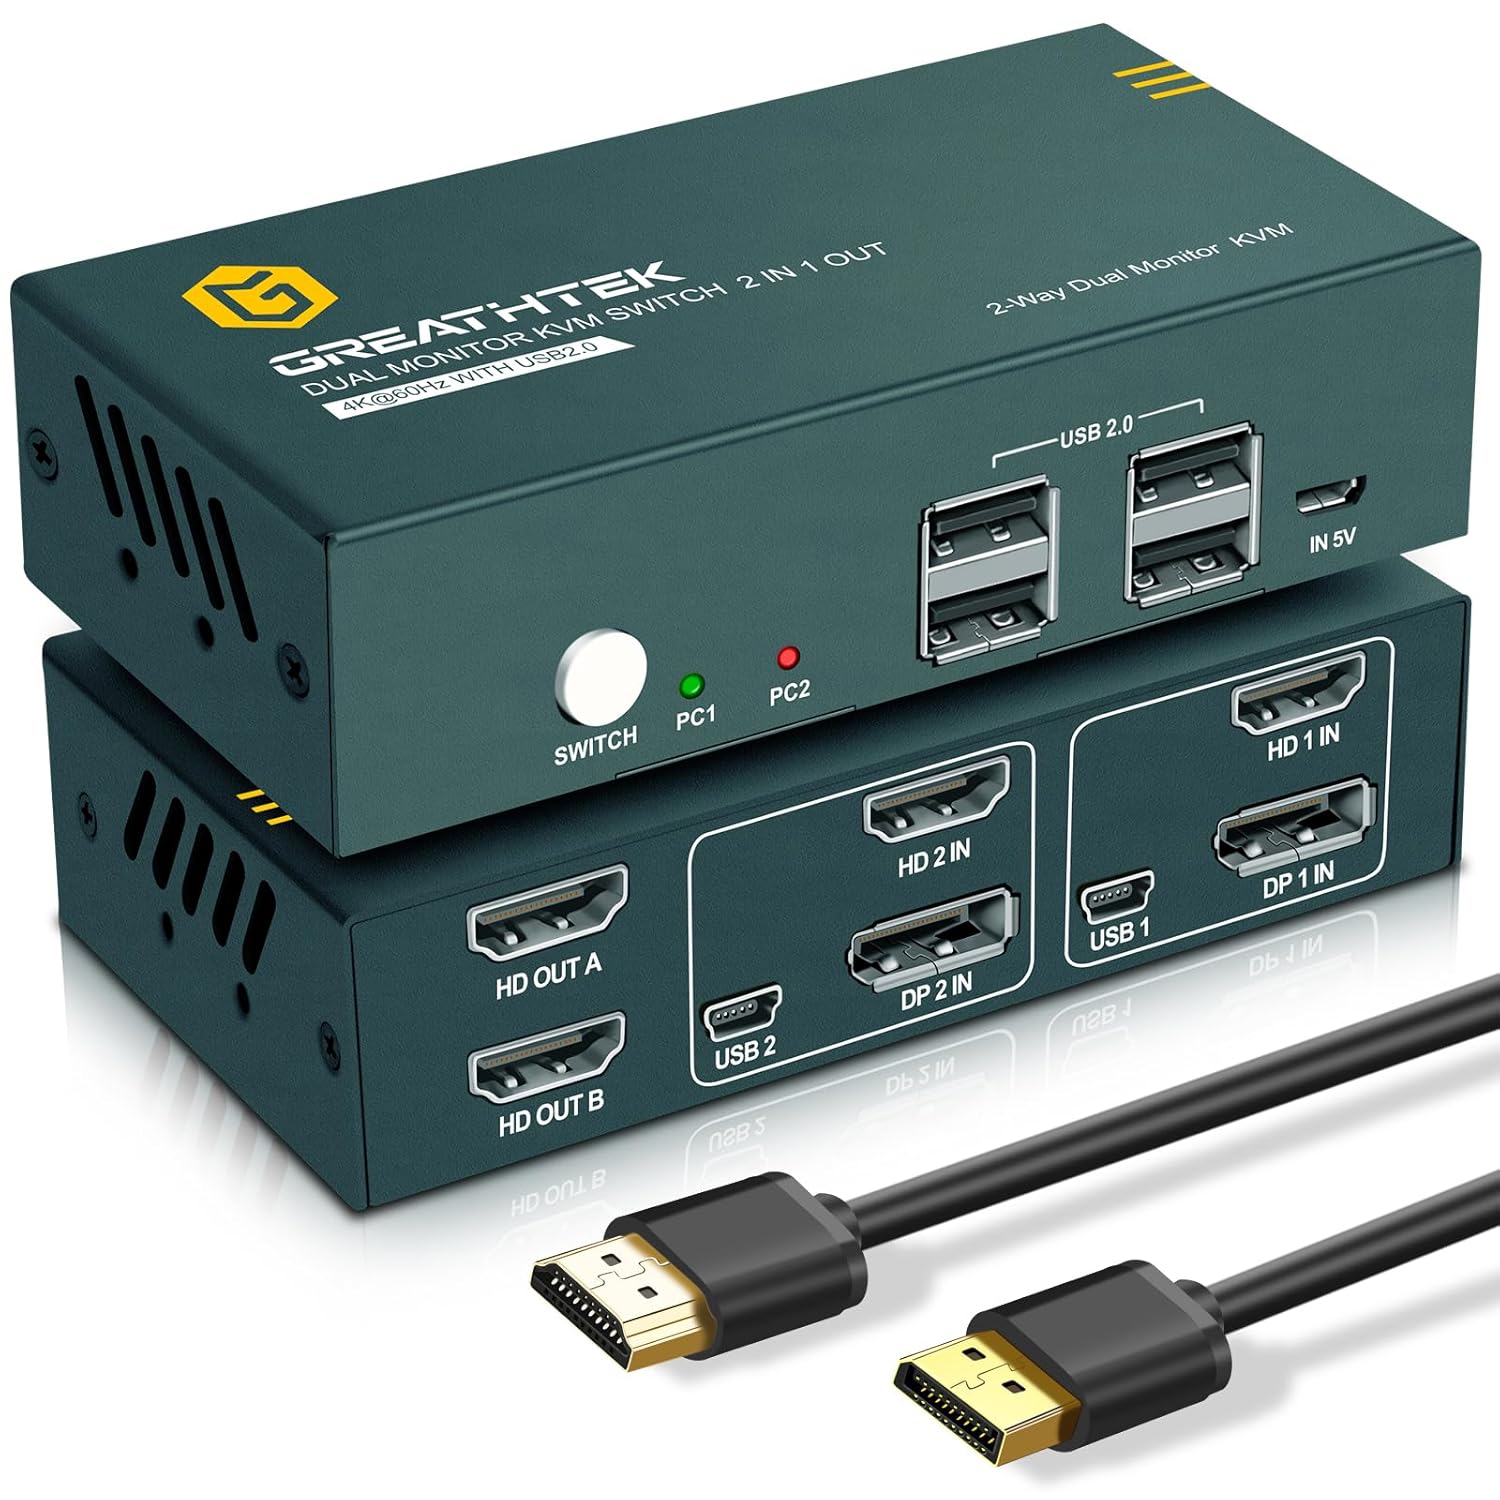
Delwedd 1.1: Blaen a chefn view of the GREATHTEK KVM Switch with included cables.
2. Cynnwys Pecyn
Gwiriwch fod yr holl eitemau a restrir isod wedi'u cynnwys yn eich pecyn:
- GREATHTEK HDMI+Displayport Dual Monitor KVM Switch Unit
- Mini USB Cable (x2)
- Cebl Micro USB (x1)
- DP Cable (5 ft) (x2)
- HDMI Cable (5 ft) (x2)
- Pad Traed
- Cerdyn Gwarant
- Llawlyfr Defnyddiwr
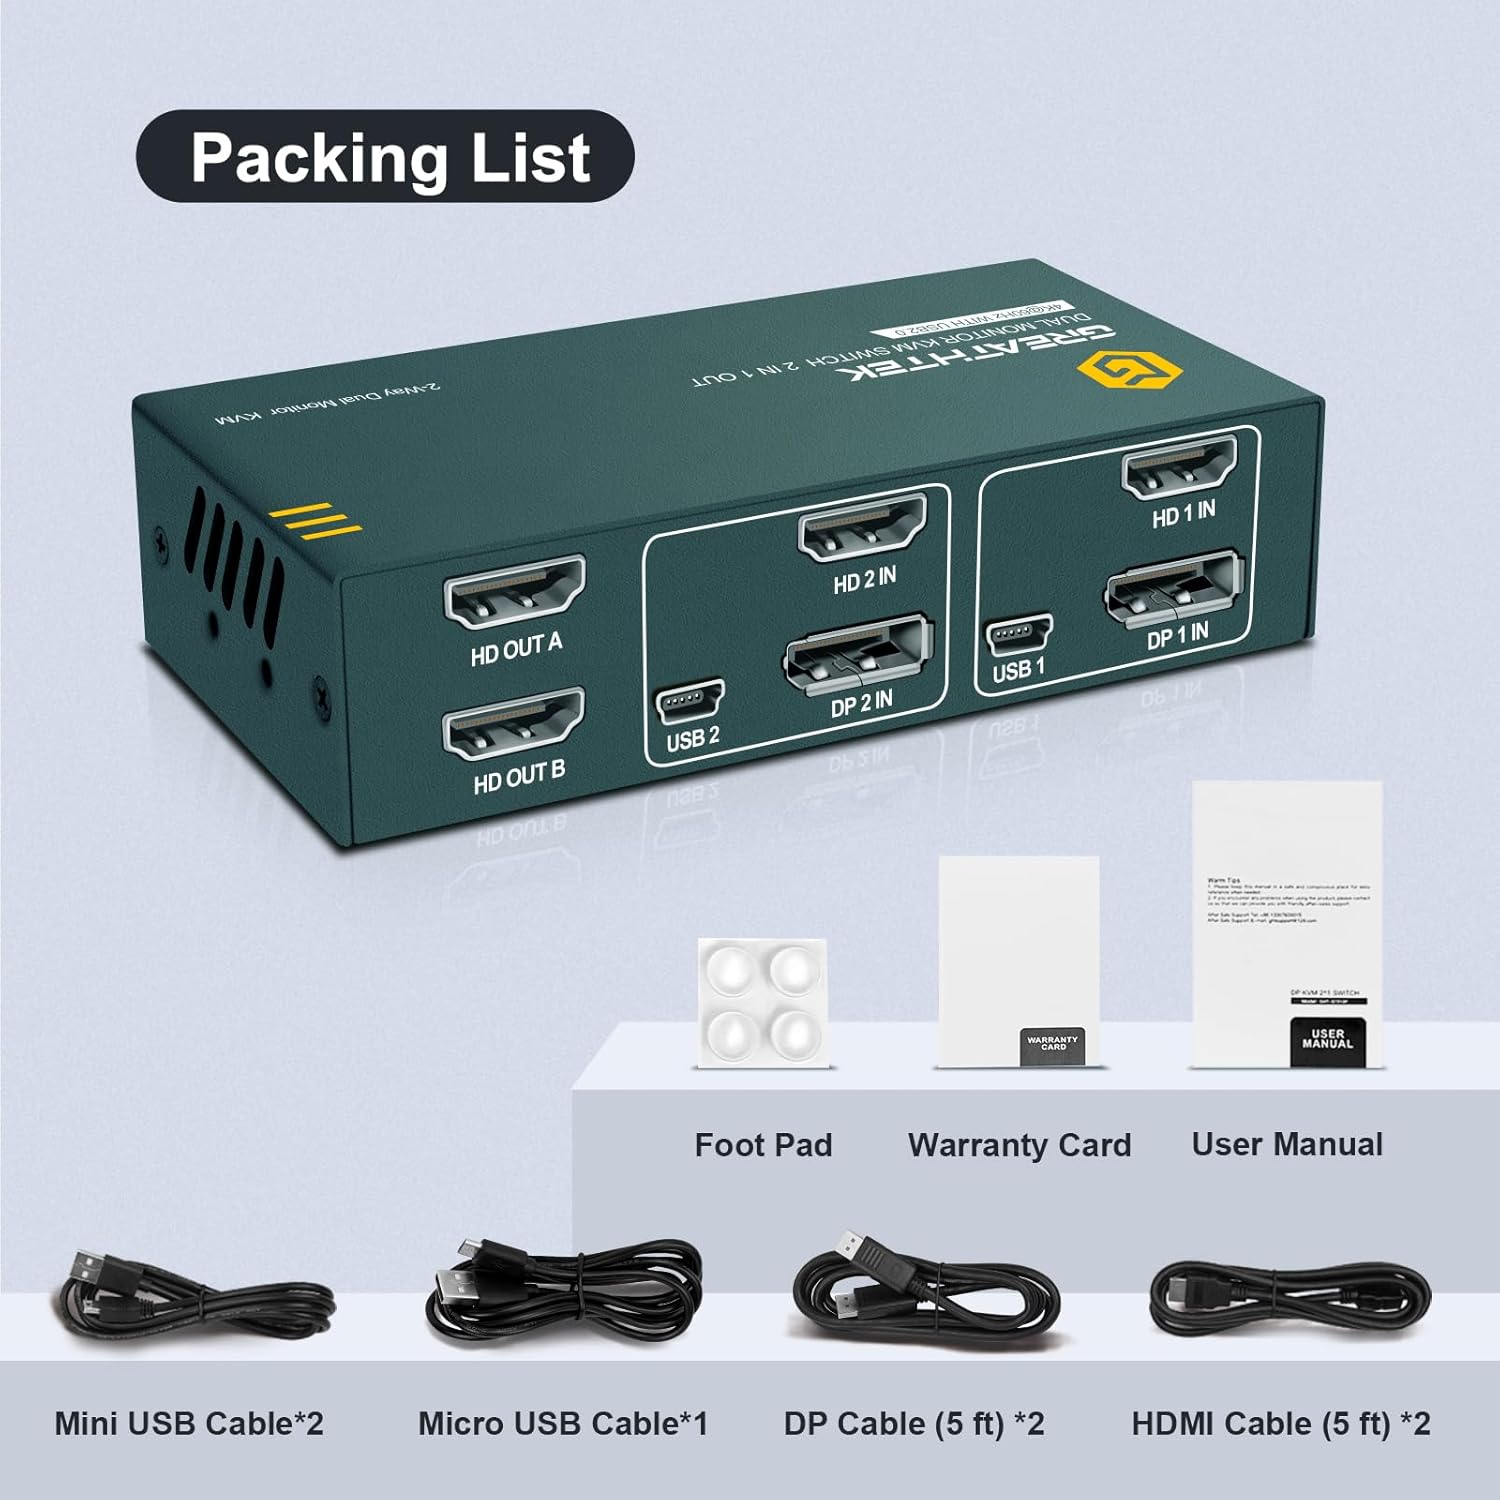
Image 2.1: Illustration of the KVM Switch and its included accessories.
3. Product Diagrams
3.1 Cynllun y Panel Blaen a'r Panel Cefn

Delwedd 3.1: Manwl view of the KVM Switch's front and rear ports.
- 1. HD OUT A: HDMI output for Monitor A
- 2. HD OUT B: HDMI output for Monitor B
- 3. HD 2 IN / DP 2 IN / USB 2: Input group for PC2 (HDMI, DisplayPort, USB)
- 4. HD 1 IN / DP 1 IN / USB 1: Input group for PC1 (HDMI, DisplayPort, USB)
- 5. SWITCH: Button to switch between PC1 and PC2
- 6. PC1 / PC2: Dangosyddion statws (LEDs)
- 7. USB 2.0 Ports: For keyboard, mouse, and other USB 2.0 devices
- 8. IN 5V: 5V power supply input port (Micro USB)
3.2 Diagram Cysylltiad

Image 3.2: Visual guide for connecting two computers and two monitors to the KVM Switch.
4. Cyfarwyddiadau Gosod
Follow these steps to connect your GREATHTEK KVM Switch:
- Dyfeisiau Pweru i ffwrdd: Gwnewch yn siŵr bod y cyfrifiaduron a'r monitorau wedi'u diffodd cyn gwneud unrhyw gysylltiadau.
- Connect Monitors to KVM Outputs:
- Connect your first monitor to the KVM's HD ALLAN A porthladd gan ddefnyddio cebl HDMI.
- Connect your second monitor to the KVM's HD ALLAN B porthladd gan ddefnyddio cebl HDMI.
- Connect PC1 to KVM Inputs:
- Connect PC1's HDMI output to the KVM's HD 1 IN porthladd gan ddefnyddio cebl HDMI.
- Connect PC1's DisplayPort output to the KVM's DP 1 IN port using a DisplayPort cable.
- Connect PC1's USB port to the KVM's USB 1 port using a Mini USB to USB-A cable.
- Connect PC2 to KVM Inputs:
- Connect PC2's HDMI output to the KVM's HD 2 IN porthladd gan ddefnyddio cebl HDMI.
- Connect PC2's DisplayPort output to the KVM's DP 2 IN port using a DisplayPort cable.
- Connect PC2's USB port to the KVM's USB 2 port using a Mini USB to USB-A cable.
- Cysylltu Perifferolion USB: Connect your keyboard, mouse, and other USB 2.0 devices (e.g., U-disk, printer, webcam) to the four Porthladdoedd USB 2.0 ar flaen y switsh KVM.
- Pwer Cysylltu: Connect the Micro USB cable to the YN 5V port on the KVM switch and to a 5V power adapter (not always included, but recommended for stable operation, especially with multiple USB devices).
- Pŵer Ymlaen: Power on your monitors and then your computers. The KVM switch should automatically detect the active input.
Nodyn: Ensure all cables are securely connected. Loose connections can lead to display or peripheral issues.
5. Gweithredu'r Switsh KVM
5.1 Newid Rhwng Cyfrifiaduron
To switch between the connected computers (PC1 and PC2), press the SWITCH button located on the front panel of the KVM device. The corresponding LED indicator (PC1 or PC2) will illuminate to show which computer is currently active.

Image 5.1: The front panel switch button for changing active computers.
5.2 Moddiau Arddangos
The KVM switch supports both extended and duplicate display modes. The specific mode depends on your computer's operating system and graphics card settings. You can configure these settings directly on your computer.

Image 5.2: Illustration of mirrored and extended display configurations.
6. cynnal
To ensure the longevity and optimal performance of your KVM switch, follow these general maintenance guidelines:
- Keep the device in a cool, dry place, away from direct sunlight, heat sources, and moisture.
- Osgoi amlygu'r ddyfais i dymheredd neu leithder eithafol.
- Clean the exterior of the KVM switch with a soft, dry cloth. Do not use liquid cleaners or abrasive materials.
- Sicrhewch awyru priodol o amgylch y ddyfais i atal gorboethi.
- Regularly check all cable connections to ensure they are secure.
7. Datrys Problemau
Os byddwch chi'n dod ar draws problemau gyda'ch switsh KVM, cyfeiriwch at y problemau a'r atebion cyffredin canlynol:
| Problem | Achos Posibl | Ateb |
|---|---|---|
| Dim arddangosfa ar fonitorau ar ôl newid. | Loose video cables, incorrect input selection, resolution incompatibility. |
|
| Bysellfwrdd na llygoden ddim yn ymateb. | Loose USB cables, KVM not powered, incompatible USB device. |
|
| USB devices disconnect randomly. | Insufficient power, faulty USB cable, KVM firmware issue. |
|
| Switching is slow or unresponsive. | Cable quality, KVM processing delay. |
|
8. manylebau
| Nodwedd | Manylyn |
|---|---|
| Model | 4K60HZ+USB2.0 (GHT-7217PH2-016) |
| Mewnbynnau Fideo | 2 x HDMI, 2 x DisplayPort |
| Allbynnau Fideo | 2 x HDMI |
| USB Ports (for computers) | 2 x Mini USB (USB 1, USB 2) |
| USB Ports (for peripherals) | 4 x USB 2.0 Math-A |
| Datrys Max | 4K@60Hz (backward compatible) |
| Modd Gweithredu | Llawlyfr (Botwm Gwthio) |
| Dimensiynau Cynnyrch | 22.5 x 16.6 x 7.6 cm |
| Pwysau | 780 g |
| Deunydd | Plastic, Copper/Copper Alloy |
| Cydweddoldeb | Windows 10/7/2000/XP/Vista, Linux, UNIX, Ubuntu, Fedora |
9. Gwarant a Chefnogaeth
GREATHTEK is committed to providing excellent products and customer service. Your KVM switch comes with a warranty. Please refer to the included Warranty Card for specific terms and conditions, including the warranty period.
If you have any questions, concerns, or require technical assistance with your GREATHTEK KVM switch, please do not hesitate to contact our customer support team. Contact information can typically be found on the Warranty Card or the official GREATHTEK websafle.
Ask a question about this manual
Ask about setup, troubleshooting, compatibility, parts, safety, or missing instructions. Manuals+ will review the question and use this page’s manual context to help answer it.