
1. Rhagymadrodd
The NEEWER NK003 Overhead Camera Mount Rig is designed to transform your desktop or table into a versatile photography and video production workspace. This rig provides a stable and adjustable platform for various equipment, enabling professional overhead shots, live streaming setups, still life photography, and video making. Its robust construction and flexible components ensure secure mounting and precise positioning for cameras, smartphones, and other accessories.

Image 1.1: The NEEWER NK003 Overhead Camera Mount Rig fully assembled on a desk, showcasing its capability to hold lights, a camera, and a smartphone for various creative setups.
2. Beth sydd yn y Bocs
Verify that all components are present before proceeding with assembly.
- 3 x Stand Penbwrdd
- 3 x 1/4" Screw Adapter
- 2 x Croesbar
- 1 x Super Clamp with Dual Ball Head Magic Arm
- 1 x Mini Ball Head
- 1 x Phone Clamp
- 1 x Llawlyfr Defnyddiwr
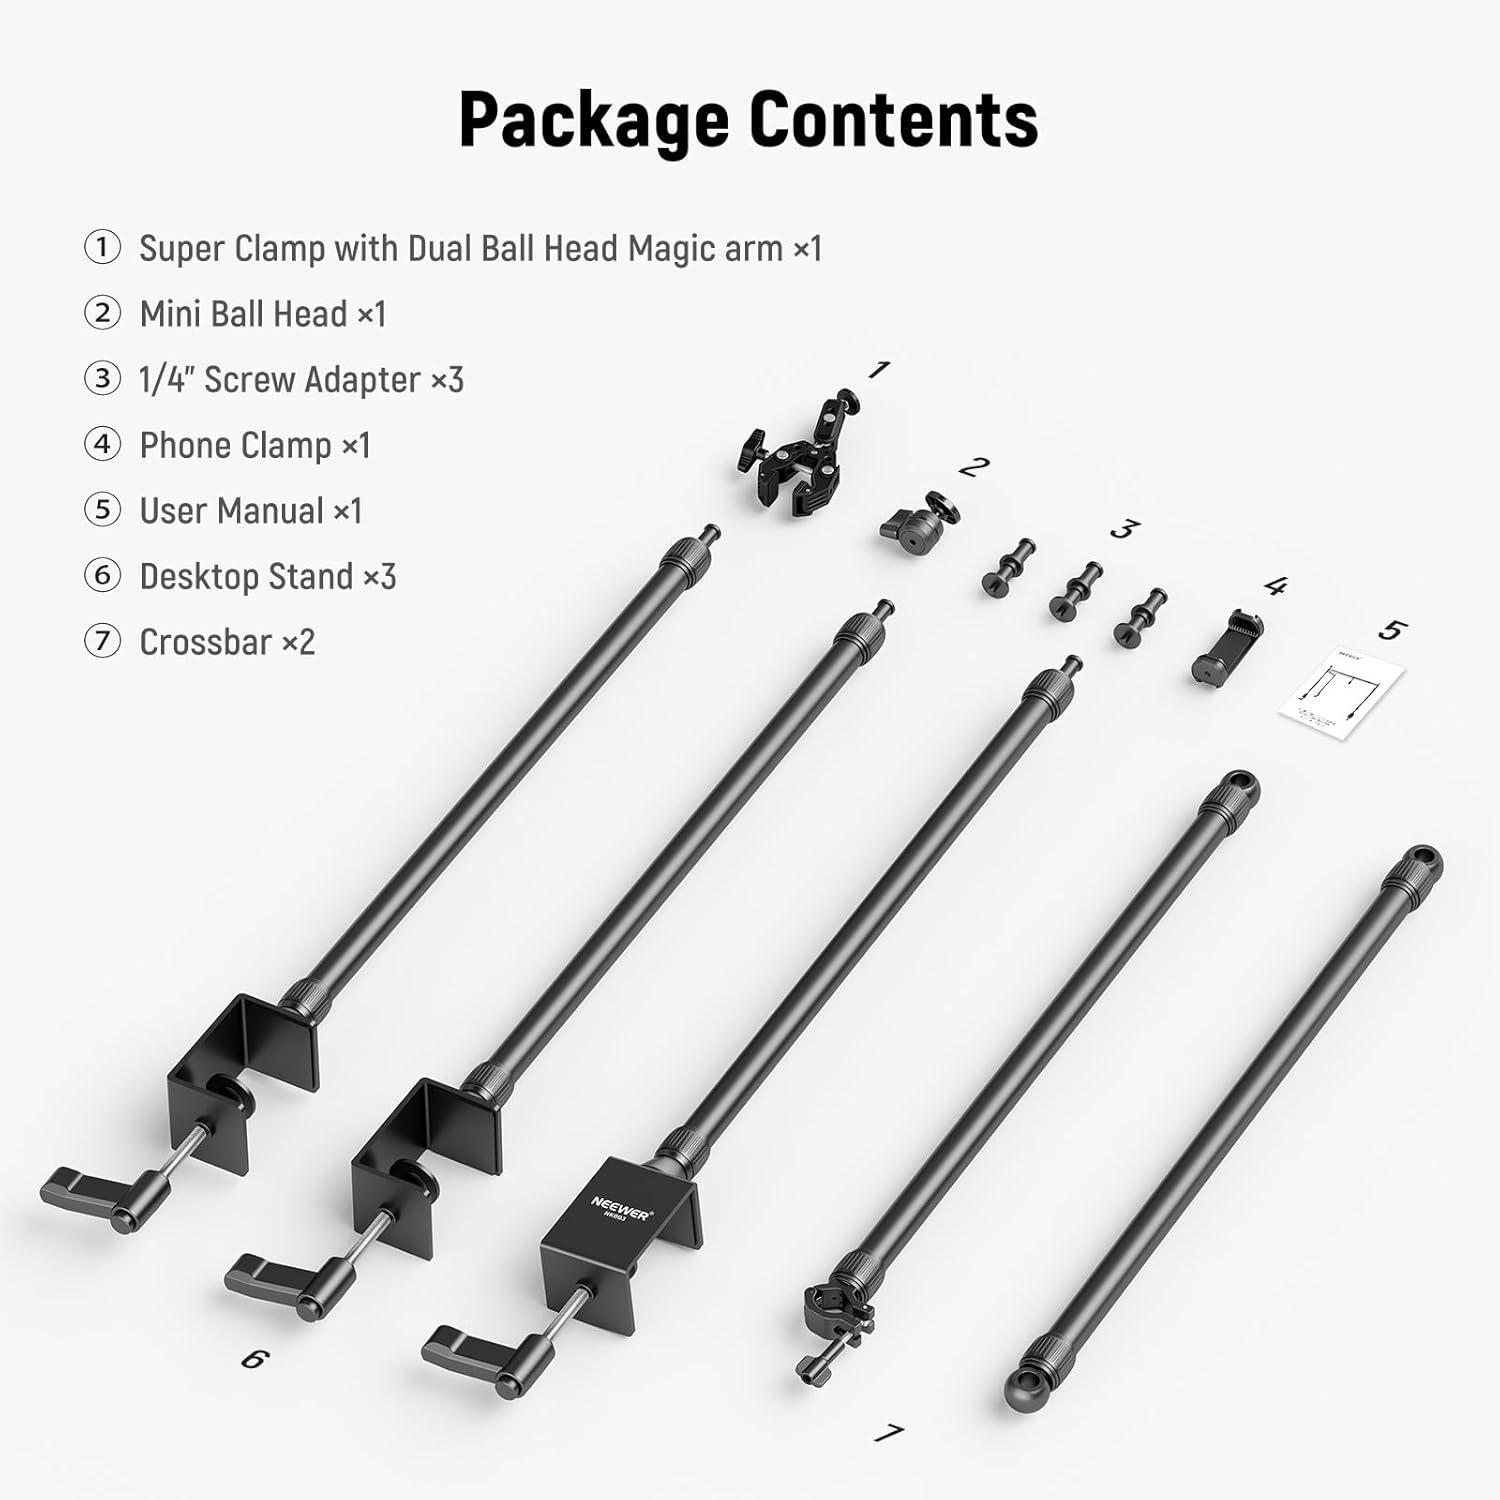
Image 2.1: All components of the NEEWER NK003 Overhead Camera Mount Rig, including stands, crossbars, clamps, and adapters, neatly arranged as they appear in the package.
3. Gosod
Follow these steps to assemble and mount your NEEWER NK003 rig securely.
3.1 Attaching the Desktop Stands
- Identify the desktop stands and their integrated C-clamps.
- Lleolwch y C-clamps on the edge of your desk or table. Ensure the desk thickness is within the clamp's maximum opening (up to 2.6 inches / 6.5 cm).
- Tighten the locking knob on each C-clamp until the stand is firmly secured to the desktop. The rubber padding on the clamp helps prevent scratches and ensures stability.

Delwedd 3.1: Manwl view o'r C-clamp, highlighting the rubber padding for desktop protection and the locking knob for secure attachment.
3.2 Assembling Crossbars and Adapters
- Insert the 1/4" screw adapters into the top of each desktop stand. These adapters feature a 5/8" stud and a 1/4" screw for attaching various accessories.
- Attach the crossbars to the 1/4" screw adapters on the desktop stands. The crossbars are length-adjustable (25.2" to 47.2" / 64cm to 120cm) to fit different desk widths.
- Adjust the height of the desktop stands (27.2" to 48.0" / 69cm to 122cm) and the length of the crossbars to achieve your desired setup. Use the precise scale markings on the tubes for accurate adjustments.

Image 3.2: Visual guide demonstrating the process of clamping the desktop stands, attaching the crossbars, and adjusting the dual head super clamp.

Image 3.3: Illustration detailing the adjustable height (69cm to 122cm) and width (71cm to 120cm) features of the rig, with telescopic sections for easy adjustment.
4. Gweithredu
Utilize the rig's features to achieve various photographic and videographic setups.
4.1 Mounting Cameras and Accessories
- The included Super Clamp with Dual Ball Head Magic Arm can be attached to the crossbar. This clamp features 1/4" and 3/8" threads, locating points, and a built-in cold shoe mount, allowing for attachment of various accessories such as monitors, microphones, or LED lights.
- The Mini Ball Head provides 360° rotation and 90° tilt, offering flexible positioning for cameras or other devices.
- For smartphones, use the included Phone Clamp, which adjusts from 2.2" to 3.3" (55mm to 85mm) in width.
- The rig supports a maximum load of 6.6lb (3kg) on the Super Clamp and 13.2lb (6kg) on each crossbar, and 26.5lb (12kg) on each stand.
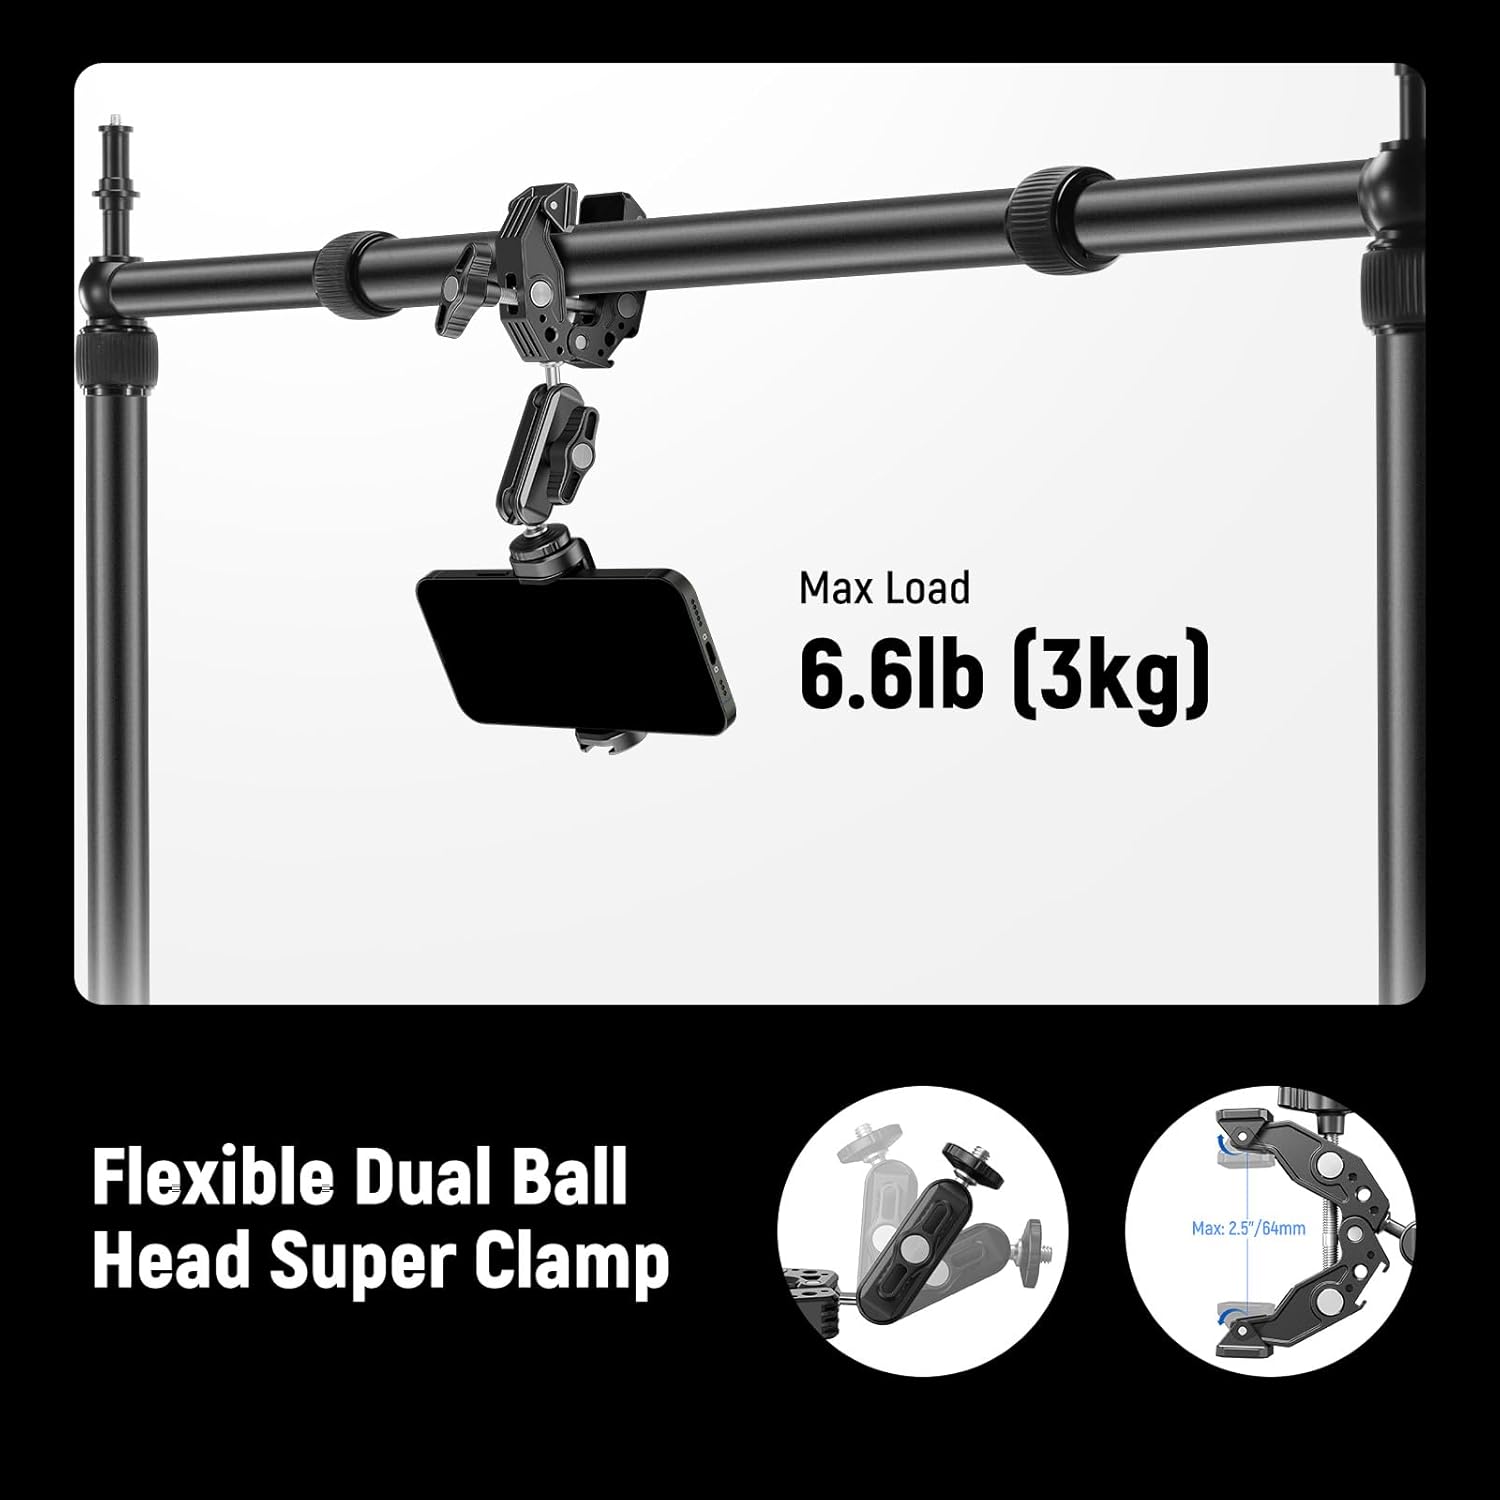
Delwedd 4.1: Manylion view of the flexible dual ball head super clamp, demonstrating its 360° rotatable ball heads and secure attachment to the crossbar, holding a smartphone.

Image 4.2: The mini ball head, offering 360° rotation and 90° tilt, alongside the adjustable phone holder with its width range indicated.
4.2 Achieving Overhead Shots
The rig is specifically designed for top-down and flat-lay photography. Position your camera or smartphone using the Super Clamp or Mini Ball Head on the crossbars to capture content directly from above your subject.
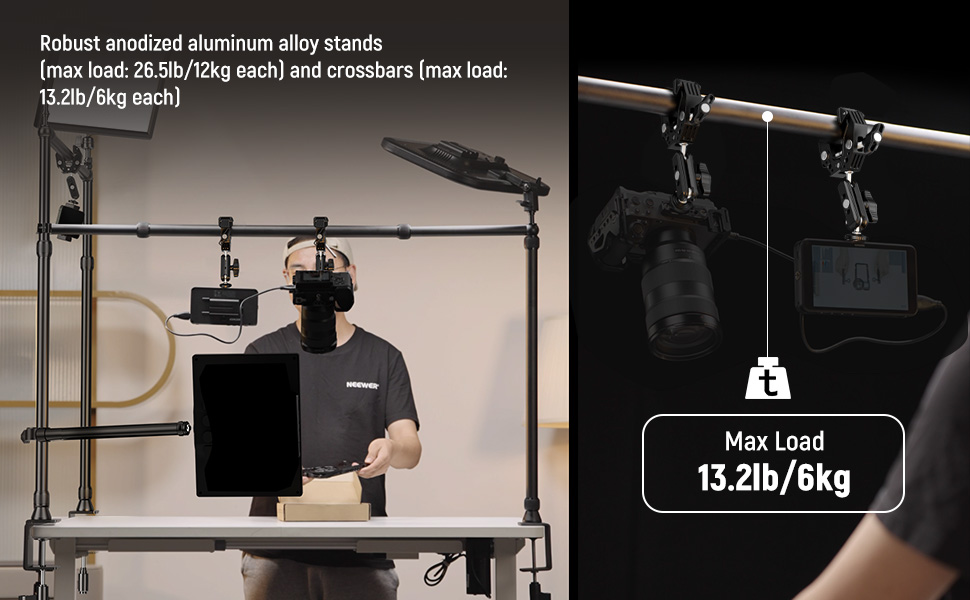
Delwedd 4.3: Cyn-ample setup demonstrating a camera and a monitor mounted on the rig for overhead shooting, highlighting the robust aluminum alloy construction and load capacity.
5. cynnal
To ensure the longevity and optimal performance of your NEEWER NK003 rig, follow these maintenance guidelines:
- Glanhau: Wipe down all metal and plastic components with a soft, dry cloth after each use to remove dust and debris. For stubborn marks, use a slightly damp cloth and mild soap, then dry thoroughly. Avoid abrasive cleaners or solvents.
- Storio: When not in use, store the rig in a clean, dry environment. If disassembling for storage, ensure all parts are clean and dry.
- Arolygiad: Gwiriwch yr holl sgriwiau, cl yn rheolaiddamps, and joints for tightness. Re-tighten any loose components to maintain stability and safety. Inspect rubber paddings for wear and tear.
- Iro: Moving parts, such as the ball heads and telescopic sections, may benefit from a small amount of silicone-based lubricant if they become stiff over time. Apply sparingly and wipe off any excess.
6. Datrys Problemau
If you encounter issues with your NEEWER NK003 rig, refer to the following common problems and solutions:
| Problem | Achos Posibl | Ateb |
|---|---|---|
| Rig feels unstable or wobbly. | C-clamps are not tightened sufficiently; desk surface is uneven; weight distribution is unbalanced. | Sicrhau C-clamps are fully tightened. Use on a flat, stable surface. Distribute equipment weight evenly across the crossbars. |
| Equipment (camera/phone) slips or rotates. | Ball head or clamp locking knob is loose; equipment exceeds maximum load capacity. | Tighten all locking knobs on ball heads and clamps. Verify that the weight of your equipment does not exceed the specified load limits (6.6lb/3kg for Super Clamp, 13.2lb/6kg for crossbars). |
| Telescopic sections are difficult to adjust. | Dust or debris inside the tubes; lack of lubrication. | Clean the telescopic sections. Apply a small amount of silicone-based lubricant if necessary. |
| C-clamp leaves marks on the desk. | Rubber padding is missing or damaged; excessive tightening. | Ensure rubber padding is correctly in place. Avoid over-tightening the clamp. |
7. manylebau
| Nodwedd | Manylyn |
|---|---|
| Rhif Model | NK003 |
| Dimensiynau Cynnyrch | 48 x 25.2 x 48 modfedd (wedi'i gydosod) |
| Pwysau Eitem | 9.38 pwys |
| Desktop Stand Height Adjustment | 27.2" i 48.0" (69cm i 122cm) |
| Addasiad Hyd y Croesfar | 25.2" i 47.2" (64cm i 120cm) |
| Max Load (Each Stand) | 26.5 pwys (12kg) |
| Max Load (Each Crossbar) | 13.2 pwys (6kg) |
| Max Load (Super Clamp) | 6.6 pwys (3kg) |
| Mae C-Clamp Uchafswm Agoriad | 2.6" (6.5cm) |
| Ffôn Clamp Ystod Lled | 2.2" to 3.3" (55mm to 85mm) |
| Deunydd | Alloy Alwminiwm Anodized |
8. Gwarant a Chefnogaeth
NEEWER products are designed for durability and performance. For information regarding warranty coverage, technical support, or replacement parts, please refer to the official NEEWER websafle neu cysylltwch â'u gwasanaeth cwsmeriaid yn uniongyrchol. Cadwch eich derbynneb prynu fel prawf o brynu ar gyfer hawliadau gwarant.
Official NEEWER Websafle: www.neewer.com


