Vector Optics SCFF-44
Vector Optics SCOL-57 Orion Pro Max 3-18x50 HD SFP Rifle Scope User Manual
Model: SCFF-44
1. Rhagymadrodd
Thank you for choosing the Vector Optics SCOL-57 Orion Pro Max 3-18x50 HD SFP Rifle Scope. This manual provides essential information for the proper setup, operation, maintenance, and troubleshooting of your new rifle scope. Please read this manual thoroughly before use to ensure optimal performance and safety.
The Orion series is a successor to the popular SCOL-06II Everest, known for its clear imaging. This Pro Max model features an even clearer image, an illuminated reticle, and lockable turrets, making it ideal for sport shooting and hunting applications. It is designed for medium to long-range engagements.
2. Cynnwys Pecyn
Wrth agor y pecyn, gwiriwch fod yr holl eitemau canlynol wedi'u cynnwys:
- Vector Optics SCOL-57 Orion Pro Max 3-18x50 HD SFP Rifle Scope
- Ocular and Objective Lens Protection Caps
- 21mm Picatinny / Weaver Mounting Rings
- Glanhau Brethyn
- Llawlyfr Defnyddiwr (y ddogfen hon)

Figure 2.1: Included components of the Vector Optics Orion Pro Max 3-18x50 HD SFP Rifle Scope. The image displays the rifle scope, protective lens caps for both the ocular and objective lenses, a pair of 21mm Picatinny/Weaver mounting rings, and a cleaning cloth.
3. Manylebau Technegol
| Nodwedd | Manyleb |
|---|---|
| Chwyddiad | 3-18x |
| Diamedr Lens Amcan | 50 mm |
| Ocular Lens Diameter | 38 mm |
| Disgybl Gadael | 8.0-2.8 mm |
| Math o Reticle | AVANT 5 MOA (Second Focal Plane) |
| Gorchudd Lens | Schott Fully Multi-Coated (FMC) |
| Maes o View | 12.7-2.1 m ar 100 m |
| Rhyddhad Llygaid | 95 mm |
| Hyd | 338 mm |
| Pwysau | 825 g |
| Diamedr Tiwb | 30 mm |
| Addasiad Parallax | 9.14 m i anfeidredd |
| Ystod Addasu Drychiad | 100 MOA |
| Ystod Addasu Windage | 60 MOA |
| Cliciwch Gwerth | 1/4 MOA |
| Goleuo | Red, 6 levels |
| Gwrthsefyll Amgylcheddol | Shockproof, Rainproof, Fogproof |
| Addasiad Diopter | -2 dpr to +2 dpr |
| Gwrthiant Adlam | Tested for .22, .223, .308WIN calibers |
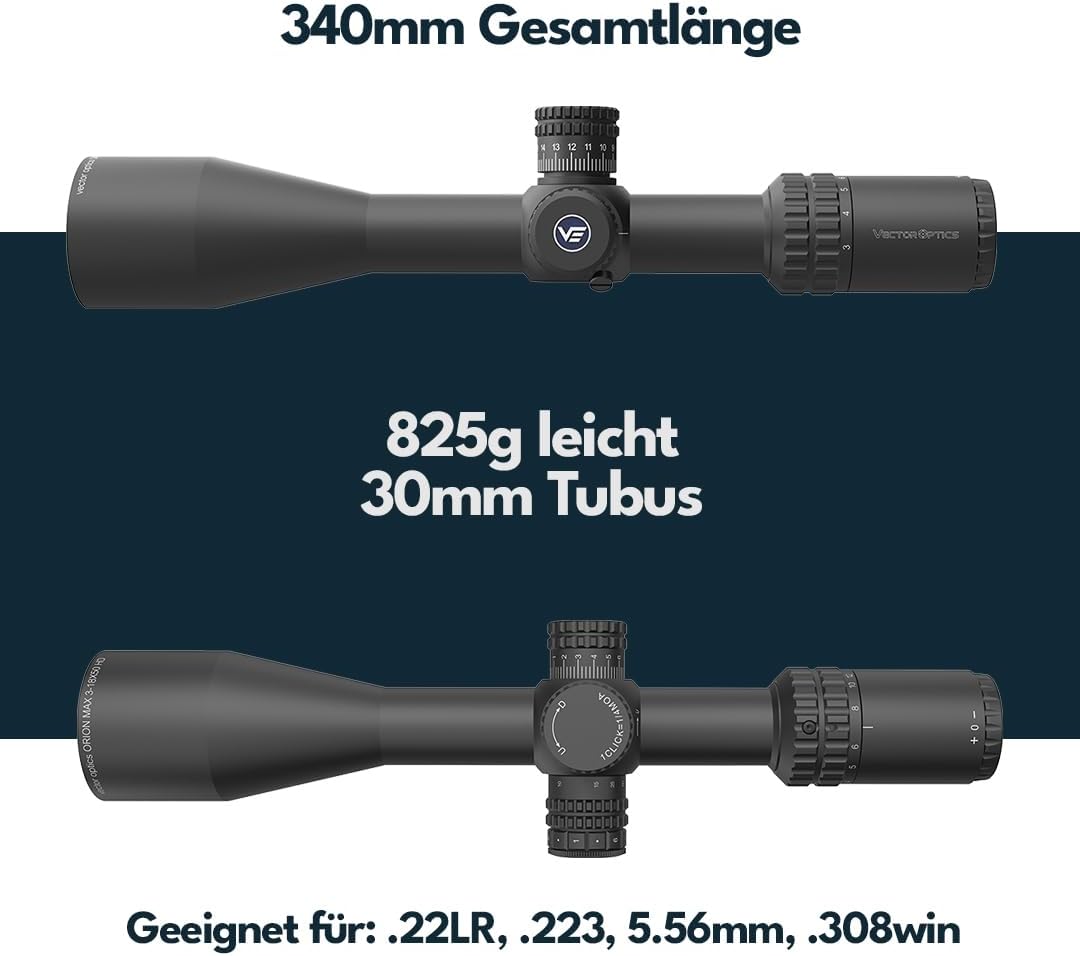
Ffigur 3.1: Drosoddview of the rifle scope's physical characteristics, including its 340mm total length, 825g weight, and 30mm tube diameter. It also indicates compatibility with .22LR, .223, 5.56mm, and .308WIN calibers.

Figure 3.2: Technical drawing illustrating the precise dimensions of the rifle scope in both inches and millimeters, providing detailed measurements for various parts of the optic.
4. Gosod a Mowntio
Proper mounting is crucial for the accuracy and performance of your rifle scope. Always ensure your firearm is unloaded and pointed in a safe direction before beginning any mounting procedures.
4.1 Gosod y Sgop
- Paratowch y Mynydd: Ensure your Picatinny or Weaver rail is clean and free of debris.
- Attach Rings: Loosely attach the provided 21mm mounting rings to your firearm's rail. Do not fully tighten them yet.
- Position the Scope: Place the rifle scope into the lower halves of the mounting rings. Ensure the reticle is level and the scope is positioned to achieve optimal eye relief (approximately 95mm from your eye to the ocular lens) when shouldering the firearm.
- Secure Top Rings: Place the top halves of the mounting rings over the scope and loosely secure the screws.
- Lefelwch y Reticle: Use a reticle leveling tool or a plumb bob to ensure the reticle is perfectly level with the firearm. This is critical for accurate windage and elevation adjustments.
- Tynhau Sgriwiau: Gradually tighten the ring screws in an alternating pattern (e.g., cross-pattern) to ensure even pressure. Refer to the mounting ring manufacturer's recommended torque specifications. Peidiwch â gordynhau, as this can damage the scope tube.
- Gwirio Diogelwch: Once tightened, gently attempt to rotate the scope within the rings to ensure it is securely mounted and will not shift under recoil.
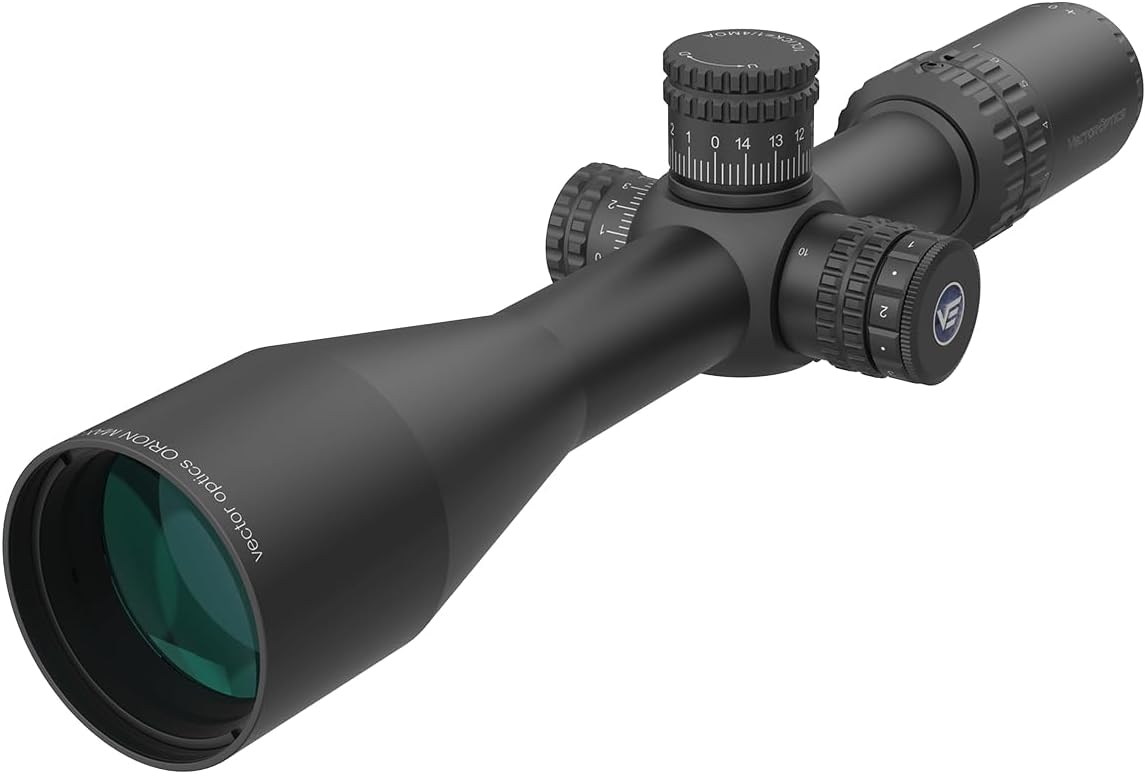
Figure 4.1: The Vector Optics Orion Pro Max 3-18x50 HD SFP Rifle Scope, showcasing its overall design and how it appears when mounted. This image highlights the main body, objective lens, ocular lens, and adjustment turrets.
4.2 Addasiad Diopter
The diopter adjustment allows you to fine-tune the focus of the reticle to your individual eye. This ensures the reticle appears sharp and clear, regardless of your vision.
- Point the scope at a plain, bright background (e.g., a clear sky or a blank wall).
- Look through the scope and quickly glance away.
- While quickly glancing back, adjust the diopter ring on the ocular lens until the reticle appears perfectly sharp and in focus. Avoid staring through the scope for too long, as your eye's natural accommodation can compensate for minor blur.
- Once adjusted, the reticle should remain sharp for your eye.
5. Operating the Rifle Scope
5.1 Addasiad Chwyddiad
The Orion Pro Max features a 3-18x magnification range. Rotate the magnification ring located on the ocular end of the scope to adjust the power. The numbers on the ring indicate the current magnification setting.

Figure 5.1: Illustration of the magnification adjustment feature on the rifle scope, showing the range from 3x to 18x. Users can rotate the ring to select their desired magnification level.
5.2 Addasiadau Gwyntedd ac Uchder
The scope features precise 1/4 MOA click adjustments for both windage (horizontal) and elevation (vertical) corrections. The elevation turret includes a Zero-Stop system, and the windage turret has a locking mechanism.
- Elevation Turret (Top): To adjust elevation, pull the turret upwards to unlock it. Rotate the turret to make adjustments. Each click represents 1/4 MOA. Push the turret down to engage the Zero-Stop and lock the setting.
- Windage Turret (Right Side): To adjust windage, pull the turret outwards to unlock it. Rotate the turret to make adjustments. Each click represents 1/4 MOA. Push the turret inwards to lock the setting.
The total adjustment range is 100 MOA for elevation and 60 MOA for windage.

Ffigur 5.2: Manwl view of the adjustment turrets. The image shows the elevation turret with its Zero-Stop mechanism and the windage turret with its pull-to-adjust, push-to-secure locking system. Each click provides 1/4 MOA adjustment.
5.3 Parallax Adjustment
The parallax adjustment knob is located on the left side of the scope. Parallax is the apparent shift in the reticle's position relative to the target when you move your eye. Adjusting parallax eliminates this shift, ensuring the reticle and target are on the same focal plane.
- Rotate the parallax knob until the target appears sharp and clear, and there is no apparent movement of the reticle when you slightly move your head.
- The parallax adjustment range is from 9.14 meters (10 yards) to infinity.
5.4 Reticle Illumination
The AVANT 5 MOA reticle features 6 levels of red illumination. The illumination control is integrated with the parallax knob on the left side of the scope.
- Rotate the outer ring of the parallax knob to turn on the illumination and select the desired brightness level.
- Rotate it back to the "off" position to conserve battery life.

Figure 5.3: Depiction of the AVANT 5 MOA reticle, which is positioned on the second focal plane. The image also indicates that the reticle features 6 levels of dimmable red illumination for various lighting conditions.

Figure 5.4: A detailed diagram showing the measurements and subtensions of the AVANT 5 MOA reticle at 18x magnification. This provides users with precise reference points for holdovers and windage corrections.
6. Gofal a Chynnal a Chadw
Proper care will extend the life and maintain the performance of your Vector Optics rifle scope.
6.1 Glanhau Lensys
- Always use the provided cleaning cloth or a high-quality lens cleaning cloth.
- Gently brush off any loose dust or debris from the lens surfaces first.
- If necessary, use a small amount of lens cleaning fluid specifically designed for optical lenses. Apply the fluid to the cloth, not directly to the lens.
- Wipe the lenses gently in a circular motion from the center outwards.
- Avoid using harsh chemicals, paper towels, or clothing, as these can scratch the lens coatings.
6.2 Glanhau'r Corff
- Wipe the scope body with a soft, damp brethyn i gael gwared ar faw neu olion bysedd.
- Avoid getting water into the turrets or other moving parts.
6.3 Storio
- Store the scope in a cool, dry place, away from direct sunlight and extreme temperatures.
- Use the provided lens caps to protect the objective and ocular lenses when not in use.
- If storing for extended periods, consider removing the battery for the reticle illumination to prevent corrosion.
7. Datrys Problemau
| Problem | Achos Posibl | Ateb |
|---|---|---|
| Blurred Reticle | Addasiad diopter amhriodol. | Adjust the diopter ring on the ocular lens until the reticle is sharp. (Refer to Section 4.2) |
| Blurred Image / Parallax Error | Incorrect parallax setting for the target distance. | Adjust the parallax knob until the target and reticle are both clear and parallax is eliminated. (Refer to Section 5.3) |
| Inaccurate Shots / Point of Impact Shift |
|
|
| Reticle Illumination Not Working |
|
|
| Turrets Not Adjusting / Stiff | Turrets are locked. | Pull the elevation turret up or the windage turret out to unlock before adjusting. (Refer to Section 5.2) |
If you encounter issues not covered here, please contact Vector Optics customer support for assistance.
8. Gwarant a Chefnogaeth
Vector Optics products are manufactured with high standards and undergo rigorous quality control. For warranty information and customer support, please refer to the official Vector Optics websafle neu cysylltwch â'ch dosbarthwr lleol.
For service inquiries, please have your model number (SCFF-44) and purchase information ready.
Gwybodaeth Gyswllt: Ymwelwch www.vectoroptics.com for the most up-to-date contact details and support resources.
Ask a question about this manual
Ask about setup, troubleshooting, compatibility, parts, safety, or missing instructions. Manuals+ will review the question and use this page’s manual context to help answer it.