
1. Rhagymadrodd
This manual provides essential instructions for the safe and efficient operation of your GROVIEW Mini Projector Bluetooth, Model Groview-B2D-US. Please read this manual thoroughly before using the projector and retain it for future reference.
Mae'r Groview-B2D-US is a compact and portable projector featuring electric focus, Bluetooth 5.1 connectivity, and a fully sealed optical engine designed for reduced noise and extended lifespan. It supports Full HD 1080P input with a native 720P resolution and offers a digital zoom function.
2. Gwybodaeth Diogelwch
- Peidiwch ag edrych yn uniongyrchol i lens y taflunydd pan fydd y lamp yn ymlaen.
- Ensure proper ventilation around the projector to prevent overheating. Do not block ventilation openings.
- Defnyddiwch yr addasydd pŵer a gyflenwir gyda'r taflunydd yn unig.
- Peidiwch ag amlygu'r taflunydd i law, lleithder, na thymheredd eithafol.
- Ceisiwch osgoi gosod y taflunydd ar arwynebau ansefydlog.
- Peidiwch â cheisio dadosod na thrwsio'r taflunydd eich hun. Cysylltwch â phersonél gwasanaeth cymwys i gael cymorth.
- Cadwch y taflunydd i ffwrdd oddi wrth blant ac anifeiliaid anwes.
3. Beth sydd yn y Bocs
Gwiriwch fod yr holl eitemau yn bresennol yn y pecynnu:
- 1 x Groview Electric Focus Projector
- 1 x cebl HDMI
- 1 x Power Cord
- 1 x Rheolaeth Anghysbell
- 1 x Llawlyfr Defnyddiwr (y ddogfen hon)
4. Cynnyrch Drosview
4.1 Cydrannau'r Taflunydd
The following image illustrates the main components of the Groview Mini Projector.

4.2 Porthladdoedd Mewnbwn/Allbwn
The rear panel of the projector features various ports for connecting external devices.
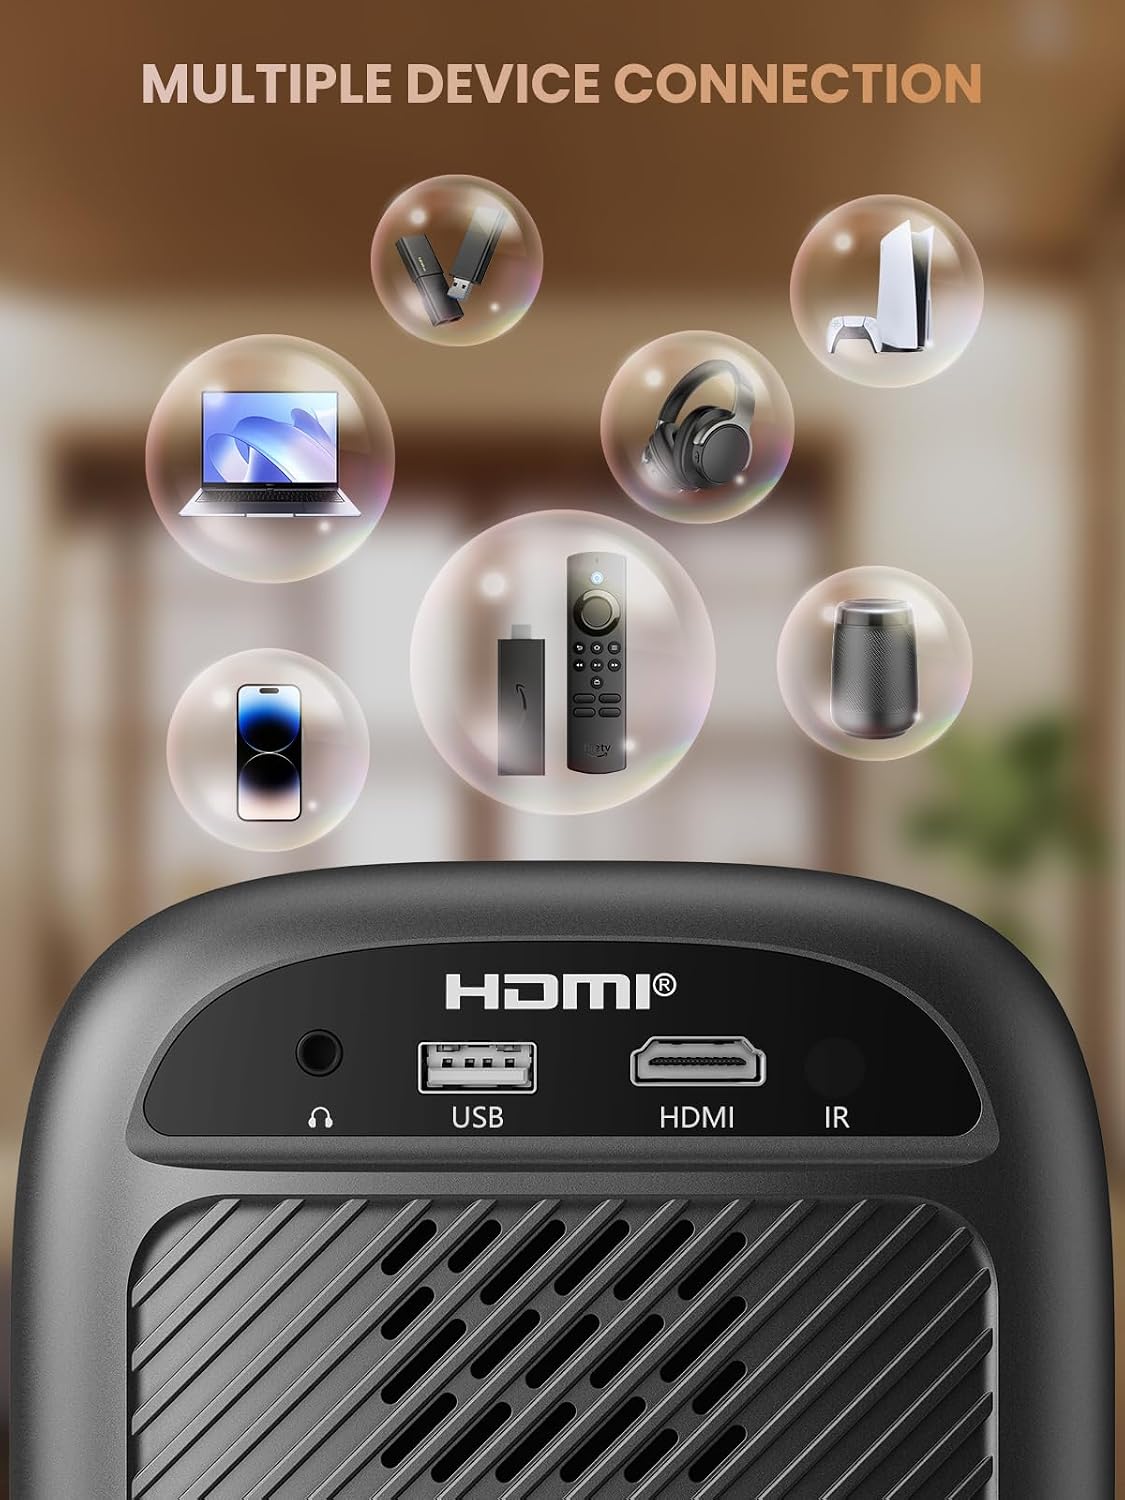
- Porthladd HDMI: Connects to devices such as TV sticks, laptops, game consoles, and Blu-ray players.
- Porth USB: Connects to USB flash drives for media playback.
- Audio Port (3.5mm Jack): Yn cysylltu â siaradwyr neu glustffonau allanol.
- Derbynnydd IR: Ar gyfer signalau rheoli o bell.
5. Gosod
5.1 Cysylltiad Pwer
- Cysylltwch y llinyn pŵer â mewnbwn pŵer y taflunydd.
- Plygiwch ben arall y llinyn pŵer i mewn i allfa bŵer.
5.2 Lleoliad y Taflunydd
Place the projector on a stable, flat surface. For optimal image quality, position the projector perpendicular to the projection surface (wall or screen). The projector can create a large image from a relatively short distance.
5.3 Addasiad Ffocws
Mae'r Groview-B2D-US features electric focus, allowing for precise image clarity adjustment using the remote control.

- Trowch y taflunydd ymlaen.
- Point the remote control at the projector.
- Press the dedicated focus buttons (usually marked with 'F+' and 'F-' or similar icons) on the remote until the projected image is sharp and clear.
5.4 Cywiriad Keystone
The projector includes a keystone adjustment slider on the rear panel. This allows you to correct trapezoidal distortion if the projector is not perfectly aligned with the screen. Adjust the slider until the image appears rectangular.
5.5 Pŵer Cychwynnol Ymlaen
Pwyswch y botwm pŵer ar y taflunydd neu'r teclyn rheoli o bell i droi'r ddyfais ymlaen. Bydd y taflunydd yn cychwyn ac yn arddangos y prif ryngwyneb.
6. Cyfarwyddiadau Gweithredu
6.1 Cysylltu Dyfeisiau
Mae'r taflunydd yn cynnig sawl opsiwn cysylltedd:
- HDMI: Connect an HDMI cable from your source device (e.g., TV Stick, laptop, game console) to the projector's HDMI port. Select the HDMI input source from the projector's menu.
- USB: Insert a USB flash drive into the USB port. The projector's media player will typically detect the drive automatically, allowing you to browse and play supported media files.
- Bluetooth 5.1: Connect to external Bluetooth speakers or headphones for enhanced audio.

- Enable Bluetooth on your external audio device and set it to pairing mode.
- Ar y taflunydd, llywiwch i'r ddewislen gosodiadau Bluetooth.
- Dewiswch eich dyfais o'r rhestr o ddyfeisiau sydd ar gael i'w paru.
Note: Bluetooth does not support smartphone mirroring.
6.2 Smartphone Connection Methods
To connect a smartphone, an adapter is required:

- Dyfeisiau iOS: Use a Lightning to HDMI adapter cable.
- Dyfeisiau Android: Use a Micro USB/Type C to HDMI adapter cable or a Google Chromecast.
6.3 Navigation and Menu
Use the arrow buttons on the remote control to navigate through the projector's on-screen menu. The 'OK' or 'Enter' button confirms selections, and the 'Back' or 'Return' button goes back to the previous menu.
6.4 Digital Zoom Function
The projector features a digital zoom function, allowing you to adjust the image size from 75% to 100% without moving the projector.

Access the zoom settings through the projector's menu and use the remote control to adjust the desired size.
6.5 Defnydd Rheoli o Bell
The included remote control operates the projector's functions. Ensure batteries are correctly installed. Note: A coin may be needed to open the battery compartment.
7. cynnal
7.1 Glanhau
- Lens: Sychwch y lens yn ysgafn gyda lliain meddal, di-flwff, sydd wedi'i gynllunio'n benodol ar gyfer arwynebau optegol. Peidiwch â defnyddio glanhawyr sgraffiniol.
- Tu allan: Sychwch du allan y taflunydd gyda lliain meddal, sych. Ar gyfer marciau ystyfnig, defnyddiwch frethyn ychydig yn sych.amp gellir defnyddio lliain, ac yna un sych.
7.2 Dust-proof Design
Mae'r Groview-B2D-US features a fully sealed optical engine, which helps prevent dust and debris from entering the projector and affecting image quality or lifespan.

7.3 Storio
When not in use, store the projector in a cool, dry place, away from direct sunlight and extreme temperatures. Use the lens cap to protect the lens from dust and scratches.
8. Datrys Problemau
- Dim Delwedd: Check power connection, input source selection, and ensure the lens cap is removed. Verify the connected device is powered on and outputting a signal.
- Delwedd aneglur: Adjust the electric focus using the remote control. Ensure the projector is placed at an appropriate distance from the screen.
- Dim Sain: Check the volume settings on both the projector and the connected source device. If using Bluetooth, ensure the external audio device is properly paired and its volume is up.
- Rheolaeth Anghysbell Ddim yn Gweithio: Check the batteries in the remote control and ensure there are no obstructions between the remote and the projector's IR receiver.
- Rhybudd gorboethi: Ensure ventilation openings are not blocked. Turn off the projector and allow it to cool down before restarting.
For further assistance, please contact Groview cymorth cwsmeriaid.
9. manylebau
| Nodwedd | Manyleb |
|---|---|
| Brand | Groview |
| Rhif Model | Groview-B2D-US |
| Datrysiad Brodorol | 1280 x 720 picsel |
| Datrys a Gefnogir | 1080P Llawn HD |
| Technoleg Cysylltedd | 3.5mm Jack, Bluetooth 5.1, HDMI, USB |
| Nodweddion Arbennig | Electric Focus, Fully Sealed Optical Engine, Mini size & Lightweight, 150" Display, Digital Zoom (75%-100%) |
| Defnyddiau a Argymhellir | Dan Do / Awyr Agored |
| Pwysau Eitem | 2.99 pwys |
| Dimensiynau Cynnyrch | 4.8 x 5.7 x 6.9 modfedd |
| Lliw | Llwyd |
10. Gwarant a Chefnogaeth
Groview products are designed for reliability and performance. For information regarding warranty coverage and customer support, please refer to the warranty card included with your purchase or visit the official Groview website. Our service team is available to assist with any product-related inquiries.


