
Rhagymadrodd
This manual provides detailed instructions for the installation, operation, and maintenance of your GREATHTEK HDMI KVM Switch. This device allows you to control up to four computers using a single monitor, keyboard, and mouse, enhancing workspace efficiency and reducing cable clutter. Please read this manual thoroughly before use to ensure proper functionality and to maximize your product experience.
Cynnwys Pecyn
Gwiriwch fod yr holl eitemau a restrir isod wedi'u cynnwys yn eich pecyn. Os oes unrhyw eitemau ar goll neu wedi'u difrodi, cysylltwch â chymorth cwsmeriaid.
- KVM Switch Unit x1
- HDMI 2.0 Cebl x1
- Cebl USB 3.0 x4
- USB C Power Cable x1
- Desktop Controller x1
- Llawlyfr Cyfarwyddiadau x1
- Pad Troed x4

Nodweddion Cynnyrch
- Swyddogaeth KVM 4-Borth: Control up to four computers (PCs) with a single set of keyboard, mouse, and monitor.
- Cefnogaeth Cydraniad Uchel: Supports resolutions up to 4K@60Hz (3840x2160@60Hz), and is backward compatible with 2K and 1080P. Ensure your source devices, monitor, and HDMI cables all support 4K@60Hz for optimal performance.
- High-Speed USB 3.0 Ports: Equipped with 3 USB 3.0 ports and 1 USB C port, offering data transfer speeds up to 5 Gbit/s, which is ten times faster than USB 2.0. These ports can connect keyboards, mice, USB drives, printers, scanners, and other USB devices.
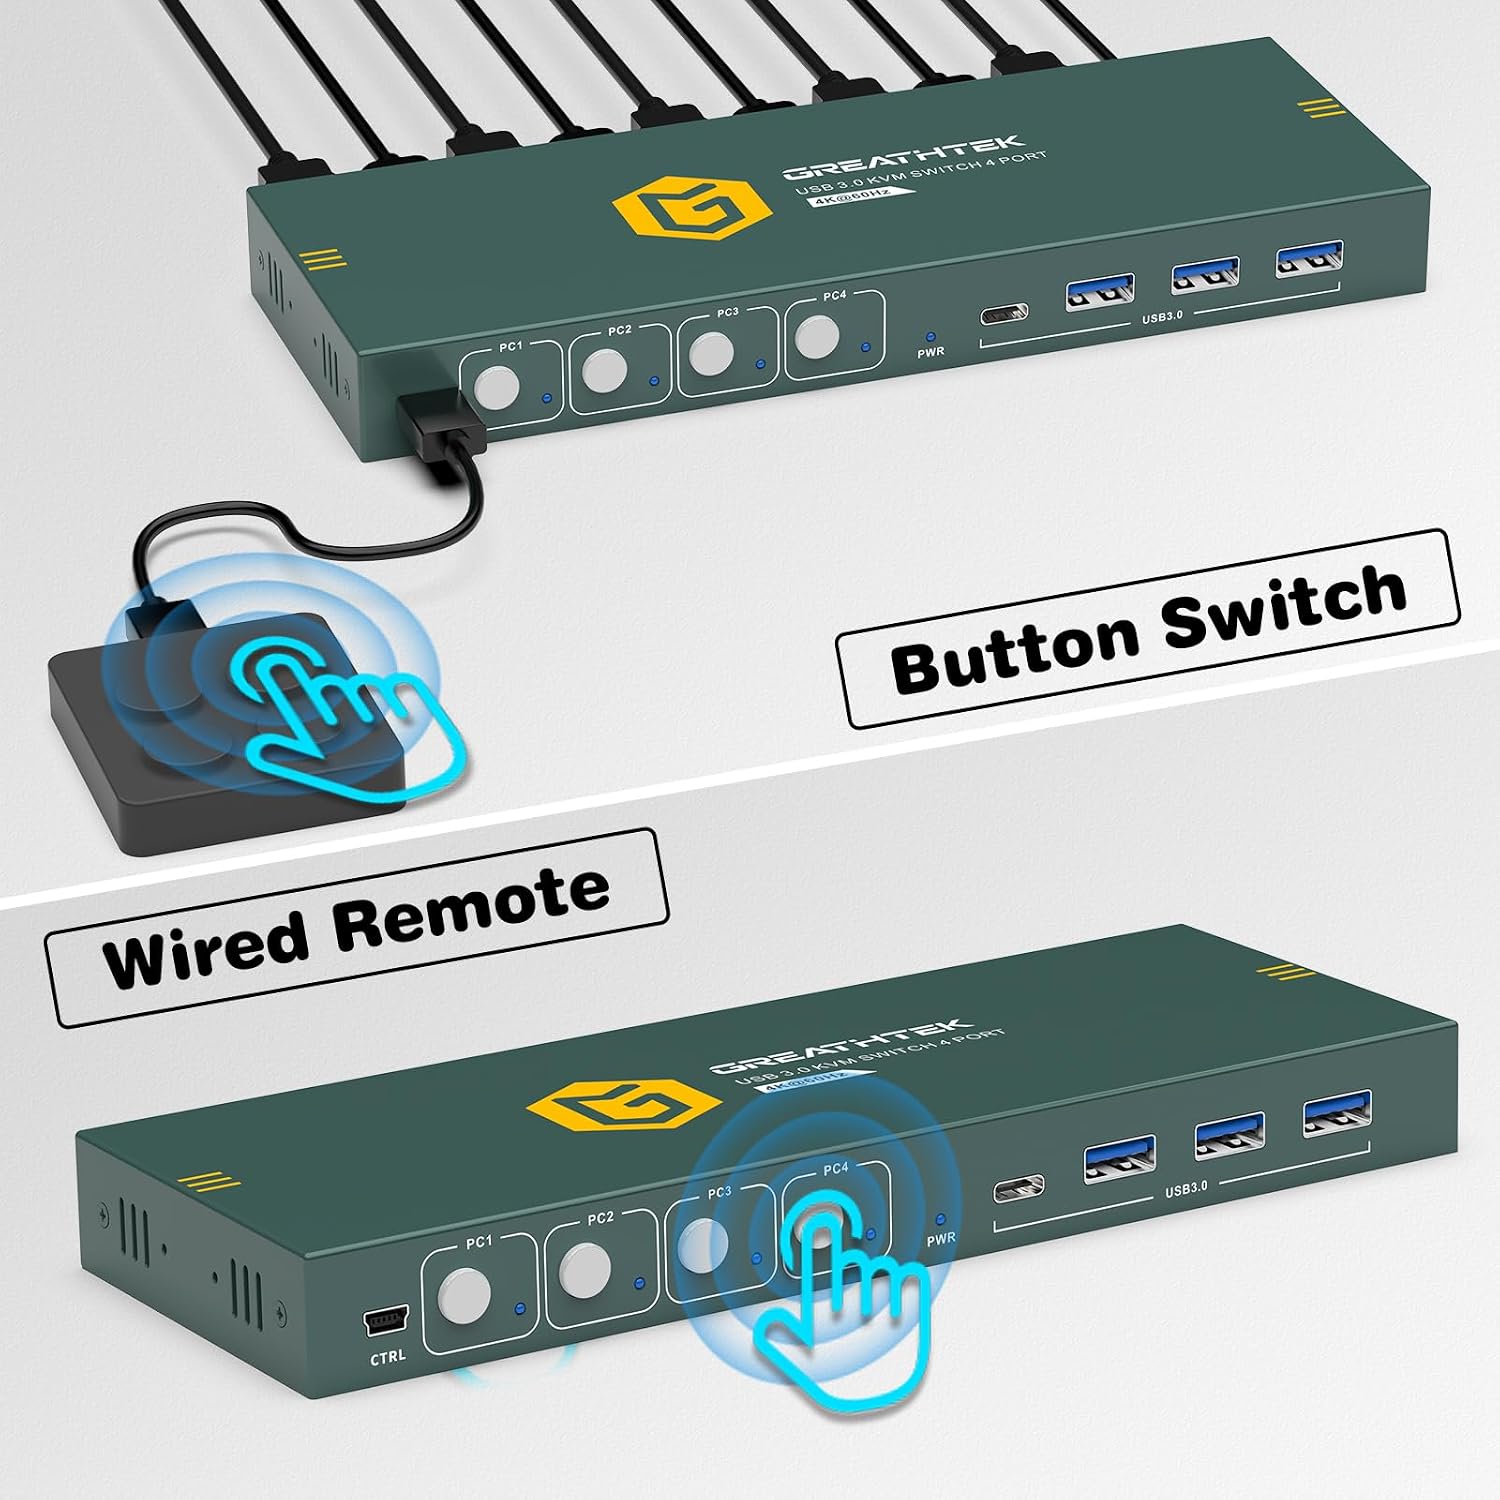
- Dual Switching Methods: Easily switch between connected computers using either the physical button on the KVM switch or the included 1.5m wired desktop controller.
- EDID Adaptation: Features EDID adaptation to maintain consistent window and resolution settings when switching between computers, preventing display disruption.
- Cydnawsedd Eang: Compatible with various operating systems including Windows, Linux, Unix, and Mac.


Cyfarwyddiadau Gosod
Follow these steps to properly set up your GREATHTEK HDMI KVM Switch:
- Diffoddwch yr holl ddyfeisiau: Before starting, ensure all computers and your monitor are powered off and unplugged from their power sources.
- Cysylltu'r Monitor: Connect your monitor to the "HD OUT" port on the KVM switch using an HDMI cable.
- Connect Computers (HDMI): For each computer, connect an HDMI cable from the computer's HDMI output to an available "HD IN" port (PC1, PC2, PC3, PC4) on the KVM switch.
- Cysylltu Cyfrifiaduron (USB): For each computer, connect a USB 3.0 cable from the computer's USB port to the corresponding "USB 3.0" input port (PC1, PC2, PC3, PC4) on the KVM switch. These connections enable keyboard, mouse, and other USB device sharing.
- Cysylltu'r Bysellfwrdd a'r Llygoden: Connect your keyboard and mouse to the dedicated USB 3.0 ports on the KVM switch. You can also connect other USB peripherals like a USB drive or printer to the remaining USB 3.0 ports.
- Pwer Cysylltu: Connect the USB C power cable to the KVM switch's power input and then to a suitable USB power adapter (not included) or a powered USB port.
- Pŵer Ymlaen: Trowch y switsh KVM ymlaen, yna eich monitor, ac yn olaf eich cyfrifiaduron.

Cyfarwyddiadau Gweithredu
Once the KVM switch is set up, you can easily switch between your connected computers.
Newid Rhwng Cyfrifiaduron
The GREATHTEK HDMI KVM Switch offers two methods for switching:
- Botwm Panel Blaen: Press the corresponding button (PC1, PC2, PC3, or PC4) on the front panel of the KVM switch to select the desired computer. The LED indicator next to the button will illuminate to show the active computer.
- Rheolydd Penbwrdd â Gwifrau: Use the included wired desktop controller. Press the button on the controller to cycle through the connected computers. This allows for convenient switching without reaching for the KVM unit itself.

Cynnal a chadw
Er mwyn sicrhau hirhoedledd a pherfformiad gorau posibl eich switsh KVM, dilynwch y canllawiau cynnal a chadw hyn:
- Glanhau: Use a soft, dry cloth to clean the exterior of the device. Avoid using liquid cleaners or aerosols, which may damage the unit.
- Awyru: Gwnewch yn siŵr bod y switsh KVM wedi'i osod mewn man sydd wedi'i awyru'n dda i atal gorboethi. Peidiwch â rhwystro unrhyw agoriadau awyru.
- Rheoli Ceblau: Keep cables organized and free from kinks or excessive bending to prevent damage and ensure stable connections.
- Amodau Amgylcheddol: Osgoi amlygu'r ddyfais i dymereddau eithafol, lleithder neu olau haul uniongyrchol.
Datrys problemau
Os byddwch chi'n dod ar draws problemau gyda'ch switsh KVM, cyfeiriwch at y problemau a'r atebion cyffredin canlynol:
- Dim Allbwn Arddangos:
- Ensure all HDMI cables are securely connected to both the KVM switch and the computers/monitor.
- Gwiriwch fod y switsh KVM wedi'i bweru ymlaen.
- Gwiriwch a yw'r ffynhonnell fewnbwn gywir wedi'i dewis ar eich monitor.
- Ceisiwch ailgychwyn y switsh KVM a'r cyfrifiaduron cysylltiedig.
- Confirm that your HDMI cables support the desired resolution (e.g., 4K@60Hz).
- Bysellfwrdd/Llygoden Ddim yn Ymateb:
- Ensure the USB 3.0 cables from the computers to the KVM switch are properly connected.
- Verify that the keyboard and mouse are connected to the dedicated USB 3.0 ports on the KVM switch.
- Rhowch gynnig ar gysylltu'r bysellfwrdd a'r llygoden yn uniongyrchol â'r cyfrifiadur i gadarnhau eu bod yn gweithio'n iawn.
- Some specialized gaming keyboards/mice may require direct connection or specific drivers; try a standard keyboard/mouse first.
- Display Resolution/Refresh Rate Issues:
- Ensure all connected devices (computers, monitor, HDMI cables) support the desired resolution and refresh rate (e.g., 4K@60Hz).
- Adjust display settings on your computer to match the capabilities of your monitor and KVM switch.
- Oedi wrth newid:
- A slight delay during switching is normal as the system re-establishes connections. Excessive delays might indicate a cable issue; try replacing HDMI or USB cables.
If these steps do not resolve your issue, please contact GREATHTEK customer support for further assistance.
Manylebau
| Nodwedd | Manyleb |
|---|---|
| Rhif Model | GHT-S7415H-01 |
| Brand | GREATHTEK |
| Porthladdoedd KVM | 4 Computers, 1 Monitor |
| Datrysiad Fideo | Up to 4K@60Hz (3840x2160@60Hz) |
| Porthladdoedd USB | 3 x USB 3.0, 1 x USB C |
| Cyflymder Trosglwyddo USB | Hyd at 5 Gbit yr eiliad |
| Dulliau Newid | Switsh Botwm, Rheolydd Penbwrdd |
| Desktop Controller Cable Length | 1.5m |
| Cydweddoldeb | Windows, Linux, Unix, Mac |
| Math o Gysylltydd | HDMI, USB-A, USB-C |
| Deunydd | Copr (Deunydd Cyswllt) |
| Lliw | Du |
| Dimensiynau (Parsel) | 25.2 x 18.3 x 6.9 cm |
| Pwysau (Parsel) | 810 g |
Gwarant a Chefnogaeth
GREATHTEK products are designed for reliability and performance. This product comes with a standard manufacturer's warranty. For specific warranty details, please refer to the warranty card included in your package or contact GREATHTEK customer support.
If you encounter any issues or have questions regarding your KVM switch, please do not hesitate to contact our customer support team. We are committed to providing prompt and helpful assistance.