VEVOR 4-in-1 Hat Heat Press
VEVOR 4-in-1 Hat Heat Press Instruction Manual
Model: 4-in-1 Hat Heat Press
1. Rhagymadrodd
This manual provides detailed instructions for the safe and efficient operation of your VEVOR 4-in-1 Hat Heat Press. This machine is designed for sublimation transfer onto various types of hats and caps, offering versatility with its multiple heating platen sizes. Please read this manual thoroughly before initial use to ensure proper setup, operation, and maintenance.

Image: The VEVOR 4-in-1 Hat Heat Press machine, showcasing its main unit, the curved heating platen, and three additional interchangeable heating pads. Various hats are displayed, indicating the machine's application.

Image: The VEVOR 4-in-1 Cap Heat Press machine with a selection of different hat styles, including baseball caps, berets, and bucket hats, demonstrating the machine's adaptability for various headwear.
2. Gwybodaeth Diogelwch
- Defnyddiwch y wasg wres bob amser ar arwyneb sefydlog sy'n gwrthsefyll gwres.
- Keep hands and fingers clear of the heating platen during operation to prevent burns.
- Do not touch the heating platen immediately after use; allow it to cool down.
- Ensure the machine is properly grounded to prevent electrical shock.
- Unplug the machine from the power outlet when not in use or before cleaning/maintenance.
- Cadwch blant ac anifeiliaid anwes i ffwrdd o'r wasg wres yn ystod y llawdriniaeth.
- Peidiwch â gweithredu'r peiriant os yw'r llinyn pŵer neu'r plwg wedi'i ddifrodi.
- Use in a well-ventilated area to dissipate any fumes from heat transfer materials.
3. Cydrannau a Nodweddion
Your VEVOR 4-in-1 Hat Heat Press comes with the main unit and several interchangeable heating pads to accommodate different hat sizes and styles.
- Prif Uned: Includes the frame, control panel, and primary heating platen.
- Panel Rheoli: Features a dual-screen digital display for temperature and time, along with control buttons.
- Pressure Control Knob: Allows adjustment of the pressure applied during heat pressing.
- Interchangeable Heating Pads: Four different sizes are included for versatile application.

Image: A visual representation of the four different heating pads included with the heat press, showing their varying dimensions: 6 x 3 in (15 x 7.6 cm), 6.7 x 2.7 in (17 x 7 cm), 6.7 x 3.8 in (17 x 10 cm), and 8.1 x 3.5 in (20.6 x 9 cm).

Delwedd: Llun agos view of the heat press's control panel, highlighting the dual-screen display for time and temperature, an intelligent heating chip, and built-in secure fuses for safety and precise control.

Delwedd: Manwl view of the pressure control knob located on top of the heat press, illustrating how it can be adjusted to apply the desired pressure for different materials and transfer types.
4. Gosod
- Dadbacio: Tynnwch yr holl gydrannau o'r pecynnu yn ofalus. Archwiliwch am unrhyw ddifrod yn ystod cludiant.
- Lleoliad: Place the heat press on a sturdy, flat, and heat-resistant surface. Ensure there is adequate space around the machine for safe operation and ventilation. The machine features non-slip base mats for stability.

Image: A close-up of the non-slip base mats on the bottom of the heat press, designed to ensure stable operation and prevent movement during use.
- Cysylltiad Pwer: Cysylltwch y llinyn pŵer ag allfa drydanol wedi'i seilio. Gwnewch yn siŵr bod y gyfainttage matches the machine's requirements (110V 60Hz).
- Attach Heating Pad: Select the appropriate heating pad for the hat you intend to press. Securely attach it to the lower platen mechanism.
5. Cyfarwyddiadau Gweithredu
Follow these steps for successful heat transfer:
- Pŵer Ymlaen: Turn on the main power switch located on the side of the machine.
- Gosod Tymheredd ac Amser: Use the digital control panel to set the desired temperature (0-570°F / 0-299°C) and time (0-999s) according to your transfer material's specifications. The machine will begin heating up.

Image: Step 1 of the heat transfer process, showing a laptop displaying an image and a printer with sublimation paper, indicating the first step of selecting and printing the desired image.
- Prepare Hat: Place the hat onto the lower platen, ensuring it fits snugly. Smooth out any wrinkles.
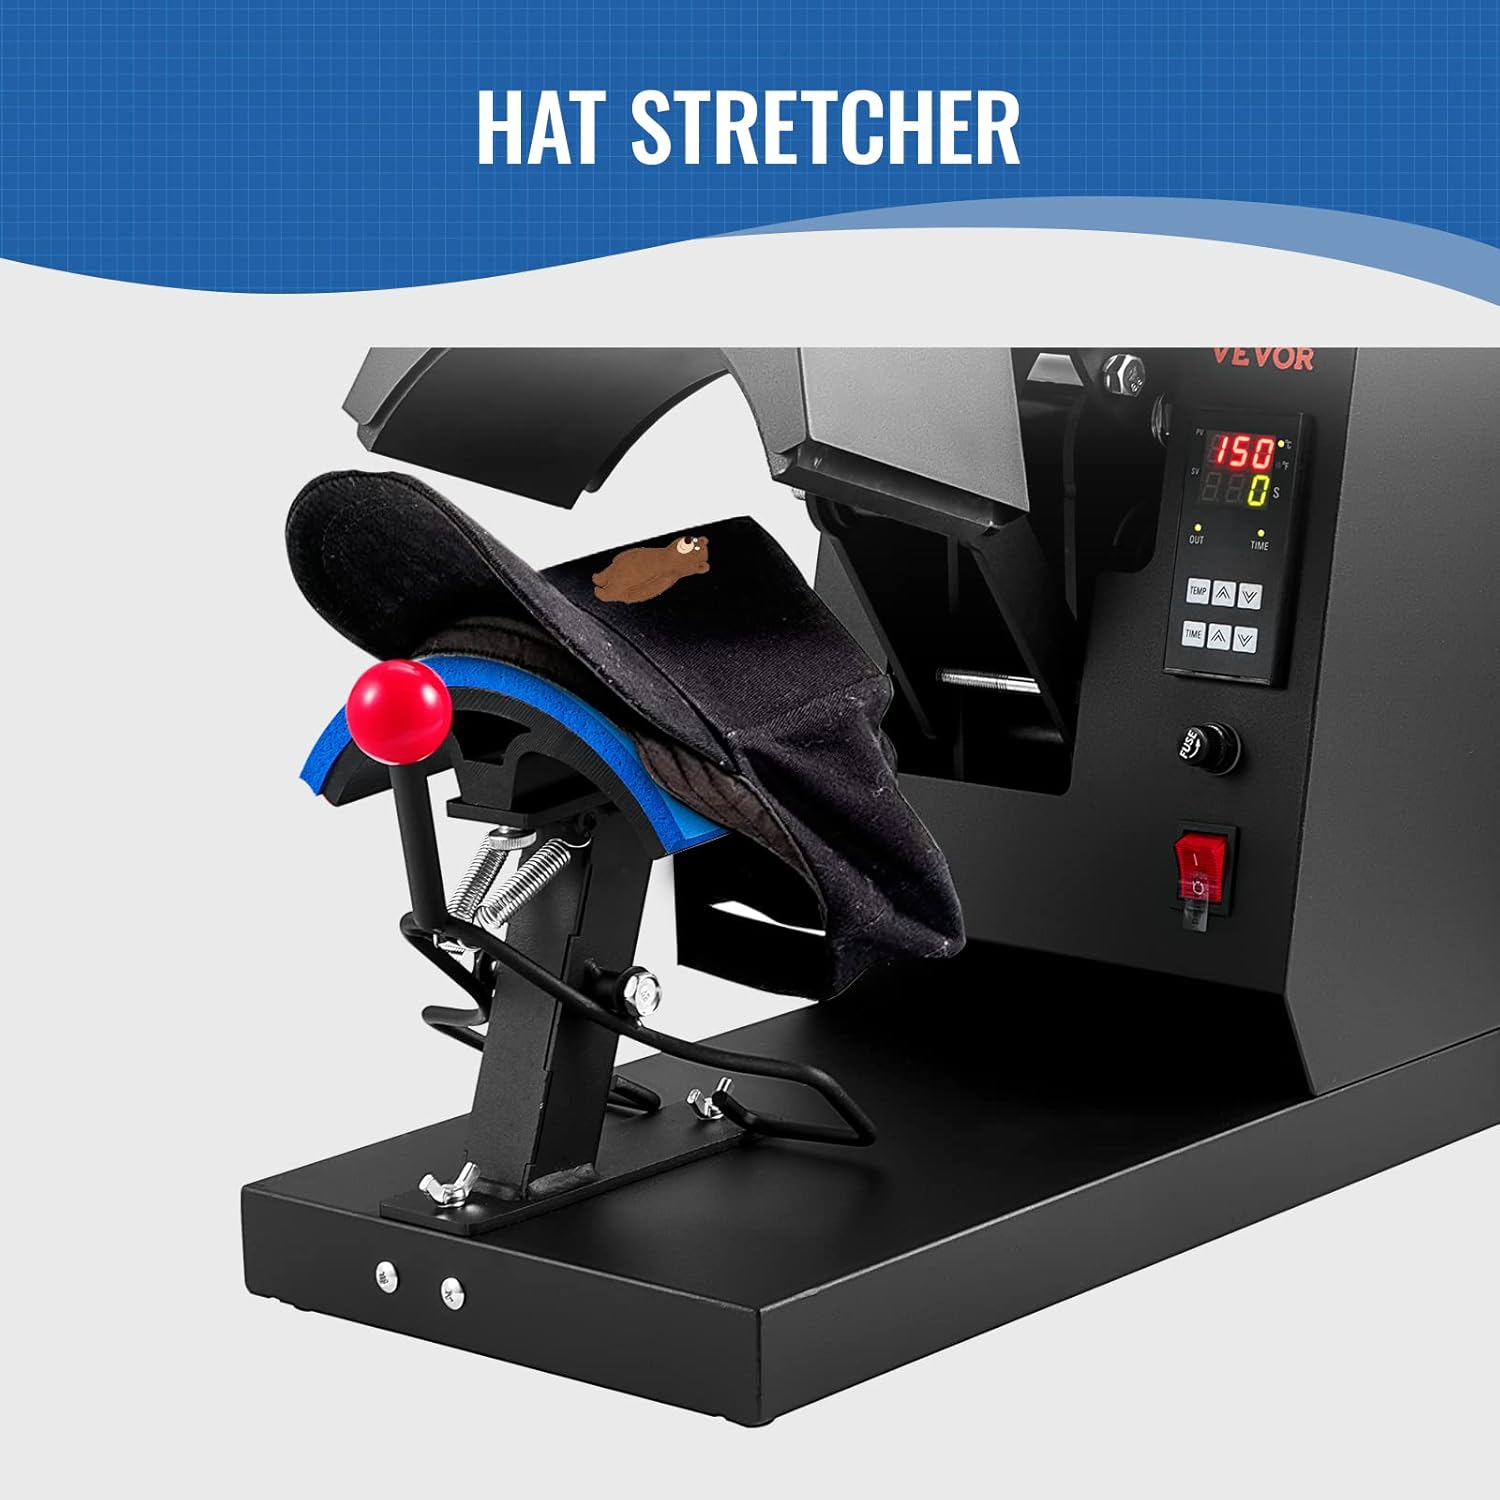
Image: A hat positioned on the hat stretcher component of the heat press, demonstrating how the hat is prepared for the transfer process.

Image: Step 2 of the heat transfer process, showing a white hat placed on the press pad with a printed sublimation paper design being applied to it.
- Apply Design: Position your transfer paper or vinyl design onto the hat. Use heat-resistant tape if necessary to secure it.
- Addasu pwysau: Use the pressure control knob to achieve the desired pressure. A firm, even pressure is typically required for most transfers.
Delwedd: Manwl view of the pressure control knob located on top of the heat press, illustrating how it can be adjusted to apply the desired pressure for different materials and transfer types.
- Pwyswch: Once the machine reaches the set temperature, pull down the handle to close the heating platen onto the hat. The timer will automatically start counting down.

Image: Step 3 of the heat transfer process, showing a hand adjusting the control panel and pulling down the handle of the heat press to initiate the transfer after setting time, temperature, and pressure.
- Remove Hat: When the timer alarms, lift the handle to open the platen. Carefully remove the hat and peel off the transfer paper/vinyl according to the material's instructions (hot peel or cold peel).

Image: Step 4 of the heat transfer process, illustrating the final action of taking out the finished hat from the heat press after the timer has completed its cycle.
Recommended Settings for Common Materials:
The machine is adaptable with Nylon, Linen, Cotton, Polyester Fiber and so on.
| Math o Ddeunydd | Tymheredd | Amser |
|---|---|---|
| Thermal Dye-sublimation Paper | 356°F / 180°C | 60s |
| HTV (Heat Transfer Vinyl) | 356°F / 180°C | 7s |
| Finyl | 338°F / 170°C | 40s |

Image: This image illustrates the "Stunning Effect Beyond Your Expectation" achieved with quick sublimation in 1 minute, showing examples of hats with transferred designs and recommended pressing times and temperatures for Thermal Dye-sublimation Paper, HTV, and Vinyl.
6. cynnal
- Glanhau: Gwnewch yn siŵr bod y peiriant wedi'i ddatgysylltu ac wedi oeri'n llwyr cyn ei lanhau. Defnyddiwch liain meddal, damp cloth to wipe down the exterior. For the heating platen, use a non-abrasive cleaner specifically designed for Teflon-coated surfaces if necessary.
- Storio: Storiwch y wasg wres mewn amgylchedd sych, di-lwch pan nad yw'n cael ei defnyddio.
- Arolygiad Rheolaidd: Periodically check the power cord for any signs of wear or damage. Ensure all screws and connections are secure.
7. Datrys Problemau
| Problem | Achos Posibl | Ateb |
|---|---|---|
| Nid yw'r peiriant yn troi ymlaen. | No power supply; power switch off; blown fuse. | Check power connection; turn on power switch; check and replace fuse if necessary. |
| Nid yw'r tymheredd yn cyrraedd y gwerth gosodedig. | Faulty heating element; incorrect temperature setting. | Verify temperature setting; contact customer support if heating element is suspected. |
| Nid yw'r trosglwyddiad yn glynu'n iawn. | Insufficient temperature, time, or pressure; incorrect material type. | Adjust temperature, time, and pressure settings; ensure material is compatible with heat press. |
| Uneven transfer results. | Uneven pressure; hat not properly positioned. | Adjust pressure knob for even distribution; ensure hat is flat on the platen. |
8. manylebau
| Dimensiynau Cynnyrch | 19.69 x 10.16 x 14.25 modfedd |
| Rhif Model yr Eitem | 4-in-1 Hat Heat Press |
| UPC | 840349916620 |
| Gwneuthurwr | VEVOR |
| ASIN | B0BWDC2KVM |
| Cyftage | 110V 60Hz |
| Grym | 580W |
| Tymheredd Uchaf | 0-570 ° F / 0-299 ° C. |
| Ystod Amser | 0-999s |

Image: A diagram illustrating the physical dimensions of the heat press (19.69 in / 50 cm length, 10.16 in / 25.8 cm width, 14.25 in / 36.2 cm height) and its electrical specifications (Voltage: 110V 60Hz, Power: 580W, Highest Temp: 0-570°F / 299°C, Time Range: 0-999s). It also shows the dimensions of the four heating pads.
9. Gwarant a Chefnogaeth
Am wybodaeth am warant a chymorth technegol, cyfeiriwch at swyddog VEVOR websafle neu cysylltwch â'u gwasanaeth cwsmeriaid yn uniongyrchol. Cadwch eich derbynneb prynu fel prawf o brynu ar gyfer unrhyw hawliadau gwarant.
Ewch i Siop VEVOR: Siop VEVOR ar Amazon
Dogfennau Cysylltiedig - 4-in-1 Hat Heat Press
 |
Peiriant Gwasgu Gwres Het 4-mewn-1 VEVOR TLM2310-4S - Llawlyfr Defnyddiwr Llawlyfr defnyddiwr cynhwysfawr ar gyfer Peiriant Gwasgu Gwres Hetiau 4-mewn-1 VEVOR TLM2310-4S. Yn cwmpasu nodweddion, manylebau, cyfarwyddiadau gweithredu, rhagofalon diogelwch, a datrys problemau ar gyfer trosglwyddo sublimiad ar hetiau. |
 |
Canllaw Defnyddiwr Peiriant Gwasg Gwres Digidol Amlswyddogaethol Canllaw defnyddiwr cynhwysfawr ar gyfer y Peiriant Gwasg Gwres Digidol Amlswyddogaethol, sy'n cwmpasu cyflwyno rhannau, cydosod, gweithredu, datrys problemau, a rhagofalon diogelwch. |
 |
Canllaw Defnyddiwr Peiriant Gwasg Gwres Digidol Amlswyddogaethol VEVOR Canllaw defnyddiwr cynhwysfawr ar gyfer Peiriant Gwasgu Gwres Digidol Amlswyddogaethol VEVOR, sy'n cwmpasu adnabod rhannau, camau cydosod, gweithrediad rheolydd tymheredd, dulliau argraffu, a datrys problemau ansawdd trosglwyddo cyffredin. |
 |
Llawlyfr Defnyddiwr a Chyfarwyddiadau Peiriant Gwasgu Gwres VEVOR TL1215/TL1515 Llawlyfr defnyddiwr swyddogol ar gyfer Peiriannau Gwasgu Gwres VEVOR, modelau TL1215 a TL1515. Yn darparu cyfarwyddiadau manwl ar gyfer gweithredu, gosod, calibradu, rhannau sbâr, datrys problemau, a chanllawiau diogelwch ar gyfer argraffu trosglwyddo gwres. |
 |
Canllaw Defnyddiwr Peiriant Gwasg Gwres Digidol Amlswyddogaethol VEVOR Canllaw defnyddiwr manwl ar gyfer Peiriant Gwasgu Gwres Digidol Amlswyddogaethol VEVOR, yn cwmpasu gosod, gweithredu, rheoli tymheredd, technegau argraffu, a datrys problemau ar gyfer cymwysiadau dyrnu a throsglwyddo gwres. |
 |
Dual-Display Heat Press Machine User Instructions Comprehensive user instructions and technical specifications for the Dual-Display Heat Press Machine. Covers features, parts identification, operation, assembly, temperature settings for various materials, and troubleshooting guide. |
Ask a question about this manual
Ask about setup, troubleshooting, compatibility, parts, safety, or missing instructions. Manuals+ will review the question and use this page’s manual context to help answer it.