
1. Cynnyrch Drosview
The XTU Adjustable Angle Mount (Model M6) is designed to enhance the viewing angle of your XTU J7/J9 Wireless Doorbell Camera. This mount allows for precise adjustment of the doorbell's angle, ensuring an optimal field of view for monitoring your property.
Constructed from high-quality ABS material, the mount is built to withstand various environmental conditions, including heat, rain, and low temperatures, providing a durable and reliable solution for your doorbell installation.

Delwedd 1.1: Drosoddview of the XTU Adjustable Angle Mount and compatible XTU J7/J9 doorbell models.
2. Cydweddoldeb
This angle mount is specifically designed for use with XTU J7 a XTU J9 wireless doorbell cameras. It is crucial to note that this mount is ddim yn gydnaws with other video doorbell brands or models. Using it with non-compatible doorbells may result in improper fit or functionality.
3. Nodweddion Allweddol
- Ongl Addasadwy: Allows precise left or right angle adjustment from 25 degrees to 50 degrees. The integrated degree scale assists in achieving the desired viewongl ing.
- Gwell View: Helps to eliminate blind spots and provides a clearer, unobstructed view of your entrance and surrounding areas, especially useful for optimizing views of roads and pathways.
- Adeiladu Gwydn: Made from high-quality ABS material, ensuring resistance to heat, rain, and low temperatures for long-lasting performance.
- Gosodiad Hawdd: Designed for quick and straightforward setup, typically completed within 5 minutes.
4. Gosod a Gosod
The XTU Adjustable Angle Mount is designed for easy installation. Follow these steps to properly install your mount and doorbell:
- Paratoi'r Arwyneb Mowntio: Choose a suitable location for your doorbell, ensuring it provides the desired viewing angle once the mount is installed.
- Attach the Mount Base: Secure the base of the angle mount to your wall or door frame using appropriate screws (not included, as doorbell installation kits typically provide these). Ensure it is level and firmly attached.
- Attach the Doorbell to the Mount: Align your XTU J7 or J9 doorbell with the mounting plate of the angle mount. The doorbell should slide or click into place securely.
- Secure the Doorbell: Once the doorbell is attached to the mount, ensure it is firmly secured according to your doorbell's specific instructions.
- Addasu'r Ongl: Once installed, you can adjust the angle of the doorbell by gently rotating the mount. Refer to the degree scale on the mount to achieve the desired left or right angle between 25 and 50 degrees.

Image 4.1: The angle mount showing its mounting points and adjustable mechanism.

Image 4.2: The XTU doorbell and angle mount components, illustrating their connection points.
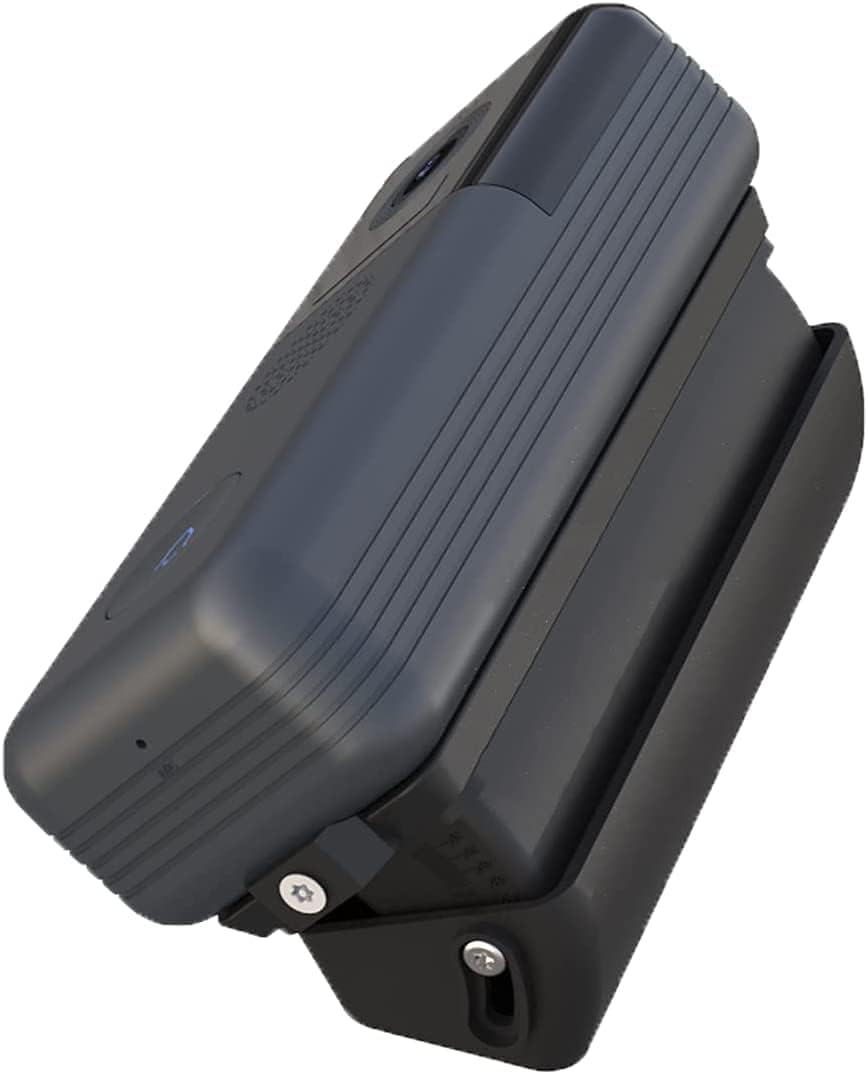
Image 4.3: An XTU doorbell securely mounted on the adjustable angle bracket.

Delwedd 4.4: Ochr view demonstrating the angle adjustment capability of the mount with a doorbell attached.
5. Cyfarwyddiadau Gweithredu
The XTU Adjustable Angle Mount itself does not require active operation beyond its initial setup. Its primary function is to provide a fixed, adjustable angle for your doorbell.
I addasu'r viewing angle after installation:
- Gently rotate the doorbell and mount assembly to the left or right.
- Observe the degree markings on the mount to select an angle between 25 and 50 degrees that best suits your viewing anghenion.
- Once the desired angle is achieved, the mount will hold the doorbell securely in that position.
6. cynnal
The XTU Adjustable Angle Mount is designed for minimal maintenance due to its durable ABS construction. To ensure its longevity and appearance:
- Glanhau: Periodically wipe the mount with a soft, damp cloth to remove dust or dirt. Avoid using harsh chemicals or abrasive cleaners, as these may damage the material.
- Arolygiad: Occasionally check the mount for any signs of wear, damage, or loosening of screws. If any issues are found, address them promptly to maintain stability.
- Diogelu'r Amgylchedd: While resistant to various weather conditions, extreme prolonged exposure to direct sunlight or severe weather may affect its lifespan.
7. Datrys Problemau
If you encounter any issues with your XTU Adjustable Angle Mount, consider the following:
- Mount Not Holding Angle: Ensure the doorbell is properly seated and secured within the mount. Check if the mounting screws are tight.
- Doorbell Not Fitting: Verify that your doorbell is an XTU J7 or J9 model. This mount is not compatible with other doorbell types.
- Mae'r Mynydd yn Teimlo'n Rhydd: Re-tighten the screws that secure the mount to the wall or door frame.
- Gwael Viewing Angle: Re-adjust the angle of the mount using the degree scale until the desired field of view yn cael ei gyflawni.
For further assistance, please refer to the support information provided with your XTU doorbell or contact XTU customer support.
8. manylebau
| Manyleb | Manylyn |
|---|---|
| Rhif Model | M6 |
| Gwneuthurwr | XTU |
| Compatible Doorbell Models | XTU J7, XTU J9 |
| Ystod Ongl Addasadwy | 25 to 50 degrees (left or right) |
| Deunydd | High-quality ABS |
| Dimensiynau Cynnyrch (L x W x H) | 2 x 3 x 10 cm (0.79 x 1.18 x 3.94 modfedd) |
| Pwysau Cynnyrch | 110 gram (0.24 pwys) |
| Batris Angenrheidiol | Nac ydw |
9. Gwarant a Chefnogaeth
Information regarding specific warranty terms for the XTU Adjustable Angle Mount (Model M6) is not provided in the product details. Please refer to the documentation included with your purchase or visit the official XTU website for warranty information and customer support contact details.
For technical assistance or inquiries, it is recommended to contact XTU customer service directly.