
1. Rhagymadrodd
Thank you for choosing the Xigmatek Lux M Micro-ATX Mini Tower PC Case. This manual provides detailed instructions for the installation, operation, and maintenance of your new PC chassis. Please read this manual carefully before beginning the assembly process to ensure proper installation and to maximize the performance and longevity of your system.
The Lux M case is designed to offer a robust and aesthetically pleasing housing for your computer components, featuring a tempered glass side panel, a metallic front panel with a unique cut-out pattern, and pre-installed fixed RGB fans for optimal cooling and visual appeal. It supports Micro-ATX and Mini-ITX motherboards and is compatible with various cooling solutions, including water cooling.
2. Gwybodaeth Diogelwch
Dilynwch y rhagofalon diogelwch canlynol yn ystod y gosodiad a'r gweithrediad:
- Always disconnect the power supply from the wall outlet before installing or removing any components to prevent electric shock.
- Handle all components with care. Avoid touching circuit boards directly; hold them by their edges.
- Wear an anti-static wrist strap when handling sensitive electronic components to prevent electrostatic discharge (ESD) damage.
- Keep the case and components away from liquids, excessive heat, and direct sunlight.
- Sicrhewch awyru digonol o amgylch cas y cyfrifiadur i atal gorboethi.
- Keep small parts and screws out of reach of children.
3. Cynnwys Pecyn
Gwiriwch fod yr holl eitemau yn bresennol yn eich pecyn. Os oes unrhyw eitemau ar goll neu wedi'u difrodi, cysylltwch â'ch manwerthwr.
- Xigmatek Lux M Micro-ATX Mini Tower PC Case
- Accessory box (containing screws, standoffs, cable ties, etc.)
- Llawlyfr Defnyddiwr (y ddogfen hon)
4. Cynnyrch Drosview
Familiarize yourself with the various parts of your Xigmatek Lux M PC case.
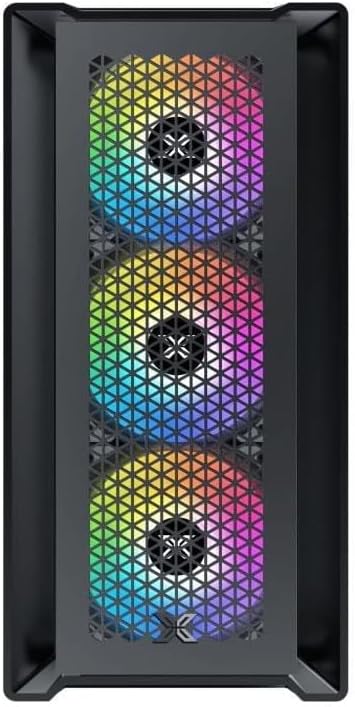
Ffigur 4.1: Blaen View. This image displays the front of the Xigmatek Lux M case, highlighting the metallic mesh panel with a triangular design and the three pre-installed 120mm fixed RGB fans.

Figure 4.2: Angled Top-Front View. This perspective shows the tempered glass side panel, offering a clear view of the interior, and the top panel with its I/O ports (USB, audio) and power button.
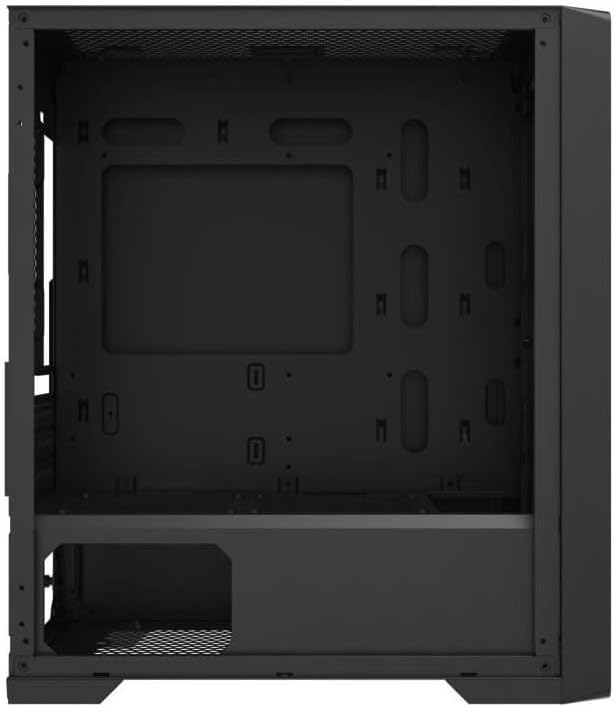
Figure 4.3: Interior Layout. The internal structure of the case, featuring the motherboard mounting tray, cutouts for cable management, and the power supply shroud at the bottom.
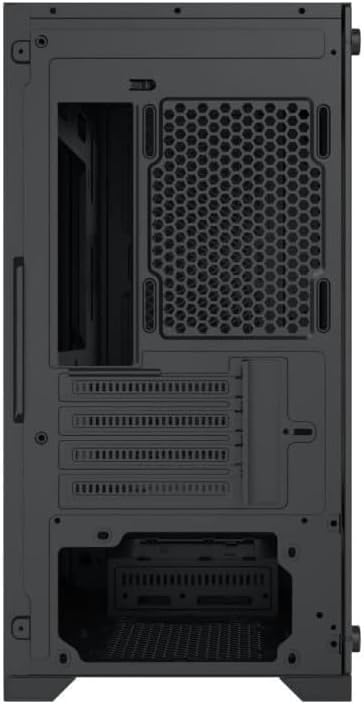
Ffigur 4.4: Cefn View. This image illustrates the rear of the case, including the expansion slots for graphics cards and other add-in cards, the rear fan mounting area, and the power supply mounting bracket.
5. Gosod a Gosod
Follow these steps to install your computer components into the Xigmatek Lux M case.
5.1. Paratoi'r Achos
- Rhowch y cas ar arwyneb gwastad, sefydlog.
- Remove the tempered glass side panel by unscrewing the thumb screws and carefully lifting it off. Set it aside on a soft, non-abrasive surface.
- Remove the opposite steel side panel by unscrewing the thumb screws and sliding it backward.
5.2. Gosod Motherboard
The Lux M supports Micro-ATX and Mini-ITX motherboards.
- Gosodwch y darian I/O (os nad yw wedi'i gosod ymlaen llaw ar eich mamfwrdd) yn agoriad cefn y cas.
- Align the motherboard with the pre-installed standoffs. Ensure all screw holes on the motherboard match the standoffs.
- Secure the motherboard using the provided motherboard screws. Do not overtighten.
5.3. Gosod yr Uned Cyflenwad Pŵer (PSU)
The PSU mounts at the rear bottom of the case.
- Slide the PSU into its designated compartment from the rear of the case.
- Align the PSU's screw holes with the holes on the case's rear panel.
- Sicrhewch y PSU gyda'r sgriwiau a ddarperir.
5.4. Storage Drive Installation (2.5"/3.5" Drives)
The case supports 2x 2.5"/3.5" storage drives.
- Locate the drive cage beneath the PSU shroud or dedicated 2.5" mounting points behind the motherboard tray.
- For 3.5" HDDs, slide the drive into a drive tray (if applicable) and secure it with screws.
- For 2.5" SSDs, secure them directly to the mounting points using the provided screws.
5.5. Graphics Card (VGA) and Expansion Card Installation
Mae'r cas yn cefnogi cardiau graffeg hyd at 320mm o hyd.
- Tynnwch y gorchuddion slot ehangu angenrheidiol o gefn y cas.
- Insert your graphics card or other expansion card into the appropriate PCIe slot on your motherboard.
- Secure the card to the case using the expansion slot screws.
5.6. Cooling System Installation (Optional)
The Lux M comes with 4x 120mm X24F fixed RGB fans. It supports additional cooling options.
- Oerach CPU: Max height of 160mm. Install your CPU cooler according to its manufacturer's instructions.
- Cefnogaeth Rheiddiadur: The case supports radiators of 360mm, 240mm, or 120mm. Refer to your radiator's manual for installation. Common mounting locations include the front and top panels.
5.7. Rheoli Ceblau
Defnyddiwch y toriadau llwybro ceblau a'r pwyntiau clymu y tu ôl i hambwrdd y famfwrdd i drefnu ceblau. Mae hyn yn gwella llif aer ac estheteg.
5.8. Cymanfa Derfynol
- Once all components are installed and cables are managed, reattach the steel side panel and secure it with thumb screws.
- Carefully reattach the tempered glass side panel and secure it with thumb screws.
6. Cyfarwyddiadau Gweithredu
After completing the installation, connect your peripherals (monitor, keyboard, mouse) and power cable to the PC. Press the power button located on the top panel of the case to start your system.
The pre-installed X24F RGB fans feature fixed RGB lighting, which will illuminate automatically upon system power-on. No additional software or controller is required for their basic operation.
Ensure that the case's ventilation is not obstructed to maintain optimal airflow and cooling performance.
7. cynnal
Mae cynnal a chadw rheolaidd yn helpu i sicrhau hirhoedledd a pherfformiad gorau posibl cydrannau eich cyfrifiadur.
- Glanhau Llwch: Periodically clean dust filters (if present) and the interior of the case using compressed air or a soft brush. Dust accumulation can hinder airflow and lead to overheating.
- Glanhau Allanol: Sychwch yr arwynebau allanol gyda meddal, damp cloth. Avoid harsh chemicals that may damage the finish or tempered glass.
- Gwydr Tymherus: Clean the tempered glass panel with a glass cleaner and a microfiber cloth to avoid scratches and streaks.
8. Datrys Problemau
Os byddwch chi'n dod ar draws problemau yn ystod neu ar ôl y gosodiad, ystyriwch y camau datrys problemau cyffredin canlynol:
- Dim pŵer:
- Gwnewch yn siŵr bod y cebl pŵer wedi'i gysylltu'n ddiogel â'r PSU a'r soced wal.
- Gwiriwch fod switsh y PSU yn y safle 'ON'.
- Verify that the front panel power switch cable is correctly connected to the motherboard's front panel header.
- Fans Not Spinning / RGB Not Lighting:
- Ensure all fan power cables are securely connected to the motherboard or a fan controller.
- For RGB, confirm that any necessary RGB headers are connected to the motherboard (though the included fans are fixed RGB and should light up with power).
- Dim Allbwn Arddangos:
- Verify that your monitor cable is connected to the graphics card (if installed) and not the motherboard's integrated graphics port.
- Ail-osodwch y cerdyn graffeg yn ei slot PCIe.
- Gorboethi:
- Ensure all case fans are spinning and oriented correctly for optimal airflow (intake/exhaust).
- Clean any dust filters and internal components.
- Verify that the CPU cooler is properly seated and making good contact with the CPU.
For more complex issues, consult your component manuals or seek assistance from Xigmatek support or a qualified technician.
9. manylebau
| Nodwedd | Manyleb |
|---|---|
| Brand | Xigmatek |
| Enw Model | Lux M |
| Rhif Model | EN48540 |
| Math o Achos | Twr Mini |
| Cydnawsedd Motherboard | Micro-ATX, Mini-ITX |
| Deunydd | Tempered Glass (side panel), Metal (front panel) |
| Lliw | Du |
| Fans wedi'u gosod ymlaen llaw | 4 x 120mm X24F Fixed RGB Fans |
| Cymorth Rheiddiadur | 360mm, 240mm, 120mm |
| Uchder Uchder Uchder Uchaf CPU | 160mm |
| Hyd VGA Uchaf | 320mm |
| Hyd PSU Uchaf | 165mm |
| Mannau Storio | 2x 2.5"/3.5" |
| Nodweddion Arbennig | RGB Lighting, Triangular Mesh Front Design |
10. Gwarant a Chefnogaeth
Xigmatek products are manufactured to the highest quality standards. For warranty information and technical support, please refer to the warranty card included with your product or visit the official Xigmatek websafle. Cadwch eich prawf prynu ar gyfer hawliadau gwarant.
For further assistance, you may contact Xigmatek customer support through their official channels.