
1. Rhagymadrodd
Diolch am brynuasing the MUSE M-10 Red Radio Alarm Clock. This manual provides essential information for the safe and efficient operation of your device. Please read these instructions carefully before use and retain them for future reference.

Figure 1: MUSE M-10 Red Radio Alarm Clock. This image shows the front view of the red alarm clock with its digital LED display showing '12:00' and various control buttons on the top panel.
2. Cyfarwyddiadau Diogelwch
- Darllenwch yr holl gyfarwyddiadau cyn gweithredu'r teclyn.
- Peidiwch ag amlygu'r teclyn hwn i law na lleithder i atal peryglon tân neu sioc.
- Ensure the power adapter is easily accessible.
- Defnyddiwch atodiadau/ategolion a nodir gan y gwneuthurwr yn unig.
- Peidiwch â gosod y cynnyrch mewn golau haul uniongyrchol nac yn agos at ffynonellau gwres.
- Avoid placing the product on surfaces that are unstable or subject to vibration.
- Peidiwch ag agor y casing; cyfeiriwch yr holl waith cynnal a chadw at bersonél cymwys.
- Gwaredwch fatris ail-law yn gyfrifol, gan ddilyn rheoliadau lleol.
3. Cynnyrch Drosview
3.1 Panel Blaen ac Arddangosfa
The front panel features a clear 0.6-inch white LED display for time and alarm indicators.
3.2 Rheolyddion y Panel Uchaf
The top panel houses all control buttons for easy access:
- MEM: Memory button for saving and recalling radio presets.
- SET: Button for setting time and alarm parameters.
- AL1: Alarm 1 setting button.
- AL2: Alarm 2 setting button.
- << HR: Hour adjustment button (backward).
- MIN >>: Minute adjustment button (forward).
- SNOOZE: Activates the snooze function during an alarm.
- CYSGU: Yn actifadu'r swyddogaeth amserydd cysgu.
- DIMMER: Yn addasu'r disgleirdeb arddangos.

Ffigur 2: Drosoddview of the MUSE M-10 Red Radio Alarm Clock's functions, including its 0.6-inch white LED display, PLL radio, 20 FM presets, dimmer, dual alarm, snooze, and sleep features.
4. Gosod
4.1 Cysylltiad Pwer
Connect the provided AC adapter to the DC IN jack on the rear of the unit and then plug it into a standard wall outlet. The unit will power on and the display will light up.
4.2 Gosod Batri Wrth Gefn
For time and alarm settings backup during a power outage, install 2 x AAA batteries (not included) into the battery compartment located on the bottom of the unit. Ensure correct polarity (+/-) when inserting batteries.
5. Cyfarwyddiadau Gweithredu
5.1 Gosod yr Amser
- Pwyswch a dal y GOSOD botwm nes bod y digidau awr yn fflachio.
- Defnyddiwch y << HR or MIN >> botymau i addasu'r awr.
- Gwasgwch GOSOD again, and the minute digits will flash.
- Defnyddiwch y << HR or MIN >> botymau i addasu'r cofnodion.
- Gwasgwch GOSOD unwaith eto i gadarnhau ac ymadael â'r modd gosod amser.
5.2 Gosod Larymau (Larwm 1 a Larwm 2)
Mae'r uned yn cynnwys dau larwm annibynnol.
- Pwyswch a dal y AL1 (neu AL2) button until the alarm hour digits flash.
- Defnyddiwch y << HR or MIN >> botymau i osod yr awr larwm a ddymunir.
- Gwasgwch AL1 (neu AL2) again, and the alarm minute digits will flash.
- Defnyddiwch y << HR or MIN >> botymau i osod y munudau larwm a ddymunir.
- Gwasgwch AL1 (neu AL2) again to select the alarm source: Swniwr or Radio.
- Gwasgwch AL1 (neu AL2) once more to confirm and activate the alarm. An alarm icon will appear on the display.
Gweithrediad Radio 5.3 FM
The unit has a PLL FM radio with 20 preset stations.
- tiwnio: Gwasgwch y << HR or MIN >> buttons to manually tune the radio frequency. Press and hold these buttons for automatic scanning to the next available station.
- Rhagosodiadau Arbed: Tiwniwch i'ch gorsaf ddymunol. Pwyswch a daliwch y MEM button until 'P01' (or the next available preset number) flashes. Use << HR or MIN >> i ddewis rhif rhagosodedig, yna pwyswch MEM eto i arbed.
- Dwyn i gof Rhagosodiadau: Pwyswch yn fyr y MEM button to cycle through saved preset stations.
5.4 Swyddogaeth Snooze
Pan fydd larwm yn seinio, pwyswch y SNOOZE botwm i dawelu'r larwm dros dro am tua 9 munud. Bydd y larwm yn canu eto ar ôl y cyfnod hwn.
5.5 Swyddogaeth Amserydd Cysgu
Gwasgwch y CYSGU button repeatedly to set a sleep timer (e.g., 90, 60, 30, 15 minutes, or OFF). The radio will play for the selected duration and then automatically turn off.
5.6 Pylu Arddangosfa
Gwasgwch y DIMMER button repeatedly to cycle through display brightness levels: High, Low, or Off.

Figure 3: Key features of the MUSE M-10 Red Radio Alarm Clock, including snooze, radio or buzzer alarm, dimmable display, and FM PLL radio with 20 presets.
6. cynnal
- Glanhau: Sychwch yr uned gyda lliain meddal, sych. Peidiwch â defnyddio glanhawyr sgraffiniol na thoddyddion.
- Amnewid Batri: Amnewidiwch y batris wrth gefn yn flynyddol neu pan fydd yr arddangosfa'n dangos arwyddion o bylu yn ystod y cyfnod diffodd pŵer.tages.
- Storio: If storing the unit for an extended period, remove the backup batteries to prevent leakage.
7. Datrys Problemau
| Problem | Achos Posibl | Ateb |
|---|---|---|
| Dim pŵer/Arddangosfa i ffwrdd | Addasydd pŵer heb ei gysylltu neu'n ddiffygiol. | Check power adapter connection. Try a different outlet. |
| Nid yw'r larwm yn swnio | Larwm heb ei actifadu neu wedi'i osod yn anghywir. | Ensure alarm icon is visible on display. Re-check alarm time and source settings. |
| Derbyniad radio gwael | FM antenna not extended or poor signal area. | Fully extend the FM wire antenna. Adjust its position for better reception. |
| Amser/gosodiadau wedi'u colli ar ôl diffodd y pŵertage | Batris wrth gefn heb eu gosod neu wedi'u disbyddu. | Install new AAA batteries for backup. |
8. manylebau
- Model: M-10 COCH
- Brand: AMGUEDD
- Arddangos: 0.6-inch White LED, Digital
- Radio: FM PLL Radio with 20 Presets
- Larwm: Larwm Deuol (Bwser neu Radio)
- Nodweddion arbennig: Snooze, Sleep Timer, Display Dimmer (High/Low/Off)
- Ffynhonnell Pwer: AC Adapter (included), 2 x AAA batteries for backup (not included)
- Dimensiynau (L x W x H): 12 x 7 x 10.9 cm (tua 4.7 x 2.8 x 4.3 modfedd)
- Pwysau: 200 gram (tua 0.44 pwys)
- Deunydd: Plastig
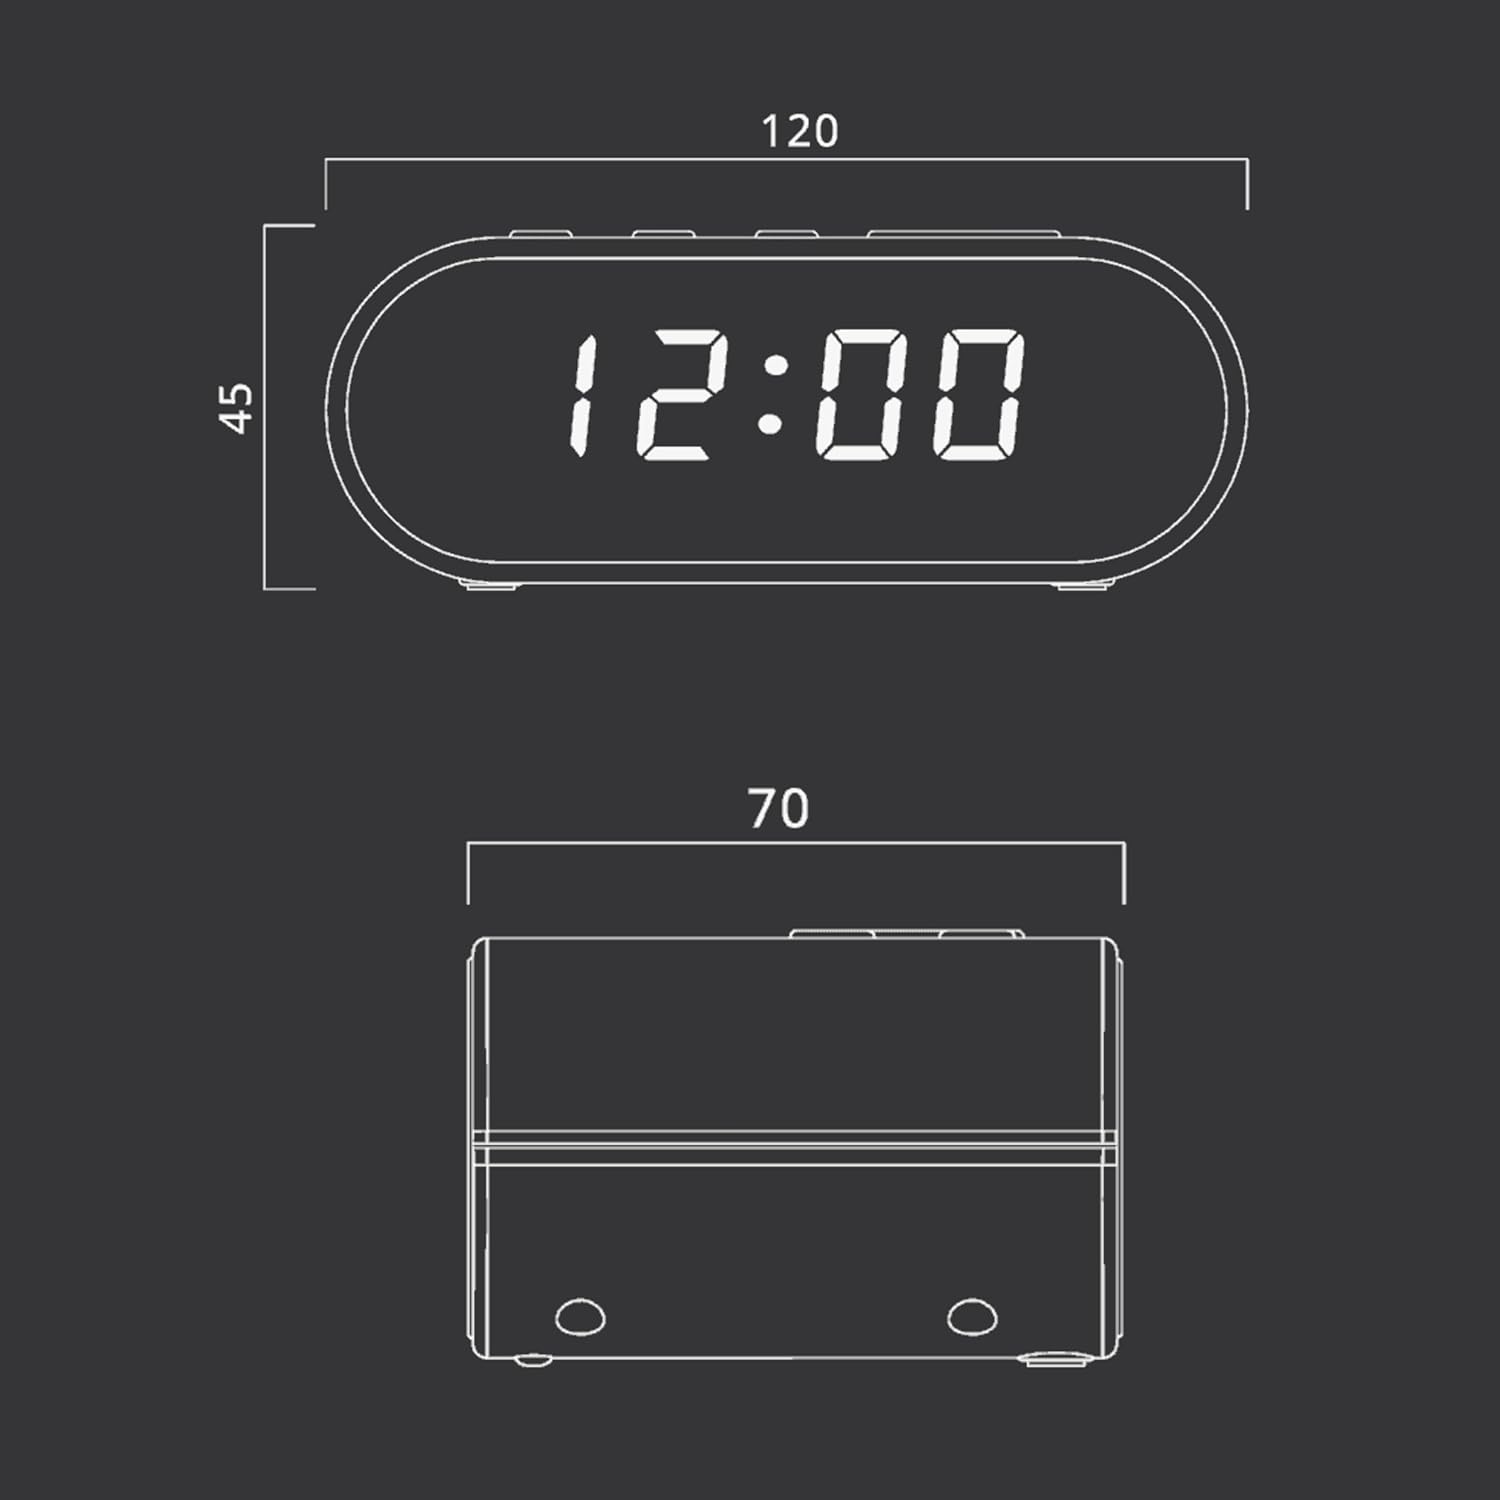
Figure 4: Dimensional drawing of the MUSE M-10 Red Radio Alarm Clock, showing its length (120mm), width (70mm), and height (45mm).
9. Gwarant a Chefnogaeth
For warranty information or technical support, please refer to the warranty card included with your product or contact your local MUSE distributor. Keep your purchase receipt as proof of purchase.