FLIR FLIR K45
FLIR K45 High Performance Thermal Imaging Camera User Manual
Model: FLIR K45
Rhagymadrodd
This manual provides comprehensive instructions for the safe and effective operation, maintenance, and troubleshooting of your FLIR K45 High Performance Thermal Imaging Camera. The FLIR K45 is designed to provide clear thermal images in challenging environments, aiding in navigation and decision-making.

Figure 1: FLIR K45 Thermal Imaging Camera in operation, showing a thermal view.
Gwybodaeth Diogelwch
Always read and understand all safety warnings and instructions before operating the FLIR K45 camera. Failure to do so may result in injury or damage to the device.
- Do not expose the camera to temperatures exceeding its operational limits (up to 500°F for 5 minutes).
- Ensure the battery is properly charged and installed before use.
- Avoid direct exposure of the lens to extreme heat sources when not in use for thermal imaging.
- The device is water resistant (IP67), but avoid prolonged submersion.
Cydrannau Cynnyrch
The FLIR K45 package includes the following items:
- FLIR K45 Thermal Imaging Camera
- Batri Lithiwm Ion (wedi'i gynnwys)
- Charging dock (if applicable, based on image)
- Cebl USB
- Addasydd Pŵer
- Dogfennaeth

Ffigur 2: Blaen view of the FLIR K45 camera, showing the screen and control buttons.

Ffigur 3: Blaen view of the FLIR K45, highlighting the thermal lens.
Gosod
1. Codi Tâl y Batri
The FLIR K45 uses a Lithium Ion battery. Before first use, fully charge the battery. Connect the camera to the charging dock or directly via the USB cable to a power adapter.
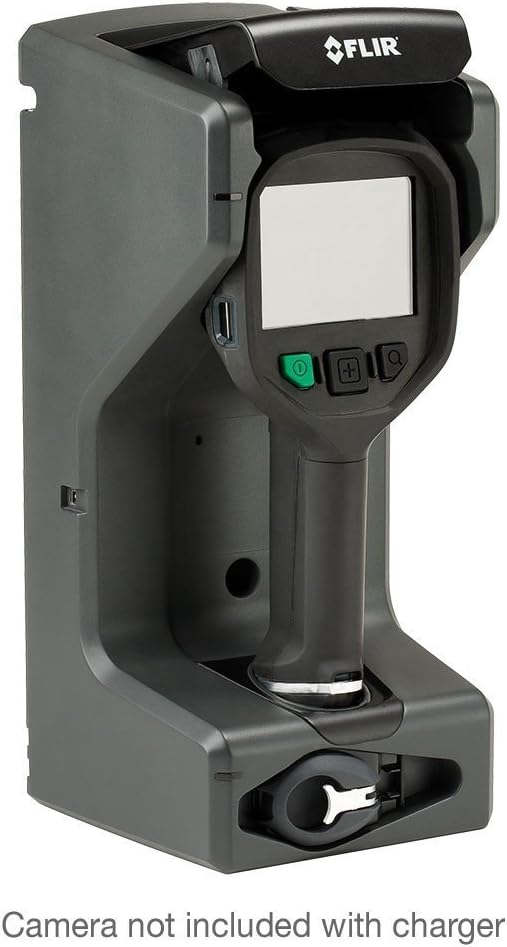
Figure 4: FLIR K45 in its charging dock. Camera not included with charger.
2. Mewnosod y Batri
Locate the battery compartment, typically at the base of the handle. Insert the charged Lithium Ion battery, ensuring it clicks into place securely.
3. Troi ymlaen yn gychwynnol
Press and hold the power button (green button) to turn on the device. The 4-inch screen will illuminate, displaying the FLIR logo followed by the thermal image feed.
Cyfarwyddiadau Gweithredu
1. Gweithrediad Sylfaenol
Point the camera towards the area of interest. The thermal image will be displayed on the 4-inch screen. The K45 provides a crisp, 240 x 180 pixel thermal image, enhanced by FSX™ Flexible Scene Enhancement for improved detail.

Ffigur 5: Example of a thermal image captured by the FLIR K45, indicating temperature variations.
2. Image Modes
The FLIR K45 offers several image modes to optimize viewing for different scenarios. Use the mode selection button (often indicated by a plus/minus or menu icon) to cycle through these options:
- IR image: Standard infrared thermal view.
- TI Basic fire-fighting mode: Optimized for general firefighting scenarios.
- Black-and-white fire-fighting mode: Provides a high-contrast monochrome thermal view.
- Fire mode: Specific mode for fire scene analysis.
- Search-and-rescue mode: Enhances visibility for locating individuals.
- Heat detection mode: Highlights areas of significant heat.
- Thumbnail gallery: Yn caniatáu ailview of saved images.

Figure 6: Detail of the FLIR K45 control buttons for navigation and mode selection.
3. Cipio Delweddau
To capture a thermal image, press the designated capture button (refer to the device's physical buttons, often a trigger or a specific button on the control panel). Images are saved to the internal memory or an inserted SD card.
Cynnal a chadw
1. Glanhau'r Camera
Regularly clean the camera body with a damp cloth. For the lens, use a soft, lint-free cloth specifically designed for optical surfaces. Do not use abrasive cleaners or solvents.
2. Gofal Batri
To prolong battery life, avoid fully discharging the battery frequently. Store the camera and battery in a cool, dry place when not in use for extended periods.
Datrys problemau
| Problem | Achos Posibl | Ateb |
|---|---|---|
| Nid yw'r camera yn troi ymlaen. | Batri isel neu wedi'i wagio. | Codwch y batri yn llawn. |
| Mae'r ddelwedd yn aneglur neu'n aneglur. | Dirty lens; extreme temperature difference. | Clean the lens; allow camera to acclimate to environment. |
| Cannot save images. | Memory full or no SD card inserted. | Delete old images or insert a compatible SD card. |
If you encounter issues not listed here, please refer to the support section for further assistance.
Manylebau
| Nodwedd | Manylyn |
|---|---|
| Model | FLIR K45 |
| Cydraniad Thermol | 240 x 180 picsel |
| Maint Sgrin | 4 modfedd (11 cm) |
| Cywirdeb | ±4°C (±7.2°F) or ±4% of reading (for ambient 10°C to 35°C) |
| Gwydnwch | Withstands 2-meter drop, IP67 water resistant |
| Tymheredd Gweithredu | Fully operational up to 500°F (5 minutes) |
| Math Batri | 1 batri Ion Lithiwm (wedi'i gynnwys) |
| Dimensiynau Cynnyrch | 4.7 x 4.9 x 11 modfedd |
| Pwysau Eitem | 1 pwys |
| Math Cyfryngau | Cerdyn SD |
Gwybodaeth Gwarant
The FLIR K45 camera is protected by FLIR's 2-5-10 Warranty:
- 2 mlynedd ar gyfer batris.
- 5 mlynedd for the camera.
- 10 mlynedd ar gyfer y synhwyrydd.
For detailed warranty terms and conditions, please refer to the official FLIR websafle neu cysylltwch â chymorth cwsmeriaid.
Cefnogaeth i Gwsmeriaid
For technical assistance, service, or additional information regarding your FLIR K45 Thermal Imaging Camera, please contact FLIR customer support or visit the official FLIR websafle.
Gallwch hefyd ymweld â'r FLIR Store on Amazon am wybodaeth ac adnoddau cynnyrch.
Fideos Cynnyrch
No official product videos from the seller were provided in the available data for embedding in this manual.
Ask a question about this manual
Ask about setup, troubleshooting, compatibility, parts, safety, or missing instructions. Manuals+ will review the question and use this page’s manual context to help answer it.