Thank you for choosing the AMS Pendule 211/1 wall clock. This manual provides comprehensive instructions for the safe and efficient setup, operation, and maintenance of your new clock. Please read this manual thoroughly before use and retain it for future reference.
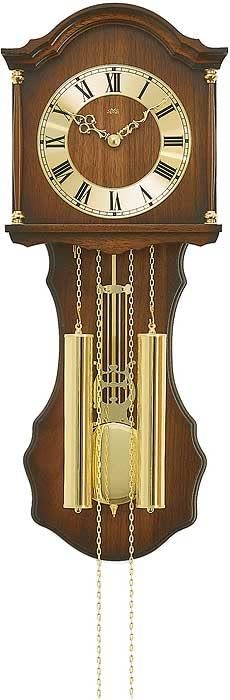
Figure 1: AMS Pendule 211/1 Wall Clock
2. Gosod
2.1 Dadbacio
Tynnwch y cloc o'i becynnu yn ofalus.
Inspect the clock for any signs of damage. If damaged, do not proceed with setup and contact customer support.
Remove all protective films or packaging materials from the clock face, hands, and pendulum.
Cadwch y deunydd pacio ar gyfer cludo neu storio yn y dyfodol.
2.2 Gosod Batri
The AMS Pendule 211/1 requires batteries (not included) for operation. Please use the specified battery type.
Lleolwch glawr adran y batri ar gefn y cloc.
Remove the cover by sliding or unlatching it.
Insert the required batteries (e.g., 1x AA or 1x C, refer to the compartment label for exact type) according to the polarity indicators (+ and -).
Amnewid y clawr adran batri yn ddiogel.
2.3 Gosod y Cloc
Ensure the clock is mounted securely on a stable wall surface.
Choose a suitable location on a wall, away from direct sunlight, extreme temperatures, or vibrations.
Use an appropriate wall anchor and screw for your wall type (e.g., drywall, concrete). The mounting point should be strong enough to support the clock's weight.
Hang the clock securely using the keyhole slot on the back. Ensure it is level.
2.4 Gosod yr Amser
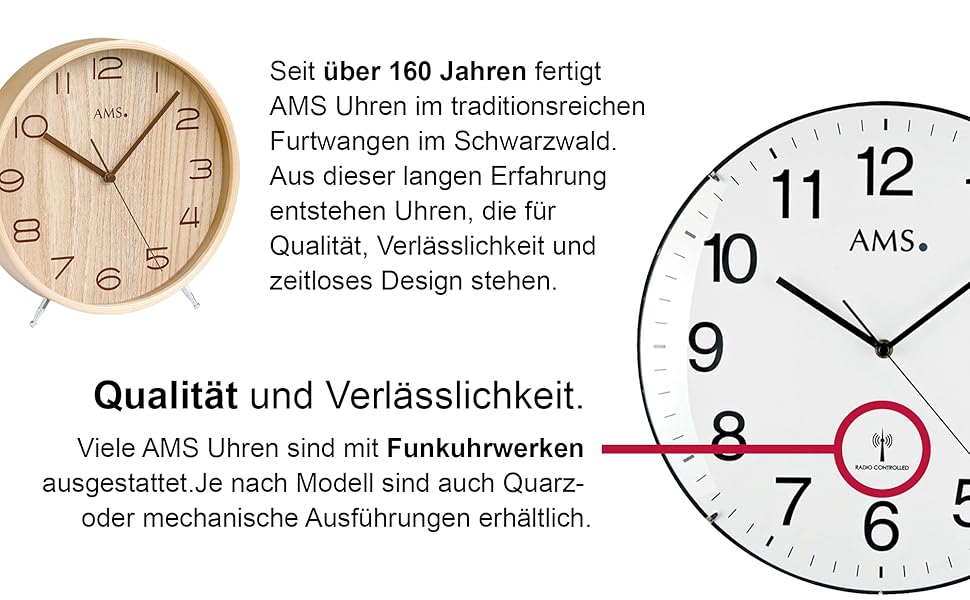
Your AMS Pendule 211/1 clock features an analog display. Some models may include a radio-controlled mechanism for automatic time synchronization.
Ffigur 2: Example Clock Face with Radio Controlled Symbol
Gosod â llaw: Locate the time-setting knob or wheel on the back of the clock. Gently turn this knob to move the minute and hour hands clockwise until the correct time is displayed. Avoid turning the hands counter-clockwise.
Radio-Controlled (if applicable): If your clock is radio-controlled, it will attempt to synchronize with a time signal after battery installation. Place the clock near a window for better signal reception. This process may take several minutes or hours. Once synchronized, the clock will automatically display the correct time.
2.5 Pendulum Setup
The pendulum is a decorative and functional element of your clock.
Carefully unpack the pendulum if it was separate from the main clock body.
Attach the pendulum to its hook or hanging mechanism inside the clock case. Ensure it hangs freely and does not touch the sides of the case.
Gently push the pendulum to one side to start its swing. It should swing evenly.
3. Cyfarwyddiadau Gweithredu
3.1 Darllen yr Amser
The AMS Pendule 211/1 features a clear analog display with hour, minute, and second hands for precise timekeeping.
Mae'r short hand indicates the hour.
Mae'r long hand indicates the minute.
Mae'r thin sweeping hand indicates the second.
3.2 Swyddogaeth Larwm
Your clock is equipped with an alarm function. Refer to the specific controls on the back or side of your clock for alarm setting.
Amser Larwm Gosod: Locate the alarm setting knob/dial (often separate from the main time setting). Turn it to set the desired alarm time.
Cychwyn y Larwm: Find the alarm ON/OFF switch or button. Move it to the "ON" position to activate the alarm.
Dadactifadu Larwm: To turn off the alarm sound, move the alarm switch to the "OFF" position.
3.3 Pendulum Operation
Once the pendulum is installed and started, it should swing continuously. If it stops, gently restart it.
Ensure the clock is level on the wall to allow for an even pendulum swing.
Avoid obstructing the pendulum's movement.
4. cynnal
4.1 Glanhau
Regular cleaning will help maintain the appearance of your clock. The frame is made of Acrylonitrile Butadiene Styrene (ABS).
Wipe the clock's exterior with a soft, dry, lint-free cloth.
Ar gyfer marciau ystyfnig, ychydig yn dampgolchwch y brethyn gyda dŵr. Osgowch ddefnyddio cemegau llym, glanhawyr sgraffiniol, neu doddyddion, gan y gall y rhain niweidio'r gorffeniad.
Do not spray cleaning solutions directly onto the clock.
Keep the clock away from excessive dust and moisture.
4.2 Batri Newydd
Replace batteries when the clock starts losing time or stops functioning.
Follow the steps in Section 2.2 "Battery Installation" to replace old batteries with new ones of the correct type.
Gwaredwch fatris ail-law yn gyfrifol yn unol â rheoliadau lleol.
5. Datrys Problemau
If you encounter issues with your AMS Pendule 211/1, refer to the table below for common problems and solutions.
Problem
Achos Posibl
Ateb
Cloc ddim yn rhedeg
Batris marw neu wedi'u gosod yn anghywir.
Gwiriwch bolaredd y batri; amnewidiwch gyda batris newydd.
Replace batteries. For radio-controlled, move to a location with better signal. If problem persists, contact support.
Pendwl ddim yn siglo
Not properly installed; obstruction; clock not level.
Ensure pendulum is correctly hooked and swings freely. Check if the clock is level. Gently restart the pendulum.
Larwm ddim yn seinio
Alarm not activated; incorrect alarm time set; low battery.
Sicrhewch fod switsh y larwm YMLAEN. Gwiriwch osodiad amser y larwm. Amnewidiwch y batris.
6. manylebau
Nodwedd
Manylyn
Brand
AMS
Model
211/1
ASIN
B005DRWNZ0
Math Arddangos
Analog
Siâp
hirsgwar
Deunydd Ffrâm
Styren Biwtadïen Acrylonitrile (ABS)
Larwm
Oes
Batris wedi'u Cynnwys
Nac ydw
7. Gwarant a Chefnogaeth
Am wybodaeth am warant neu gymorth technegol, cyfeiriwch at y ddogfennaeth a ddarparwyd gyda'ch pryniant neu cysylltwch â'r manwerthwr. Cadwch eich prawf prynu ar gyfer unrhyw hawliadau gwarant.
For further assistance, you may visit the official AMS websafle neu cysylltwch â'u hadran gwasanaethau cwsmeriaid.
Ask a question about this manual
Ask about setup, troubleshooting, compatibility, parts, safety, or missing instructions. Manuals+ will review the question and use this page’s manual context to help answer it.