Rhagymadrodd
This manual provides detailed instructions for the installation, operation, and maintenance of the Rain Bird 200-PEB 2" Commercial Electric Control Valve. This industrial-strength glass-filled nylon globe valve is designed for commercial irrigation applications, offering reliable performance and durability.
The 200-PEB series is engineered for high leak resistance and features a robust construction suitable for demanding environments. It incorporates a forward flow design with slow closing action to prevent water hammer, protecting your irrigation system from damage.
Cynnyrch Drosview
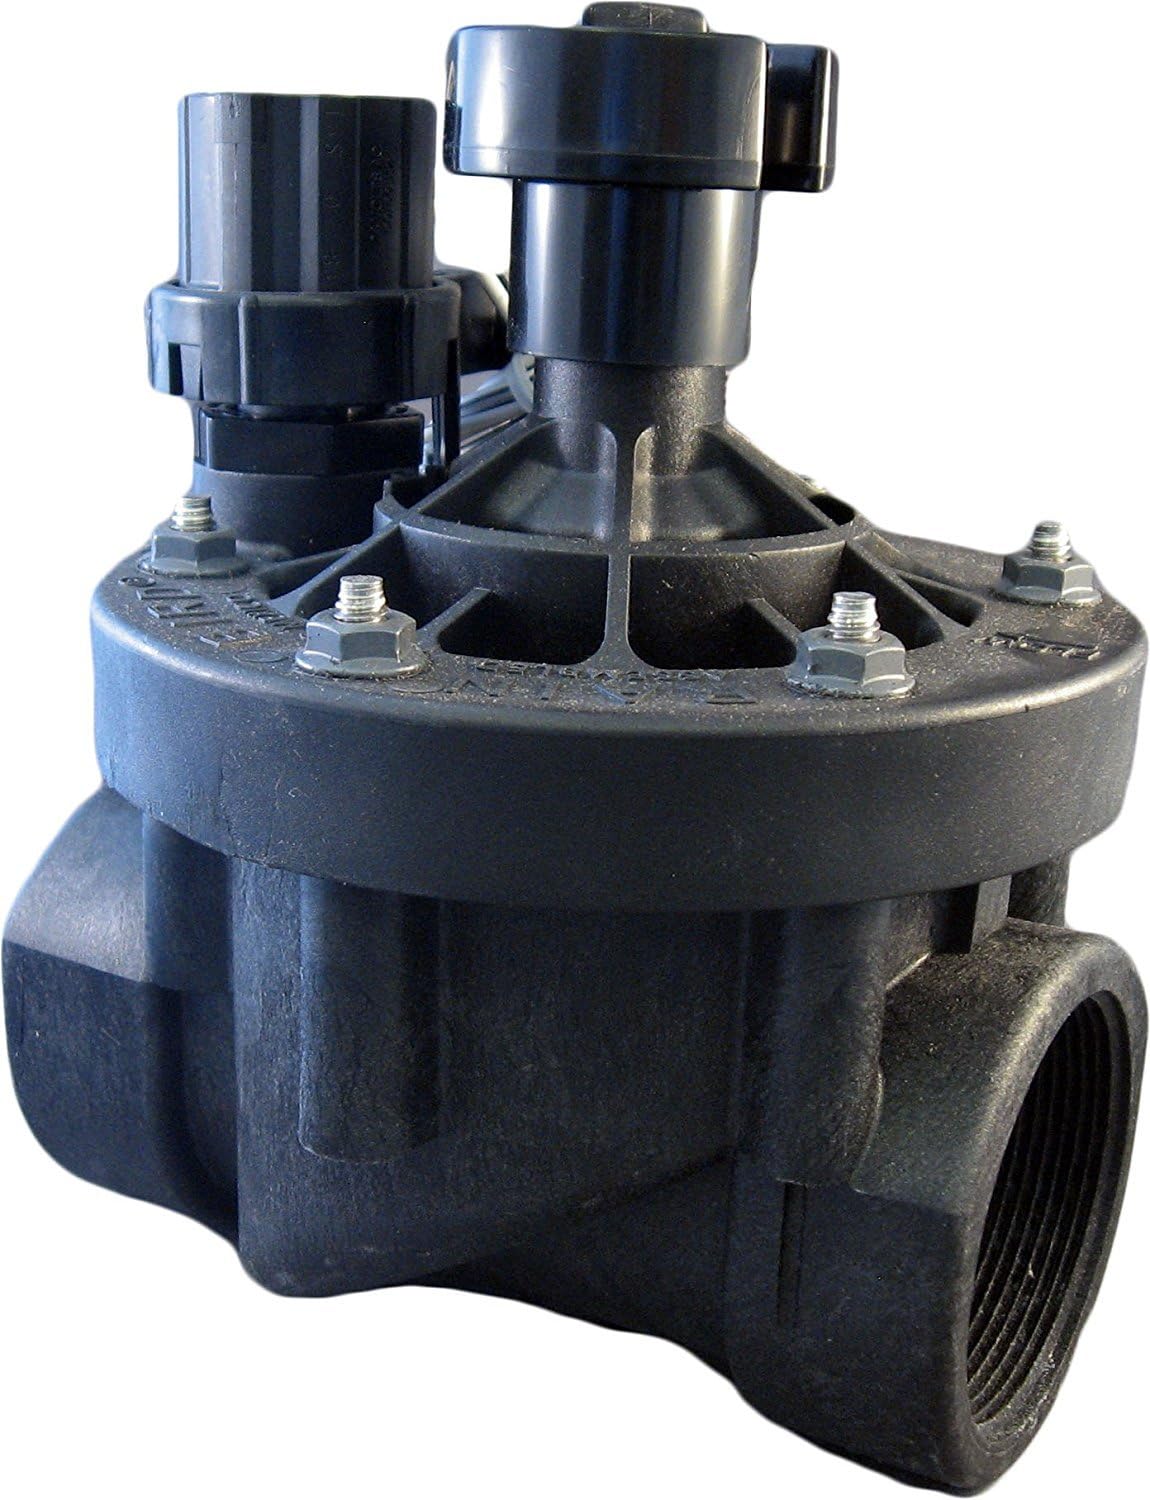
Figure 1: Rain Bird 200-PEB 2-inch Commercial Electric Control Valve. This image shows the black plastic valve body with threaded inlet/outlet ports and the solenoid assembly on top, secured by bolts.
The Rain Bird 200-PEB valve is a globe configuration valve with a 2-inch Female Pipe Thread (FPT) inlet and outlet. Key features include a one-piece solenoid design with a captured plunger and spring for simplified servicing, and a flow control handle for precise water flow adjustment.
Gosod a Gosod
1. Rhestr Wirio Cyn Gosod
- Gwnewch yn siŵr bod y cyflenwad dŵr wedi'i ddiffodd cyn dechrau'r gosodiad.
- Verify that the valve size (2 inches) matches your irrigation system's piping.
- Confirm the power supply is 24VAC 50/60Hz.
- Have appropriate tools ready: pipe wrench, thread sealant, wire strippers, electrical connectors.
2. Gosod Corfforol
- Identify the inlet and outlet ports. The valve is a forward flow design.
- Apply thread sealant to the male threads of your irrigation pipes.
- Thread the valve onto the pipes, ensuring a secure, watertight connection. Do not overtighten.
- Position the valve in a location that allows for easy access for maintenance and operation.
3. Cysylltiad Trydanol
- Connect the two wires from the solenoid to the corresponding wires from your irrigation controller.
- Ensure all electrical connections are secure and protected from moisture using waterproof connectors.
- The solenoid requires 24VAC 50/60Hz power. Inrush current is 0.41A (9.9VA) at 60Hz, and holding current is 0.14A (3.43VA) at 60Hz.
Gweithrediad
1. Initial System Start-up
- Slowly turn on the main water supply to the irrigation system.
- Use the manual external bleed feature to flush debris from the system before full operation. This is recommended for system start-up and after repairs.
2. Flow Control Adjustment
- The valve features a flow control handle. Turn the handle clockwise to decrease flow and counter-clockwise to increase flow.
- Adjust the flow as needed for specific irrigation zones to optimize water distribution.
3. Gweithrediad Llaw
- Manual Internal Bleed: This feature allows manual operation of the valve without allowing water into the valve box. It is useful for adjusting pressure regulators without activating the valve via the controller.
- Manual External Bleed: This feature permits flushing debris from the system. It is recommended for system start-up and after repairs.
Cynnal a chadw
- Regularly inspect the valve for any signs of leaks or damage.
- If using the PESB series (which incorporates scrubber technology), the nylon scrubber scrapes a stainless steel screen to clean and break down grit and plant material, preventing debris build-up and clogging. For PEB series, periodic flushing via the manual external bleed is recommended to clear debris.
- The one-piece solenoid design with captured plunger and spring simplifies servicing. If solenoid replacement is needed, parts are less likely to be lost during field service.
- Ensure the bonnet is securely attached. Stainless steel studs molded into the body allow for easier and more frequent attachment and removal of the bonnet without damaging threads.
Datrys problemau
| Problem | Achos Posibl | Ateb |
|---|---|---|
| Nid yw'r falf yn agor | No power to solenoid; clogged diaphragm; faulty solenoid. | Check electrical connections and controller output; inspect and clean diaphragm; test and replace solenoid if necessary. |
| Valve does not close completely (leaks) | Debris in valve; worn diaphragm; damaged seat. | Flush valve using manual external bleed; inspect and replace diaphragm; inspect valve seat for damage. |
| Water hammer (loud banging noise) | Rapid valve closure. | The 200-PEB is designed for slow closing. Ensure proper system pressure and check for any obstructions affecting valve operation. |
| Cyfradd llif isel | Partially closed flow control; clogged filter/screen; insufficient water pressure. | Adjust flow control handle; clean internal screen (if applicable); check main water supply pressure. |
Manylebau
| Priodoledd | Manylyn |
|---|---|
| Model | 200-PEB |
| Deunydd | Glass-filled Nylon (Durable plastic) |
| Maint Mewnfa/Allfa | 2 Inches FPT (Female Pipe Thread) |
| Ystod Pwysedd | 20 i 200 psi (1.4 i 13.8 bar) |
| Flow Range (without PRS-D option) | 0.25 to 200 GPM (0.06 to 45 m³/h; 0.02 to 12.60 l/s) |
| Tymheredd | Hyd at 150°F (66°C) |
| Solenoid Power Requirement | 24VAC 50 / 60Hz |
| Solenoid Inrush Current | 0.41A (9.9VA) at 60Hz |
| Solenoid Holding Current | 0.14A (3.43VA) at 60Hz |
| Math Falf | Falf Globe |
| Cyfluniad | Normally closed, forward flow design |
| Pwysau Eitem | 2.77 pwys |
| Dimensiynau (L x W x H) | 8 x 6 inches (approximate, based on item dimensions) |
Gwybodaeth Gwarant
The Rain Bird 200-PEB Commercial Electric Control Valve comes with a Five-year trade warranty. For specific terms and conditions, please refer to the official Rain Bird warranty documentation or contact Rain Bird customer support.
Cefnogaeth a Chysylltiad
For further assistance, technical support, or inquiries regarding your Rain Bird 200-PEB valve, please visit the official Rain Bird websafle neu cysylltwch â'u hadran gwasanaeth cwsmeriaid. Gallwch ddod o hyd i ragor o wybodaeth ac adnoddau yn y Rain Bird Store on Amazon neu eu corfforaethol websafle.